Dell PowerEdge 4300 Dell PowerEdge 4300 Systems User's Guide - Page 89
Step 2: Add or
 |
View all Dell PowerEdge 4300 manuals
Add to My Manuals
Save this manual to your list of manuals |
Page 89 highlights
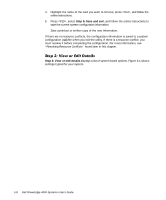
If you are adding an ISA expansion card, insert your .cfg diskette to find the .cfg file for that card. If the .cfg file for the expansion card you are installing is not on the diskette, select Generic ISA board from the list of configuration files. NOTE: Alternatively, if you know the resources used by the expansion card, you can press and bring up a menu that lets you create the .cfg file. For all ISA expansion cards, use the Step 4: Examine switches or print report option (under the Steps in configuring your computer menu) to check the switch and jumper settings on the new card. Configure the new card as indicated before it is installed in your computer. 6. Press , select Step 5: Save and exit, and follow the online instructions to save the current system configuration information. Save a printout or written copy of your new configuration. The utility may prompt you to check the jumper and switch settings on the new card. Follow the online instructions to see an illustration of the card's settings. Use the following procedure before an ISA expansion card is repositioned but after a PCI expansion card is repositioned. See "When to Run the RCU" found earlier in this chapter for more detailed information. 1. Start the RCU as described in "Starting the RCU" found earlier in this chapter. 2. At the Main Menu, select Configure computer. 3. At the Steps in configuring your computer menu, select Step 2: Add or remove boards. A list of expansion slots and the cards in them appears on the screen. 4. Highlight the name of the card you want to reposition, press , and follow the online instructions. 5. Press , select Step 5: Save and exit, and follow the online instructions to save the current system configuration information. Save a printout or written copy of the new information. Use the following procedure before an ISA expansion card is removed but after a PCI expansion card is removed. See "When to Run the RCU" found earlier in this chapter for more detailed information. 1. Start the RCU as described in "Starting the RCU" found earlier in this chapter. 2. At the Main Menu, select Configure computer. 3. At the Steps in configuring your computer menu, select Step 2: Add or remove boards. A list of expansion slots and the cards installed in them appears on the screen. Using the Resource Configuration Utility 5-7
-
 1
1 -
2
-
3
-
4
-
5
-
6
-
7
-
8
-
9
-
10
-
11
-
12
-
13
-
14
-
15
-
16
-
17
-
18
-
19
-
20
-
21
-
22
-
23
-
24
-
25
-
26
-
27
-
28
-
29
-
30
-
31
-
32
-
33
-
34
-
35
-
36
-
37
-
38
-
39
-
40
-
41
-
42
-
43
-
44
-
45
-
46
-
47
-
48
-
49
-
50
-
51
-
52
-
53
-
54
-
55
-
56
-
57
-
58
-
59
-
60
-
61
-
62
-
63
-
64
-
65
-
66
-
67
-
68
-
69
-
70
-
71
-
72
-
73
-
74
-
75
-
76
-
77
-
78
-
79
-
80
-
81
-
82
-
83
-
 84
84 -
 85
85 -
 86
86 -
 87
87 -
 88
88 -
 89
89 -
 90
90 -
 91
91 -
 92
92 -
 93
93 -
 94
94 -
95
-
96
-
97
-
98
-
99
-
100
-
101
-
102
-
103
-
104
-
105
-
106
-
107
-
108
-
109
-
110
-
111
-
112
-
113
-
114
-
115
-
116
-
117
-
118
-
119
-
120
-
121
-
122
-
123
-
124
-
125
-
126
-
127
-
128
-
129
-
130
-
131
-
132
-
133
-
134
-
135
-
136
-
137
-
138
-
139
-
140
-
141
-
142
-
143
-
144
-
145
-
146
-
147
-
148
-
149
-
150
-
151
-
152
-
153
-
154
-
155
-
156
-
157
-
158
-
159
-
160
-
161
 |
 |
