Dell PowerEdge 4300 Dell PowerEdge 4300 Systems User's Guide - Page 92
Step 3: View or edit details, Advanced
 |
View all Dell PowerEdge 4300 manuals
Add to My Manuals
Save this manual to your list of manuals |
Page 92 highlights
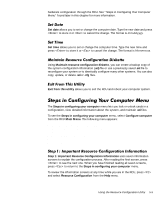
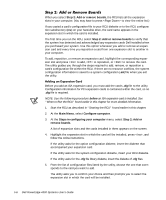
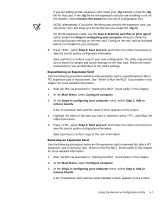
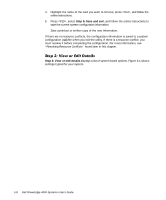
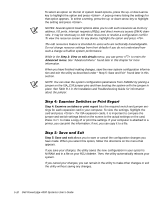
To select an option on the list of system board options, press the up- or down-arrow key to highlight the option and press . A pop-up menu listing the settings for that option appears. To select a setting, press the up- or down-arrow key to highlight the setting and press . NOTES: Several system board options allow you to edit such resources as memory address, I/O ports, interrupt requests (IRQs), and direct memory access (DMA) channels. It may be necessary to edit these resources to resolve a configuration conflict. To view the resource screen for any device, highlight the option and press . The edit resources feature is intended for users who are technically knowledgeable. Do not change resource settings from their defaults if you do not understand how such a change will affect system performance. While in the Step 3: View or edit details menu, you can press to enter the Advanced menu. See "Advanced Menu" found later in this chapter for more information. When you have finished making changes, save the new system configuration information and exit the utility as described under "Step 5: Save and Exit" found later in this section. NOTE: You can clear the system configuration parameters from NVRAM by placing a jumper on the ISA_CLR jumper pins and then booting the system with the jumper in place. See Table B-1 in the Installation and Troubleshooting Guide for information about the jumper. Step 4: Examine switches or print report lists the required switch and jumper settings for each expansion card in your computer. To view the settings, highlight the card and press . For ISA expansion cards, it is important to compare the jumper and switch settings listed on the screen to the actual settings on the card. Press to make a copy of or print the settings. If your computer is attached to a printer, you can print the information; if not, you can copy it to a file. Step 5: Save and exit allows you to save or cancel the configuration changes you have made. When you select this option, follow the directions on the menu that appears. If you save your changes, the utility saves the new configuration in your system's NVRAM and in a file on your RCU diskette. Then, the utility automatically reboots your system. If you cancel your changes, you can remain in the utility to make other changes or exit the utility without saving any changes. 5-10 Dell PowerEdge 4300 Systems User's Guide
-
 1
1 -
2
-
3
-
4
-
5
-
6
-
7
-
8
-
9
-
10
-
11
-
12
-
13
-
14
-
15
-
16
-
17
-
18
-
19
-
20
-
21
-
22
-
23
-
24
-
25
-
26
-
27
-
28
-
29
-
30
-
31
-
32
-
33
-
34
-
35
-
36
-
37
-
38
-
39
-
40
-
41
-
42
-
43
-
44
-
45
-
46
-
47
-
48
-
49
-
50
-
51
-
52
-
53
-
54
-
55
-
56
-
57
-
58
-
59
-
60
-
61
-
62
-
63
-
64
-
65
-
66
-
67
-
68
-
69
-
70
-
71
-
72
-
73
-
74
-
75
-
76
-
77
-
78
-
79
-
80
-
81
-
82
-
83
-
84
-
85
-
86
-
 87
87 -
 88
88 -
 89
89 -
 90
90 -
 91
91 -
 92
92 -
 93
93 -
 94
94 -
 95
95 -
 96
96 -
 97
97 -
98
-
99
-
100
-
101
-
102
-
103
-
104
-
105
-
106
-
107
-
108
-
109
-
110
-
111
-
112
-
113
-
114
-
115
-
116
-
117
-
118
-
119
-
120
-
121
-
122
-
123
-
124
-
125
-
126
-
127
-
128
-
129
-
130
-
131
-
132
-
133
-
134
-
135
-
136
-
137
-
138
-
139
-
140
-
141
-
142
-
143
-
144
-
145
-
146
-
147
-
148
-
149
-
150
-
151
-
152
-
153
-
154
-
155
-
156
-
157
-
158
-
159
-
160
-
161
 |
 |
