Dell PowerEdge M420 Hardware Owner's Manual - Page 293
Troubleshooting Fan Modules, Reseat the faulty fan. See Installing a Fan Module
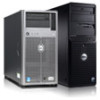 |
View all Dell PowerEdge M420 manuals
Add to My Manuals
Save this manual to your list of manuals |
Page 293 highlights
NOTE: After installing a new power supply, allow several seconds for the system to recognize the power supply and determine whether it is working properly. The power supply DC power indicator turns green if the power supply is functioning properly. See Figure 1-16. 3 If none of the power supplies show a fault LED and the blades do not power on, check the LCD display or CMC for status messages. 4 If the problem is not resolved, see "Getting Help" on page 337. Troubleshooting Fan Modules NOTE: The fan modules are hot swappable. Remove and replace only one fan module at a time in a system that is turned on. Operating the system without all six fan modules for extended periods of time can cause the system to overheat. 1 Locate the faulty fan. Each fan module has indicators that identify a faulty fan. See Figure 1-17. 2 Remove the fan module. See "Removing a Fan Module" on page 269. 3 Examine the blades for debris. If debris is present, carefully remove it. 4 Reseat the faulty fan. See "Installing a Fan Module" on page 270. 5 If none of the fans show a fault LED and the blades do not power on, check the LCD display or CMC for status messages. 6 If the problem is not resolved, install a new fan. 7 If the new fan does not operate, see "Getting Help" on page 337. Troubleshooting the CMC Module NOTE: To eliminate the possibility of a hardware problem with the module or its attaching devices, first ensure that the module is properly initialized and configured. See the Configuration Guide and the documentation that came with the module before performing the following procedure. 1 Verify that the latest firmware is installed on the CMC module. See support.dell.com for the latest firmware and refer to the release notes for firmware compatibility and update information. 2 Verify that the CMC(s) have valid IP addresses for the subnet. Verify using the ICMP ping command. NOTE: In an enclosure with two CMCs, both share the same IP address. Troubleshooting Your System 293
-
 1
1 -
2
-
3
-
4
-
5
-
6
-
7
-
8
-
9
-
10
-
11
-
12
-
13
-
14
-
15
-
16
-
17
-
18
-
19
-
20
-
21
-
22
-
23
-
24
-
25
-
26
-
27
-
28
-
29
-
30
-
31
-
32
-
33
-
34
-
35
-
36
-
37
-
38
-
39
-
40
-
41
-
42
-
43
-
44
-
45
-
46
-
47
-
48
-
49
-
50
-
51
-
52
-
53
-
54
-
55
-
56
-
57
-
58
-
59
-
60
-
61
-
62
-
63
-
64
-
65
-
66
-
67
-
68
-
69
-
70
-
71
-
72
-
73
-
74
-
75
-
76
-
77
-
78
-
79
-
80
-
81
-
82
-
83
-
84
-
85
-
86
-
87
-
88
-
89
-
90
-
91
-
92
-
93
-
94
-
95
-
96
-
97
-
98
-
99
-
100
-
101
-
102
-
103
-
104
-
105
-
106
-
107
-
108
-
109
-
110
-
111
-
112
-
113
-
114
-
115
-
116
-
117
-
118
-
119
-
120
-
121
-
122
-
123
-
124
-
125
-
126
-
127
-
128
-
129
-
130
-
131
-
132
-
133
-
134
-
135
-
136
-
137
-
138
-
139
-
140
-
141
-
142
-
143
-
144
-
145
-
146
-
147
-
148
-
149
-
150
-
151
-
152
-
153
-
154
-
155
-
156
-
157
-
158
-
159
-
160
-
161
-
162
-
163
-
164
-
165
-
166
-
167
-
168
-
169
-
170
-
171
-
172
-
173
-
174
-
175
-
176
-
177
-
178
-
179
-
180
-
181
-
182
-
183
-
184
-
185
-
186
-
187
-
188
-
189
-
190
-
191
-
192
-
193
-
194
-
195
-
196
-
197
-
198
-
199
-
200
-
201
-
202
-
203
-
204
-
205
-
206
-
207
-
208
-
209
-
210
-
211
-
212
-
213
-
214
-
215
-
216
-
217
-
218
-
219
-
220
-
221
-
222
-
223
-
224
-
225
-
226
-
227
-
228
-
229
-
230
-
231
-
232
-
233
-
234
-
235
-
236
-
237
-
238
-
239
-
240
-
241
-
242
-
243
-
244
-
245
-
246
-
247
-
248
-
249
-
250
-
251
-
252
-
253
-
254
-
255
-
256
-
257
-
258
-
259
-
260
-
261
-
262
-
263
-
264
-
265
-
266
-
267
-
268
-
269
-
270
-
271
-
272
-
273
-
274
-
275
-
276
-
277
-
278
-
279
-
280
-
281
-
282
-
283
-
284
-
285
-
286
-
287
-
 288
288 -
 289
289 -
 290
290 -
 291
291 -
 292
292 -
 293
293 -
 294
294 -
 295
295 -
 296
296 -
 297
297 -
 298
298 -
299
-
300
-
301
-
302
-
303
-
304
-
305
-
306
-
307
-
308
-
309
-
310
-
311
-
312
-
313
-
314
-
315
-
316
-
317
-
318
-
319
-
320
-
321
-
322
-
323
-
324
-
325
-
326
-
327
-
328
-
329
-
330
-
331
-
332
-
333
-
334
-
335
-
336
-
337
-
338
-
339
-
340
-
341
-
342
-
343
-
344
-
345
-
346
 |
 |