Epson 5520W Users Guide - Page 140
When the On/Standby and Status lights turn blue and the Lamp and Temp lights turn orange, release
 |
View all Epson 5520W manuals
Add to My Manuals
Save this manual to your list of manuals |
Page 140 highlights
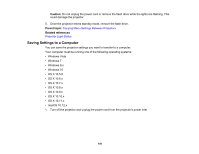
2. Insert the flash drive into the wireless LAN module port. Note: Connect the flash drive directly to the projector. Do not use a hub or your settings may not be saved correctly. 3. Press and hold the Menu button on the control panel or remote control as you connect the power cord to the projector's power inlet. 4. When the On/Standby and Status lights turn blue and the Lamp and Temp lights turn orange, release the Menu button. The lights flash to indicate that settings are transferring to the projector. When the lights stop flashing, the On/Standby light turns blue and the projector enters standby mode. 140
-
 1
1 -
2
-
3
-
4
-
5
-
6
-
7
-
8
-
9
-
10
-
11
-
12
-
13
-
14
-
15
-
16
-
17
-
18
-
19
-
20
-
21
-
22
-
23
-
24
-
25
-
26
-
27
-
28
-
29
-
30
-
31
-
32
-
33
-
34
-
35
-
36
-
37
-
38
-
39
-
40
-
41
-
42
-
43
-
44
-
45
-
46
-
47
-
48
-
49
-
50
-
51
-
52
-
53
-
54
-
55
-
56
-
57
-
58
-
59
-
60
-
61
-
62
-
63
-
64
-
65
-
66
-
67
-
68
-
69
-
70
-
71
-
72
-
73
-
74
-
75
-
76
-
77
-
78
-
79
-
80
-
81
-
82
-
83
-
84
-
85
-
86
-
87
-
88
-
89
-
90
-
91
-
92
-
93
-
94
-
95
-
96
-
97
-
98
-
99
-
100
-
101
-
102
-
103
-
104
-
105
-
106
-
107
-
108
-
109
-
110
-
111
-
112
-
113
-
114
-
115
-
116
-
117
-
118
-
119
-
120
-
121
-
122
-
123
-
124
-
125
-
126
-
127
-
128
-
129
-
130
-
131
-
132
-
133
-
134
-
 135
135 -
 136
136 -
 137
137 -
 138
138 -
 139
139 -
 140
140 -
 141
141 -
 142
142 -
 143
143 -
 144
144 -
 145
145 -
146
-
147
-
148
-
149
-
150
-
151
-
152
-
153
-
154
-
155
-
156
-
157
-
158
-
159
-
160
-
161
-
162
-
163
-
164
-
165
-
166
-
167
-
168
-
169
-
170
-
171
-
172
-
173
-
174
-
175
-
176
-
177
-
178
-
179
-
180
-
181
-
182
-
183
-
184
-
185
-
186
-
187
-
188
-
189
-
190
-
191
-
192
-
193
-
194
-
195
-
196
-
197
-
198
-
199
-
200
-
201
-
202
-
203
-
204
-
205
-
206
-
207
-
208
-
209
-
210
-
211
-
212
-
213
-
214
-
215
-
216
-
217
-
218
-
219
-
220
-
221
-
222
-
223
-
224
-
225
-
226
-
227
-
228
-
229
-
230
-
231
-
232
-
233
-
234
-
235
-
236
-
237
-
238
-
239
-
240
-
241
-
242
-
243
-
244
-
245
-
246
-
247
-
248
-
249
-
250
-
251
-
252
-
253
-
254
-
255
-
256
-
257
-
258
-
259
-
260
-
261
-
262
-
263
-
264
-
265
-
266
-
267
-
268
-
269
-
270
-
271
-
272
-
273
-
274
-
275
-
276
-
277
-
278
-
279
 |
 |

140
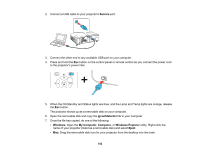
2.
Insert the flash drive into the wireless LAN module port.
Note:
Connect the flash drive directly to the projector. Do not use a hub or your settings may not be
saved correctly.
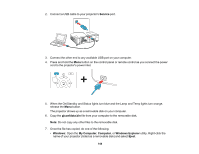
3.
Press and hold the
Menu
button on the control panel or remote control as you connect the power
cord to the projector's power inlet.
4.
When the On/Standby and Status lights turn blue and the Lamp and Temp lights turn orange,
release the
Menu
button.
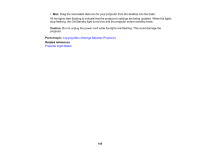
The lights flash to indicate that settings are transferring to the projector. When the lights stop
flashing, the On/Standby light turns blue and the projector enters standby mode.