Epson BrightLink 450Wi User's Guide - Page 111
Cleaning the Air Filter, Replacing the Air Filter
 |
View all Epson BrightLink 450Wi manuals
Add to My Manuals
Save this manual to your list of manuals |
Page 111 highlights
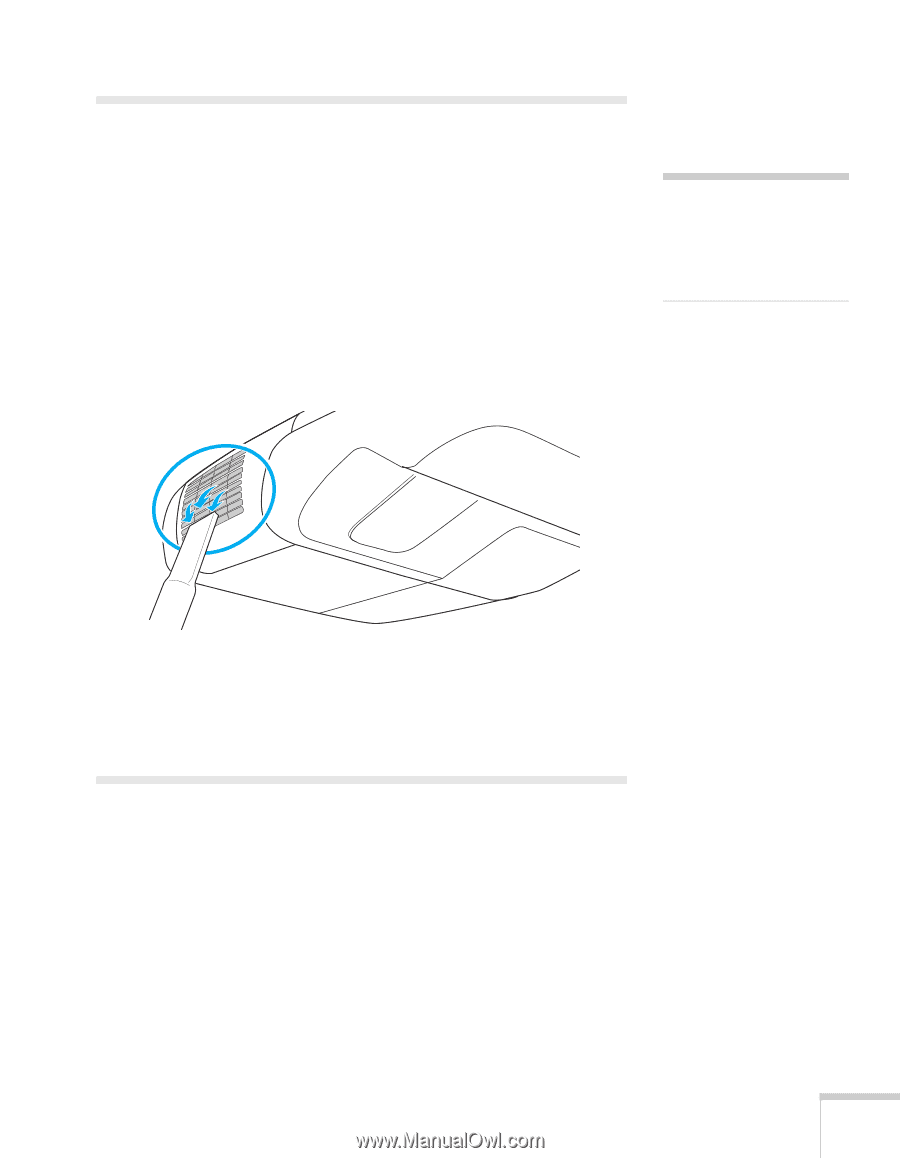
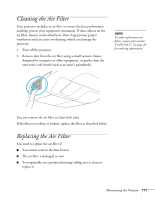
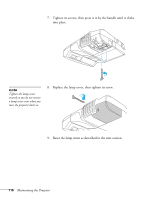
Cleaning the Air Filter Your projector includes an air filter to ensure the best performance and help protect your equipment investment. If dust collects on the air filter, clean it as described here. Dust clogs prevent proper ventilation and can cause overheating, which can damage the projector. 1. Turn off the projector. 2. Remove dust from the air filter using a small vacuum cleaner designed for computer or office equipment, or gently clean the vent with a soft brush (such as an artist's paintbrush). note To order replacement air filters, request part number V13H134A27. See page 20 for ordering information. You can remove the air filter to clean both sides. If the filter is too dirty or broken, replace the filter as described below. Replacing the Air Filter You need to replace the air filter if: ■ You cannot remove the dust from it ■ The air filter is damaged or torn ■ You repeatedly see a projected message telling you to clean or replace it Maintaining the Projector 111
-
 1
1 -
2
-
3
-
4
-
5
-
6
-
7
-
8
-
9
-
10
-
11
-
12
-
13
-
14
-
15
-
16
-
17
-
18
-
19
-
20
-
21
-
22
-
23
-
24
-
25
-
26
-
27
-
28
-
29
-
30
-
31
-
32
-
33
-
34
-
35
-
36
-
37
-
38
-
39
-
40
-
41
-
42
-
43
-
44
-
45
-
46
-
47
-
48
-
49
-
50
-
51
-
52
-
53
-
54
-
55
-
56
-
57
-
58
-
59
-
60
-
61
-
62
-
63
-
64
-
65
-
66
-
67
-
68
-
69
-
70
-
71
-
72
-
73
-
74
-
75
-
76
-
77
-
78
-
79
-
80
-
81
-
82
-
83
-
84
-
85
-
86
-
87
-
88
-
89
-
90
-
91
-
92
-
93
-
94
-
95
-
96
-
97
-
98
-
99
-
100
-
101
-
102
-
103
-
104
-
105
-
 106
106 -
 107
107 -
 108
108 -
 109
109 -
 110
110 -
 111
111 -
 112
112 -
 113
113 -
 114
114 -
 115
115 -
 116
116 -
117
-
118
-
119
-
120
-
121
-
122
-
123
-
124
-
125
-
126
-
127
-
128
-
129
-
130
-
131
-
132
-
133
-
134
-
135
-
136
-
137
-
138
-
139
-
140
-
141
-
142
-
143
-
144
-
145
-
146
-
147
-
148
-
149
-
150
-
151
-
152
-
153
-
154
-
155
-
156
-
157
-
158
-
159
-
160
-
161
-
162
-
163
-
164
-
165
-
166
-
167
-
168
-
169
-
170
-
171
-
172
-
173
-
174
-
175
-
176
-
177
-
178
-
179
-
180
-
181
-
182
-
183
-
184
-
185
-
186
 |
 |