Epson BrightLink 450Wi User's Guide - Page 49
Calibrating the Projector - calibrate
 |
View all Epson BrightLink 450Wi manuals
Add to My Manuals
Save this manual to your list of manuals |
Page 49 highlights
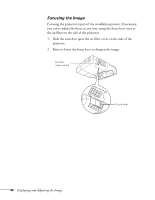
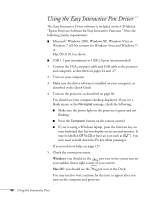
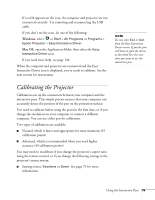
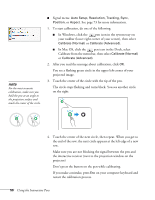
If a red X appears on the icon, the computer and projector are not connected correctly. Try removing and reconnecting the USB cable. If you don't see the icon, do one of the following: Windows: select or Start > All Programs or Programs > Epson Projector > Easy Interactive Driver. Mac OS: open the Application folder, then select the Easy Interactive Driver icon. If you need more help, see page 134. When the computer and projector are connected and the Easy Interactive Driver icon is displayed, you're ready to calibrate. See the next section for instructions. note Do not select Exit or Quit from the Easy Interactive Driver menu. If you do, you will have to open the driver as described here the next time you want to use the interactive pen. Calibrating the Projector Calibration sets up the connection between your computer and the interactive pens. This simple process ensures that your computer can accurately detect the position of the pen on the projection surface. You need to calibrate before using the pens for the first time, or if you change the resolution on your computer or connect a different computer. You can use either pen for calibration. Two types of calibration are available: ■ Normal, which is faster and appropriate for most situations (25 calibration points) ■ Advanced, which is recommended when you need higher accuracy (49 calibration points) You may need to recalibrate if you change the projector's aspect ratio using the remote control, or if you change the following settings in the projector's menu system: ■ Settings menu: Keystone or Zoom. See page 75 for more information. Using the Interactive Pens 49
-
 1
1 -
2
-
3
-
4
-
5
-
6
-
7
-
8
-
9
-
10
-
11
-
12
-
13
-
14
-
15
-
16
-
17
-
18
-
19
-
20
-
21
-
22
-
23
-
24
-
25
-
26
-
27
-
28
-
29
-
30
-
31
-
32
-
33
-
34
-
35
-
36
-
37
-
38
-
39
-
40
-
41
-
42
-
43
-
 44
44 -
 45
45 -
 46
46 -
 47
47 -
 48
48 -
 49
49 -
 50
50 -
 51
51 -
 52
52 -
 53
53 -
 54
54 -
55
-
56
-
57
-
58
-
59
-
60
-
61
-
62
-
63
-
64
-
65
-
66
-
67
-
68
-
69
-
70
-
71
-
72
-
73
-
74
-
75
-
76
-
77
-
78
-
79
-
80
-
81
-
82
-
83
-
84
-
85
-
86
-
87
-
88
-
89
-
90
-
91
-
92
-
93
-
94
-
95
-
96
-
97
-
98
-
99
-
100
-
101
-
102
-
103
-
104
-
105
-
106
-
107
-
108
-
109
-
110
-
111
-
112
-
113
-
114
-
115
-
116
-
117
-
118
-
119
-
120
-
121
-
122
-
123
-
124
-
125
-
126
-
127
-
128
-
129
-
130
-
131
-
132
-
133
-
134
-
135
-
136
-
137
-
138
-
139
-
140
-
141
-
142
-
143
-
144
-
145
-
146
-
147
-
148
-
149
-
150
-
151
-
152
-
153
-
154
-
155
-
156
-
157
-
158
-
159
-
160
-
161
-
162
-
163
-
164
-
165
-
166
-
167
-
168
-
169
-
170
-
171
-
172
-
173
-
174
-
175
-
176
-
177
-
178
-
179
-
180
-
181
-
182
-
183
-
184
-
185
-
186
 |
 |