Epson BrightLink 450Wi User's Guide - Page 13
Unpacking the Mounting Hardware - installation guide
 |
View all Epson BrightLink 450Wi manuals
Add to My Manuals
Save this manual to your list of manuals |
Page 13 highlights
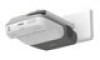
Unpacking the Mounting Hardware After unpacking the setting plate and mounting hardware, make sure you have all these parts: Wall plate Wall mount (setting plate) End cap Installation template Hex wrenches Wall plate cover Bolts See the Installation Guide for instructions on mounting the projector on a wall. Save all packaging in case you need to ship the projector. Always use the original packaging (or the equivalent) when you need to send the projector to another location. See page 120 for transportation instructions. Welcome 13
-
 1
1 -
2
-
3
-
4
-
5
-
6
-
7
-
 8
8 -
 9
9 -
 10
10 -
 11
11 -
 12
12 -
 13
13 -
 14
14 -
 15
15 -
 16
16 -
 17
17 -
 18
18 -
19
-
20
-
21
-
22
-
23
-
24
-
25
-
26
-
27
-
28
-
29
-
30
-
31
-
32
-
33
-
34
-
35
-
36
-
37
-
38
-
39
-
40
-
41
-
42
-
43
-
44
-
45
-
46
-
47
-
48
-
49
-
50
-
51
-
52
-
53
-
54
-
55
-
56
-
57
-
58
-
59
-
60
-
61
-
62
-
63
-
64
-
65
-
66
-
67
-
68
-
69
-
70
-
71
-
72
-
73
-
74
-
75
-
76
-
77
-
78
-
79
-
80
-
81
-
82
-
83
-
84
-
85
-
86
-
87
-
88
-
89
-
90
-
91
-
92
-
93
-
94
-
95
-
96
-
97
-
98
-
99
-
100
-
101
-
102
-
103
-
104
-
105
-
106
-
107
-
108
-
109
-
110
-
111
-
112
-
113
-
114
-
115
-
116
-
117
-
118
-
119
-
120
-
121
-
122
-
123
-
124
-
125
-
126
-
127
-
128
-
129
-
130
-
131
-
132
-
133
-
134
-
135
-
136
-
137
-
138
-
139
-
140
-
141
-
142
-
143
-
144
-
145
-
146
-
147
-
148
-
149
-
150
-
151
-
152
-
153
-
154
-
155
-
156
-
157
-
158
-
159
-
160
-
161
-
162
-
163
-
164
-
165
-
166
-
167
-
168
-
169
-
170
-
171
-
172
-
173
-
174
-
175
-
176
-
177
-
178
-
179
-
180
-
181
-
182
-
183
-
184
-
185
-
186
 |
 |

Welcome
13
Unpacking the Mounting Hardware
After unpacking the setting plate and mounting hardware, make sure
you have all these parts:
See the
Installation Guide
for instructions on mounting the projector
on a wall. Save all packaging in case you need to ship the projector.
Always use the original packaging (or the equivalent) when you need
to send the projector to another location. See page 120 for
transportation instructions.
Wall mount (setting plate)
Installation template
Wall plate
Wall plate cover
End cap
Hex wrenches
Bolts