Epson WorkForce WF-2630 User Manual - Page 60
Scanning from Smart Devices
 |
View all Epson WorkForce WF-2630 manuals
Add to My Manuals
Save this manual to your list of manuals |
Page 60 highlights
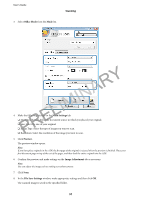
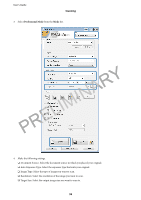
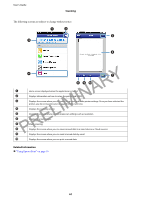
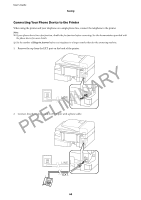
User's Guide Scanning 5. Click Preview. The preview window opens. Note: If you have place originals in the ADF, the first page of the originals is ejected when the preview is finished. Place your first document page on top of the rest of the pages, and then load the entire original into the ADF. 6. Check the preview, and adjust the image as necessary. Note: You can make various image adjustments such as improving the color, sharpness, and contrast. 7. Click Scan. 8. In the File Save Settings window, make appropriate settings and then click OK. The scanned image is saved in the specified folder. Note: When you select PDF as the Image Format setting, you can set a password to protect the file. Click Options, select the Security tab, and then make settings. Y Related Information R & "Placing Originals" on page 29 & "EPSON Scan (Scanner Driver)" on page 95 Scanning from Smart DIevMices INA Epson iPrint is an application that allows you to scan photos and documents from a smart device, such as a smartphone or tablet, that is connected to the same wireless network as your printer. You can save the scanned data on a smart device or to Cloud services, send it by email, or print it. L You can install Epson iPrint on your smart device from the following URL. PRE epson.com/iprint Using Epson iPrint Start Epson iPrint from your smart device and select the item you want to use from the home screen. 60
-
 1
1 -
2
-
3
-
4
-
5
-
6
-
7
-
8
-
9
-
10
-
11
-
12
-
13
-
14
-
15
-
16
-
17
-
18
-
19
-
20
-
21
-
22
-
23
-
24
-
25
-
26
-
27
-
28
-
29
-
30
-
31
-
32
-
33
-
34
-
35
-
36
-
37
-
38
-
39
-
40
-
41
-
42
-
43
-
44
-
45
-
46
-
47
-
48
-
49
-
50
-
51
-
52
-
53
-
54
-
 55
55 -
 56
56 -
 57
57 -
 58
58 -
 59
59 -
 60
60 -
 61
61 -
 62
62 -
 63
63 -
 64
64 -
 65
65 -
66
-
67
-
68
-
69
-
70
-
71
-
72
-
73
-
74
-
75
-
76
-
77
-
78
-
79
-
80
-
81
-
82
-
83
-
84
-
85
-
86
-
87
-
88
-
89
-
90
-
91
-
92
-
93
-
94
-
95
-
96
-
97
-
98
-
99
-
100
-
101
-
102
-
103
-
104
-
105
-
106
-
107
-
108
-
109
-
110
-
111
-
112
-
113
-
114
-
115
-
116
-
117
-
118
-
119
-
120
-
121
-
122
-
123
-
124
-
125
-
126
-
127
-
128
-
129
-
130
-
131
-
132
 |
 |