Garmin Forerunner 945 LTE Owners Manual - Page 79
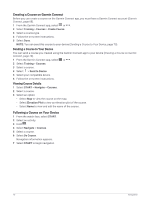
Creating a Round-Trip Course, Saving Your Location, Editing Your Saved Locations
 |
View all Garmin Forerunner 945 LTE manuals
Add to My Manuals
Save this manual to your list of manuals |
Page 79 highlights
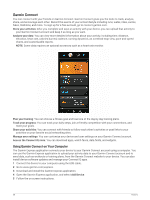
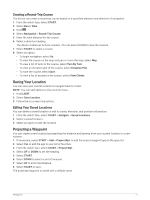
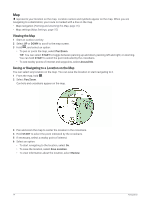
Creating a Round-Trip Course The device can create a round-trip course based on a specified distance and direction of navigation. 1 From the watch face, select START. 2 Select Run or Bike. 3 Hold . 4 Select Navigation > Round-Trip Course. 5 Enter the total distance for the course. 6 Select a direction heading. The device creates up to three courses. You can select DOWN to view the courses. 7 Select START to select a course. 8 Select an option: • To begin navigation, select Go. • To view the course on the map and pan or zoom the map, select Map. • To view a list of turns in the course, select Turn By Turn. • To view an elevation plot of the course, select Elevation Plot. • To save the course, select Save. • To view a list of ascents in the course, select View Climbs. Saving Your Location You can save your current location to navigate back to it later. NOTE: You can add options to the controls menu. 1 Hold LIGHT. 2 Select Save Location. 3 Follow the on-screen instructions. Editing Your Saved Locations You can delete a saved location or edit its name, elevation, and position information. 1 From the watch face, select START > Navigate > Saved Locations. 2 Select a saved location. 3 Select an option to edit the location. Projecting a Waypoint You can create a new location by projecting the distance and bearing from your current location to a new location. 1 If necessary, select START > Add > Project Wpt. to add the project waypoint app to the apps list. 2 Select Yes to add the app to your list of favorites. 3 From the watch face, select START > Project Wpt.. 4 Select UP or DOWN to set the heading. 5 Select START. 6 Select DOWN to select a unit of measure. 7 Select UP to enter the distance. 8 Select START to save. The projected waypoint is saved with a default name. Navigation 71
-
 1
1 -
2
-
3
-
4
-
5
-
6
-
7
-
8
-
9
-
10
-
11
-
12
-
13
-
14
-
15
-
16
-
17
-
18
-
19
-
20
-
21
-
22
-
23
-
24
-
25
-
26
-
27
-
28
-
29
-
30
-
31
-
32
-
33
-
34
-
35
-
36
-
37
-
38
-
39
-
40
-
41
-
42
-
43
-
44
-
45
-
46
-
47
-
48
-
49
-
50
-
51
-
52
-
53
-
54
-
55
-
56
-
57
-
58
-
59
-
60
-
61
-
62
-
63
-
64
-
65
-
66
-
67
-
68
-
69
-
70
-
71
-
72
-
73
-
 74
74 -
 75
75 -
 76
76 -
 77
77 -
 78
78 -
 79
79 -
 80
80 -
 81
81 -
 82
82 -
 83
83 -
 84
84 -
85
-
86
-
87
-
88
-
89
-
90
-
91
-
92
-
93
-
94
-
95
-
96
-
97
-
98
-
99
-
100
-
101
-
102
-
103
-
104
-
105
-
106
-
107
-
108
-
109
-
110
-
111
-
112
-
113
-
114
-
115
-
116
-
117
-
118
-
119
-
120
-
121
-
122
-
123
-
124
-
125
-
126
 |
 |