Gateway E-475M Gateway Notebook Reference Guide (Windows XP) - Page 54
Using a CD or DVD
 |
View all Gateway E-475M manuals
Add to My Manuals
Save this manual to your list of manuals |
Page 54 highlights
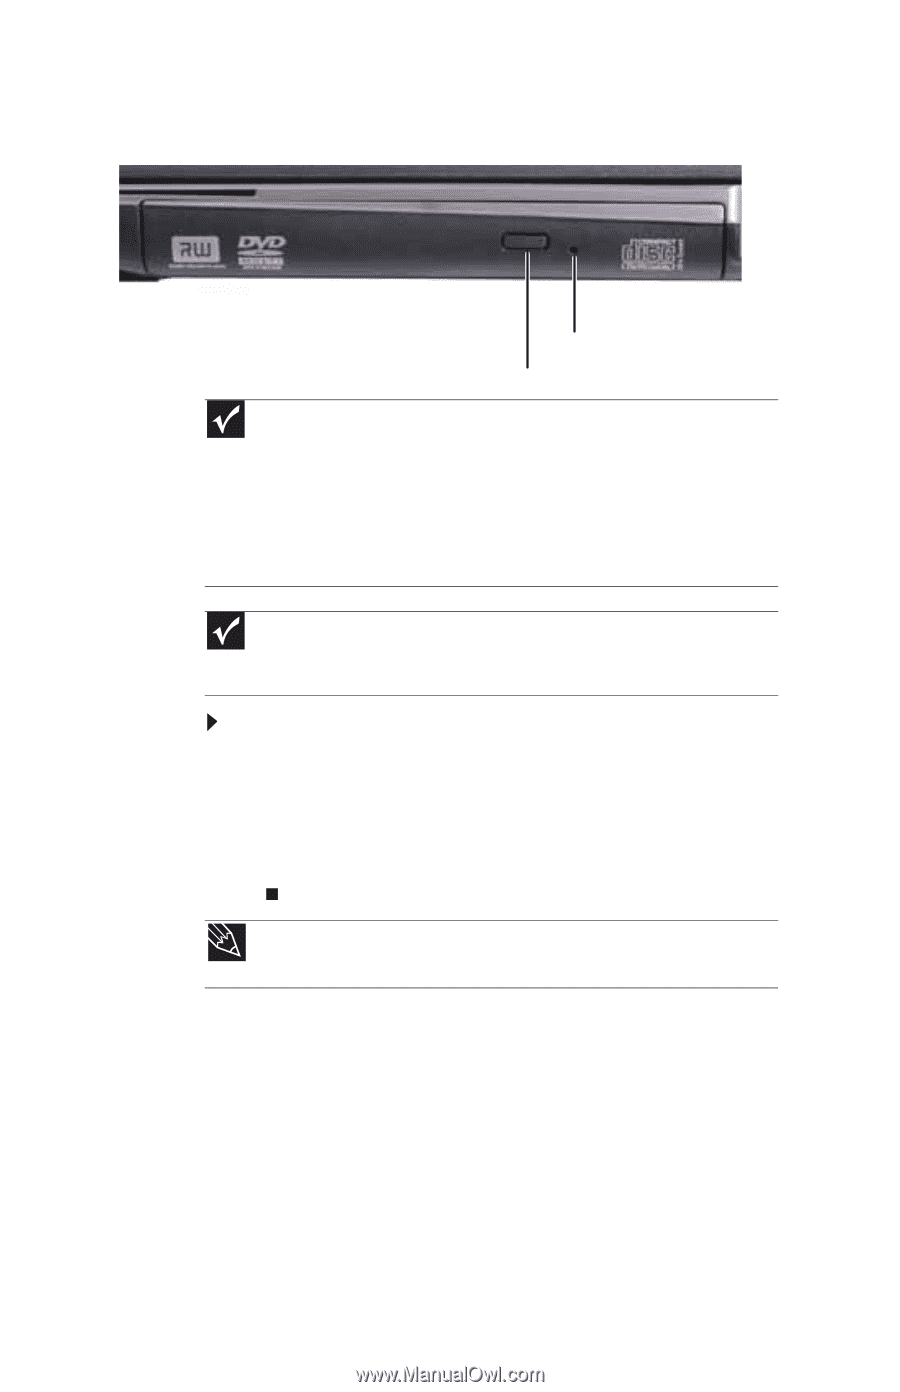
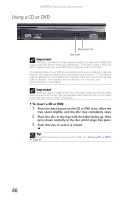
CHAPTER 4: Using Drives and Accessories Using a CD or DVD [ Manual eject hole Eject button Important DVD discs and drives contain regional codes that help control DVD title exports and help reduce illegal disc distribution. To be able to play a DVD, the disc's regional code and your DVD drive's regional code must match. The regional code on your DVD drive is determined by your notebook's delivery address. The regional code for the United States and Canada is 1. The regional code for Mexico is 4. Your DVD drive's regional code must match the regional code of the disc. The regional code for the disc is on the disc, disc documentation, or packaging. Important When you place a single-sided disc in the tray, make sure that the label side is facing up. If the disc has two playable sides, place the disc so the name of the side you want to play is facing up. To insert a CD or DVD: 1 Press the eject button on the CD or DVD drive. After the tray opens slightly, pull the disc tray completely open. 2 Place the disc in the tray with the label facing up, then press down carefully on the disc until it snaps into place. 3 Push the tray in until it is closed. Tip For information about cleaning a CD or DVD, see "Cleaning CDs or DVDs" on page 81. 46
-
 1
1 -
2
-
3
-
4
-
5
-
6
-
7
-
8
-
9
-
10
-
11
-
12
-
13
-
14
-
15
-
16
-
17
-
18
-
19
-
20
-
21
-
22
-
23
-
24
-
25
-
26
-
27
-
28
-
29
-
30
-
31
-
32
-
33
-
34
-
35
-
36
-
37
-
38
-
39
-
40
-
41
-
42
-
43
-
44
-
45
-
46
-
47
-
48
-
 49
49 -
 50
50 -
 51
51 -
 52
52 -
 53
53 -
 54
54 -
 55
55 -
 56
56 -
 57
57 -
 58
58 -
 59
59 -
60
-
61
-
62
-
63
-
64
-
65
-
66
-
67
-
68
-
69
-
70
-
71
-
72
-
73
-
74
-
75
-
76
-
77
-
78
-
79
-
80
-
81
-
82
-
83
-
84
-
85
-
86
-
87
-
88
-
89
-
90
-
91
-
92
-
93
-
94
-
95
-
96
-
97
-
98
-
99
-
100
-
101
-
102
-
103
-
104
-
105
-
106
-
107
-
108
-
109
-
110
-
111
-
112
-
113
-
114
-
115
-
116
-
117
-
118
-
119
-
120
-
121
-
122
-
123
-
124
-
125
-
126
-
127
-
128
-
129
-
130
-
131
-
132
-
133
-
134
-
135
-
136
-
137
-
138
-
139
-
140
-
141
-
142
-
143
-
144
-
145
-
146
-
147
-
148
-
149
-
150
-
151
-
152
 |
 |