HTC One max User manual - Page 255
Date & Time Settings, Activate This Device, System Updates
 |
View all HTC One max manuals
Add to My Manuals
Save this manual to your list of manuals |
Page 255 highlights
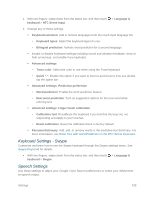
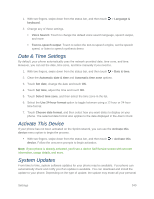
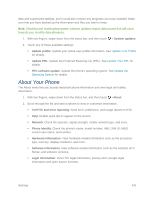
1. With two fingers, swipe down from the status bar, and then touch > Language & keyboard. 2. Change any of these settings. Voice Search: Touch to change the default voice search language, speech output, and more Text-to-speech output: Touch to select the text-to-speech engine, set the speech speed, or listen to speech synthesis demo. Date & Time Settings By default, your phone automatically uses the network-provided date, time zone, and time. However, you can set the date, time zone, and time manually if you need to. 1. With two fingers, swipe down from the status bar, and then touch > Date & time. 2. Clear the Automatic date & time and Automatic time zone options. 3. Touch Set date, change the date and touch OK. 4. Touch Set time, adjust the time and touch OK. 5. Touch Select time zone, and then select the time zone in the list. 6. Select the Use 24-hour format option to toggle between using a 12-hour or 24-hour time format. 7. Touch Choose date format, and then select how you want dates to display on your phone. The selected date format also applies to the date displayed in the Alarm Clock. Activate This Device If your phone has not been activated on the Sprint network, you can use the Activate this device menu option to begin the process. With two fingers, swipe down from the status bar, and then touch > Activate this device. Follow the onscreen prompts to begin activation. Note: If your phone is already activated, you'll see a device Self Service screen with account information, usage details, and more. System Updates From time to time, system software updates for your phone may be available. Your phone can automatically check and notify you if an update is available. You can download and install the update to your phone. Depending on the type of update, the update may erase all your personal Settings 240
-
 1
1 -
2
-
3
-
4
-
5
-
6
-
7
-
8
-
9
-
10
-
11
-
12
-
13
-
14
-
15
-
16
-
17
-
18
-
19
-
20
-
21
-
22
-
23
-
24
-
25
-
26
-
27
-
28
-
29
-
30
-
31
-
32
-
33
-
34
-
35
-
36
-
37
-
38
-
39
-
40
-
41
-
42
-
43
-
44
-
45
-
46
-
47
-
48
-
49
-
50
-
51
-
52
-
53
-
54
-
55
-
56
-
57
-
58
-
59
-
60
-
61
-
62
-
63
-
64
-
65
-
66
-
67
-
68
-
69
-
70
-
71
-
72
-
73
-
74
-
75
-
76
-
77
-
78
-
79
-
80
-
81
-
82
-
83
-
84
-
85
-
86
-
87
-
88
-
89
-
90
-
91
-
92
-
93
-
94
-
95
-
96
-
97
-
98
-
99
-
100
-
101
-
102
-
103
-
104
-
105
-
106
-
107
-
108
-
109
-
110
-
111
-
112
-
113
-
114
-
115
-
116
-
117
-
118
-
119
-
120
-
121
-
122
-
123
-
124
-
125
-
126
-
127
-
128
-
129
-
130
-
131
-
132
-
133
-
134
-
135
-
136
-
137
-
138
-
139
-
140
-
141
-
142
-
143
-
144
-
145
-
146
-
147
-
148
-
149
-
150
-
151
-
152
-
153
-
154
-
155
-
156
-
157
-
158
-
159
-
160
-
161
-
162
-
163
-
164
-
165
-
166
-
167
-
168
-
169
-
170
-
171
-
172
-
173
-
174
-
175
-
176
-
177
-
178
-
179
-
180
-
181
-
182
-
183
-
184
-
185
-
186
-
187
-
188
-
189
-
190
-
191
-
192
-
193
-
194
-
195
-
196
-
197
-
198
-
199
-
200
-
201
-
202
-
203
-
204
-
205
-
206
-
207
-
208
-
209
-
210
-
211
-
212
-
213
-
214
-
215
-
216
-
217
-
218
-
219
-
220
-
221
-
222
-
223
-
224
-
225
-
226
-
227
-
228
-
229
-
230
-
231
-
232
-
233
-
234
-
235
-
236
-
237
-
238
-
239
-
240
-
241
-
242
-
243
-
244
-
245
-
246
-
247
-
248
-
249
-
 250
250 -
 251
251 -
 252
252 -
 253
253 -
 254
254 -
 255
255 -
 256
256 -
 257
257 -
 258
258 -
 259
259 -
 260
260 -
261
-
262
-
263
-
264
-
265
-
266
 |
 |