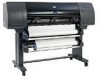
HP 4500 HP Color LaserJet 4500, 4500N, 4500DN Printer User Guide - Page 71
Control Panel Settings for Duplex Printing, To use the duplex printing accessory successfully
 |
View all HP 4500 manuals
Add to My Manuals
Save this manual to your list of manuals |
Page 71 highlights
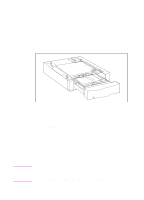
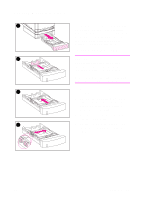
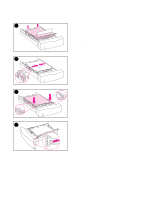
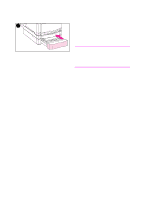
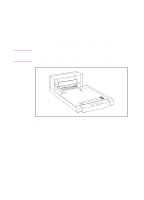
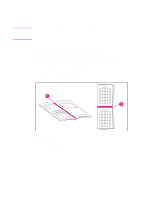
CAUTION Note To use the duplex printing accessory successfully: q Be sure that the duplex printing accessory is installed correctly. If the 500-sheet paper feeder (Tray 3) is installed, the duplex unit must be positioned between the printer and Tray 3. q Verify that the printer driver is configured to recognize the duplex printing accessory. (For instructions, see the online Help for the printer driver.) q Close the door to the rear output bin. The rear output bin is located at the back of the printer. q Select the appropriate duplex options in the printer driver software. Duplex options include the page and binding orientation. q Duplex printing is not supported for certain media types, including transparencies, labels, and cardstock. Control Panel Settings for Duplex Printing Many software applications allow you to change duplex printing settings. If your software application or printer driver does not allow you to adjust duplex printing settings, you can adjust these settings through the control panel. Do not open the door to the rear output bin during duplex printing. Doing so can cause jams or misprints. To set duplex printing from the printer control panel Changing duplex settings through the printer control panel affects all print jobs. Whenever possible, change duplex settings through your software application or printer driver. 1 Press MENU until PRINTING MENU displays. 2 Press ITEM until DUPLEX displays. 3 Press VALUE until ON displays. 4 Press SELECT to save the setting. 5 Press ITEM until BINDING displays. 6 Press VALUE to select either LONG EDGE or SHORT EDGE binding (see figure 3-4). 7 Press SELECT to save the setting. 8 Press GO to return the printer to the READY state. EN Chapter 3 71
-
 1
1 -
2
-
3
-
4
-
5
-
6
-
7
-
8
-
9
-
10
-
11
-
12
-
13
-
14
-
15
-
16
-
17
-
18
-
19
-
20
-
21
-
22
-
23
-
24
-
25
-
26
-
27
-
28
-
29
-
30
-
31
-
32
-
33
-
34
-
35
-
36
-
37
-
38
-
39
-
40
-
41
-
42
-
43
-
44
-
45
-
46
-
47
-
48
-
49
-
50
-
51
-
52
-
53
-
54
-
55
-
56
-
57
-
58
-
59
-
60
-
61
-
62
-
63
-
64
-
65
-
 66
66 -
 67
67 -
 68
68 -
 69
69 -
 70
70 -
 71
71 -
 72
72 -
 73
73 -
 74
74 -
 75
75 -
 76
76 -
77
-
78
-
79
-
80
-
81
-
82
-
83
-
84
-
85
-
86
-
87
-
88
-
89
-
90
-
91
-
92
-
93
-
94
-
95
-
96
-
97
-
98
-
99
-
100
-
101
-
102
-
103
-
104
-
105
-
106
-
107
-
108
-
109
-
110
-
111
-
112
-
113
-
114
-
115
-
116
-
117
-
118
-
119
-
120
-
121
-
122
-
123
-
124
-
125
-
126
-
127
-
128
-
129
-
130
-
131
-
132
-
133
-
134
-
135
-
136
-
137
-
138
-
139
-
140
-
141
-
142
-
143
-
144
-
145
-
146
-
147
-
148
-
149
-
150
-
151
-
152
-
153
-
154
-
155
-
156
-
157
-
158
-
159
-
160
-
161
-
162
-
163
-
164
-
165
-
166
-
167
-
168
-
169
-
170
-
171
-
172
-
173
-
174
-
175
-
176
-
177
-
178
-
179
-
180
-
181
-
182
-
183
-
184
-
185
-
186
-
187
-
188
-
189
-
190
-
191
-
192
-
193
-
194
-
195
-
196
-
197
-
198
-
199
-
200
-
201
-
202
-
203
-
204
-
205
-
206
-
207
-
208
-
209
-
210
-
211
-
212
-
213
-
214
-
215
-
216
-
217
-
218
-
219
-
220
 |
 |