HP 5200tn HP LaserJet 5200L Series Printer - User Guide - Page 107
Troubleshooting flowchart, Step 1: Does READY appear on the control-panel display? - printer specification
 |
UPC - 882780123762
View all HP 5200tn manuals
Add to My Manuals
Save this manual to your list of manuals |
Page 107 highlights
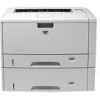
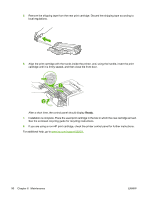
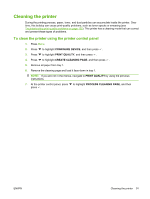
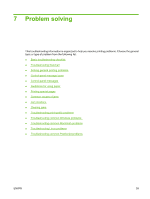
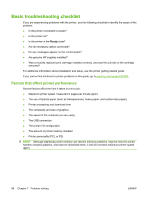
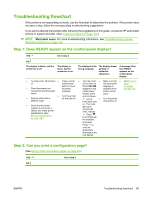
Troubleshooting flowchart If the printer is not responding correctly, use the flowchart to determine the problem. If the printer does not pass a step, follow the corresponding troubleshooting suggestions. If you cannot resolve the problem after following the suggestions in this guide, contact an HP-authorized service or support provider. (See Customer support on page 154.) NOTE: Macintosh users: For more troubleshooting information, see Troubleshooting common Macintosh problems on page 138. Step 1: Does READY appear on the control-panel display? YES Go to step 2. NO The display is blank, and the printer fan is off. The display is blank, but the printer fan is on. The display is in the wrong language. The display shows garbled or unfamiliar characters. A message other than READY appears on the control-panel display. ● Turn the printer off and then ● Press a printer ● Turn the printer ● Make sure that ● Go to Control- on. control-panel off and then on. the appropriate panel ● Check the power cord button to see if the printer connections and the power responds. switch. ● Plug the printer into a ● Turn the printer off and then on. different outlet. When XXX MB appears on the control-panel display, press and hold down until all ● three lights stay language is selected at the printer control panel. Turn the printer off and then on. messages on page 103. ● Check that the power supplied to the printer is steady, and meets printer specifications. (See Electrical specifications on page 158.) on. This could take up to 10 seconds. Then, release . Press to scroll through the available languages. Press to save the appropriate language as the new default. Step 2: Can you print a configuration page? (See Using printer information pages on page 80.) YES Go to step 3. NO ENWW Troubleshooting flowchart 95
-
 1
1 -
2
-
3
-
4
-
5
-
6
-
7
-
8
-
9
-
10
-
11
-
12
-
13
-
14
-
15
-
16
-
17
-
18
-
19
-
20
-
21
-
22
-
23
-
24
-
25
-
26
-
27
-
28
-
29
-
30
-
31
-
32
-
33
-
34
-
35
-
36
-
37
-
38
-
39
-
40
-
41
-
42
-
43
-
44
-
45
-
46
-
47
-
48
-
49
-
50
-
51
-
52
-
53
-
54
-
55
-
56
-
57
-
58
-
59
-
60
-
61
-
62
-
63
-
64
-
65
-
66
-
67
-
68
-
69
-
70
-
71
-
72
-
73
-
74
-
75
-
76
-
77
-
78
-
79
-
80
-
81
-
82
-
83
-
84
-
85
-
86
-
87
-
88
-
89
-
90
-
91
-
92
-
93
-
94
-
95
-
96
-
97
-
98
-
99
-
100
-
101
-
 102
102 -
 103
103 -
 104
104 -
 105
105 -
 106
106 -
 107
107 -
 108
108 -
 109
109 -
 110
110 -
 111
111 -
 112
112 -
113
-
114
-
115
-
116
-
117
-
118
-
119
-
120
-
121
-
122
-
123
-
124
-
125
-
126
-
127
-
128
-
129
-
130
-
131
-
132
-
133
-
134
-
135
-
136
-
137
-
138
-
139
-
140
-
141
-
142
-
143
-
144
-
145
-
146
-
147
-
148
-
149
-
150
-
151
-
152
-
153
-
154
-
155
-
156
-
157
-
158
-
159
-
160
-
161
-
162
-
163
-
164
-
165
-
166
-
167
-
168
-
169
-
170
-
171
-
172
-
173
-
174
-
175
-
176
-
177
-
178
-
179
-
180
-
181
-
182
-
183
-
184
-
185
-
186
-
187
-
188
-
189
-
190
-
191
-
192
-
193
-
194
-
195
-
196
-
197
-
198
-
199
-
200
-
201
-
202
-
203
-
204
-
205
-
206
-
207
-
208
-
209
-
210
-
211
-
212
 |
 |
