HP 6120XG HP ProCurve Series 6120 Blade Switches Advanced Traffic Management G - Page 25
Need Only a Quick Start?, IP Addressing
 |
View all HP 6120XG manuals
Add to My Manuals
Save this manual to your list of manuals |
Page 25 highlights
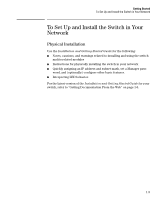
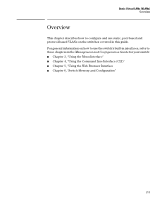
Getting Started Need Only a Quick Start? The Help Button Figure 1-5. Button for Onboard Administrator Interface Online Help Need Only a Quick Start? IP Addressing If you just want to give the switch an IP address so that it can communicate on your network, or if you are not using VLANs, ProCurve recommends that you use the Switch Setup screen to quickly configure IP addressing. To do so, do one of the following: ■ Enter setup at the CLI Manager level prompt. Procurve# setup ■ In the Main Menu of the Menu interface, select 8. Run Setup For more on using the Switch Setup screen, see the Installation and Getting Started Guide you received with the switch. 1-8
-
 1
1 -
2
-
3
-
4
-
5
-
6
-
7
-
8
-
9
-
10
-
11
-
12
-
13
-
14
-
15
-
16
-
17
-
18
-
19
-
 20
20 -
 21
21 -
 22
22 -
 23
23 -
 24
24 -
 25
25 -
 26
26 -
 27
27 -
 28
28 -
 29
29 -
 30
30 -
31
-
32
-
33
-
34
-
35
-
36
-
37
-
38
-
39
-
40
-
41
-
42
-
43
-
44
-
45
-
46
-
47
-
48
-
49
-
50
-
51
-
52
-
53
-
54
-
55
-
56
-
57
-
58
-
59
-
60
-
61
-
62
-
63
-
64
-
65
-
66
-
67
-
68
-
69
-
70
-
71
-
72
-
73
-
74
-
75
-
76
-
77
-
78
-
79
-
80
-
81
-
82
-
83
-
84
-
85
-
86
-
87
-
88
-
89
-
90
-
91
-
92
-
93
-
94
-
95
-
96
-
97
-
98
-
99
-
100
-
101
-
102
-
103
-
104
-
105
-
106
-
107
-
108
-
109
-
110
-
111
-
112
-
113
-
114
-
115
-
116
-
117
-
118
-
119
-
120
-
121
-
122
-
123
-
124
-
125
-
126
-
127
-
128
-
129
-
130
-
131
-
132
-
133
-
134
-
135
-
136
-
137
-
138
-
139
-
140
-
141
-
142
-
143
-
144
-
145
-
146
-
147
-
148
-
149
-
150
-
151
-
152
-
153
-
154
-
155
-
156
-
157
-
158
-
159
-
160
-
161
-
162
-
163
-
164
-
165
-
166
-
167
-
168
-
169
-
170
-
171
-
172
-
173
-
174
-
175
-
176
-
177
-
178
-
179
-
180
-
181
-
182
-
183
-
184
-
185
-
186
-
187
-
188
-
189
-
190
-
191
-
192
-
193
-
194
-
195
-
196
-
197
-
198
-
199
-
200
-
201
-
202
-
203
-
204
-
205
-
206
-
207
-
208
-
209
-
210
-
211
-
212
-
213
-
214
-
215
-
216
-
217
-
218
-
219
-
220
-
221
-
222
-
223
-
224
-
225
-
226
-
227
-
228
-
229
-
230
-
231
-
232
-
233
-
234
-
235
-
236
-
237
-
238
-
239
-
240
-
241
-
242
-
243
-
244
-
245
-
246
-
247
-
248
-
249
-
250
-
251
-
252
-
253
-
254
-
255
-
256
-
257
-
258
-
259
-
260
-
261
-
262
-
263
-
264
-
265
-
266
-
267
-
268
-
269
-
270
-
271
-
272
-
273
-
274
-
275
-
276
-
277
-
278
-
279
-
280
-
281
-
282
-
283
-
284
-
285
-
286
-
287
-
288
 |
 |

1-8
Getting Started
Need Only a Quick Start?
Figure 1-5.
Button for Onboard Administrator Interface Online Help
Need Only a Quick Start?
IP Addressing
If you just want to give the switch an IP address so that it can communicate
on your network, or if you are not using VLANs, ProCurve recommends that
you use the Switch Setup screen to quickly configure IP addressing. To do so,
do one of the following:
■
Enter
setup
at the CLI Manager level prompt.
Procurve# setup
■
In the Main Menu of the Menu interface, select
8. Run Setup
For more on using the Switch Setup screen, see the
Installation and Getting
Started Guide
you received with the switch.
The Help Button