HP Deskjet 6940 User Guide - Windows 2000 - Page 112
Image is printed at an angle, Ink smears, Advanced, Document Options, Printer Features, Dry Time
 |
UPC - 882780263406
View all HP Deskjet 6940 manuals
Add to My Manuals
Save this manual to your list of manuals |
Page 112 highlights
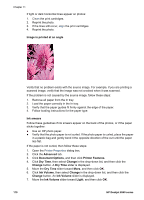
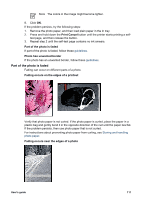
Chapter 11 If light or dark horizontal lines appear on photos: 1. Clean the print cartridges. 2. Reprint the photo. 3. If the lines still occur, align the print cartridges. 4. Reprint the photo. Image is printed at an angle Verify that no problem exists with the source image. For example, if you are printing a scanned image, verify that the image was not crooked when it was scanned. If the problem is not caused by the source image, follow these steps: 1. Remove all paper from the In tray. 2. Load the paper correctly in the In tray. 3. Verify that the paper guides fit firmly against the edge of the paper. 4. Follow loading instructions for the paper type. Ink smears Follow these guidelines if ink smears appear on the back of the photos, or if the paper sticks together: ● Use an HP photo paper. ● Verify that the photo paper is not curled. If the photo paper is curled, place the paper in a plastic bag and gently bend it the opposite direction of the curl until the paper lies flat. If the paper is not curled, then follow these steps: 1. Open the Printer Properties dialog box. 2. Click the Advanced tab. 3. Click Document Options, and then click Printer Features. 4. Click Dry Time, then select Change in the drop-down list, and then click the Change button. A Dry Time slider is displayed. 5. Move the Dry Time slider toward More, and then click OK. 6. Click Ink Volume, then select Change in the drop-down list, and then click the Change button. An Ink Volume slider is displayed. 7. Move the Ink Volume slider toward Light, and then click OK. 110 HP Deskjet 6940 series
-
 1
1 -
2
-
3
-
4
-
5
-
6
-
7
-
8
-
9
-
10
-
11
-
12
-
13
-
14
-
15
-
16
-
17
-
18
-
19
-
20
-
21
-
22
-
23
-
24
-
25
-
26
-
27
-
28
-
29
-
30
-
31
-
32
-
33
-
34
-
35
-
36
-
37
-
38
-
39
-
40
-
41
-
42
-
43
-
44
-
45
-
46
-
47
-
48
-
49
-
50
-
51
-
52
-
53
-
54
-
55
-
56
-
57
-
58
-
59
-
60
-
61
-
62
-
63
-
64
-
65
-
66
-
67
-
68
-
69
-
70
-
71
-
72
-
73
-
74
-
75
-
76
-
77
-
78
-
79
-
80
-
81
-
82
-
83
-
84
-
85
-
86
-
87
-
88
-
89
-
90
-
91
-
92
-
93
-
94
-
95
-
96
-
97
-
98
-
99
-
100
-
101
-
102
-
103
-
104
-
105
-
106
-
 107
107 -
 108
108 -
 109
109 -
 110
110 -
 111
111 -
 112
112 -
 113
113 -
 114
114 -
 115
115 -
 116
116 -
 117
117 -
118
-
119
-
120
-
121
-
122
-
123
-
124
-
125
-
126
-
127
-
128
-
129
-
130
-
131
-
132
-
133
-
134
-
135
-
136
-
137
-
138
-
139
-
140
-
141
-
142
-
143
-
144
-
145
-
146
-
147
-
148
 |
 |