HP LH4r HP Netserver LH 3000 Installation Guide - Page 33
Power-Up and Power-Down Procedures
 |
View all HP LH4r manuals
Add to My Manuals
Save this manual to your list of manuals |
Page 33 highlights
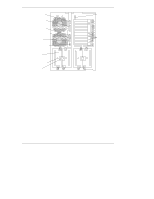
Chapter 2 Controls, Ports, and Indicators NOTE Each 16-amp PDU can accommodate a maximum of two NetServers. When the proper power supply is available, connect the NetServer to the AC power source. Power-On Tests The HP NetServer runs a set of diagnostic tests when it is first connected to a power source. If the LH 3000r passes the tests, you will see: HP NetServer LH 3000r If the HP NetServer does not pass the tests, you will see: Display now? Press Enter to view the error message. Refer to the HP NetServer Navigator CD-ROM to get an interpretation of the error code. Power-Up and Power-Down Procedures Power-Up Procedure 1. Ensure the HP NetServer's power cord is connected to a power source, and the LED on each power supply is flashing green. 2. Press the power switch when prompted by the operating system. CAUTION The power supplies continue to provide standby voltage to the NetServer until the power cord is disconnected. Power-Down Procedure Follow this procedure when installing non-hot-swap and non-hot-plug components, such as tape drives and non-hot-plug PCI boards. 1. Log off all users and back-up files. 25
-
 1
1 -
2
-
3
-
4
-
5
-
6
-
7
-
8
-
9
-
10
-
11
-
12
-
13
-
14
-
15
-
16
-
17
-
18
-
19
-
20
-
21
-
22
-
23
-
24
-
25
-
26
-
27
-
 28
28 -
 29
29 -
 30
30 -
 31
31 -
 32
32 -
 33
33 -
 34
34 -
 35
35 -
 36
36 -
 37
37 -
 38
38 -
39
-
40
-
41
-
42
-
43
-
44
-
45
-
46
-
47
-
48
-
49
-
50
-
51
-
52
-
53
-
54
-
55
-
56
-
57
-
58
-
59
-
60
-
61
-
62
-
63
-
64
-
65
-
66
-
67
-
68
-
69
-
70
-
71
-
72
-
73
-
74
-
75
-
76
-
77
-
78
-
79
-
80
-
81
-
82
-
83
-
84
-
85
-
86
-
87
-
88
-
89
-
90
-
91
-
92
-
93
-
94
-
95
-
96
-
97
-
98
-
99
-
100
-
101
-
102
-
103
-
104
-
105
-
106
-
107
-
108
-
109
-
110
-
111
-
112
-
113
-
114
-
115
-
116
-
117
-
118
-
119
-
120
-
121
-
122
-
123
-
124
-
125
-
126
-
127
-
128
-
129
-
130
-
131
-
132
-
133
-
134
-
135
-
136
-
137
-
138
-
139
-
140
-
141
-
142
-
143
-
144
-
145
-
146
-
147
-
148
-
149
-
150
-
151
-
152
-
153
-
154
-
155
-
156
-
157
-
158
-
159
-
160
-
161
-
162
-
163
-
164
-
165
-
166
-
167
-
168
-
169
-
170
-
171
-
172
-
173
-
174
-
175
-
176
-
177
-
178
-
179
-
180
-
181
-
182
 |
 |
