HP SW TL881 DLT Mini-Lib/1 Compaq TL881 MiniLibrary System Users Guide (May 19 - Page 132
Cleaning Cartridge, Installing a Cleaning Cartridge
 |
View all HP SW TL881 DLT Mini-Lib/1 manuals
Add to My Manuals
Save this manual to your list of manuals |
Page 132 highlights
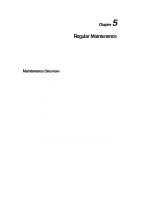
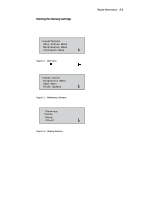
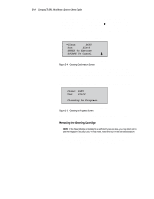
5-2 Compaq TL881 Minilibrary System Users Guide A diagnostic diskette (Windows NT, Windows 95 Operating Systems) which allows for firmware updates, is included in the Accessories Kit. This chapter tells you how to clean the drives. The Diagnostic Menu and the Demo Menu are described in Chapter 6, Diagnostics and Troubleshooting. Cleaning Cartridge The cleaning cartridge is similar in appearance to the data cartridge, but is yellow. The command to run the cartridge is issued from the control panel. The procedures that follow tell you how to install a cleaning a cartridge, how to clean a drive, and how to remove the cleaning cartridge. CAUTION: The cleaning cartridge is abrasive, and should not be used unless the Use Cleaner LED comes on. To determine which drive requires cleaning on two-drive models, unload both drives and select 'Cleaning Needed' on the Drive Status Submenu of the Show Status Menu. Installing a Cleaning Cartridge 1. Examine the Default Screen on the Control Panel to determine whether any cartridges are loaded into the drives. If so, then unload each as described in Chapter 2, Operation. 2. Using the key provided (if necessary), unlock the Magazine Security Lock on the front panel. 3. Press the Unlock/Open Button on the front panel. 4. Remove the magazine from the Base Module. 5. Remove any cartridge present in Slot 0 (the slot farthest from the handle). 6. Insert the cleaning cartridge into Slot 0. You can use any slot, but using Slot 0 saves some keystrokes. 7. Press the Unlock/Open button on the front panel. 8. Insert the magazine into the Base Module.
-
 1
1 -
2
-
3
-
4
-
5
-
6
-
7
-
8
-
9
-
10
-
11
-
12
-
13
-
14
-
15
-
16
-
17
-
18
-
19
-
20
-
21
-
22
-
23
-
24
-
25
-
26
-
27
-
28
-
29
-
30
-
31
-
32
-
33
-
34
-
35
-
36
-
37
-
38
-
39
-
40
-
41
-
42
-
43
-
44
-
45
-
46
-
47
-
48
-
49
-
50
-
51
-
52
-
53
-
54
-
55
-
56
-
57
-
58
-
59
-
60
-
61
-
62
-
63
-
64
-
65
-
66
-
67
-
68
-
69
-
70
-
71
-
72
-
73
-
74
-
75
-
76
-
77
-
78
-
79
-
80
-
81
-
82
-
83
-
84
-
85
-
86
-
87
-
88
-
89
-
90
-
91
-
92
-
93
-
94
-
95
-
96
-
97
-
98
-
99
-
100
-
101
-
102
-
103
-
104
-
105
-
106
-
107
-
108
-
109
-
110
-
111
-
112
-
113
-
114
-
115
-
116
-
117
-
118
-
119
-
120
-
121
-
122
-
123
-
124
-
125
-
126
-
 127
127 -
 128
128 -
 129
129 -
 130
130 -
 131
131 -
 132
132 -
 133
133 -
 134
134 -
 135
135 -
 136
136 -
 137
137 -
138
-
139
-
140
-
141
-
142
-
143
-
144
-
145
-
146
-
147
-
148
-
149
-
150
-
151
-
152
-
153
-
154
-
155
-
156
-
157
-
158
-
159
-
160
-
161
-
162
-
163
-
164
-
165
-
166
-
167
-
168
-
169
-
170
-
171
-
172
-
173
-
174
-
175
-
176
-
177
-
178
-
179
-
180
-
181
-
182
-
183
-
184
-
185
-
186
-
187
-
188
-
189
-
190
-
191
-
192
-
193
-
194
-
195
-
196
-
197
-
198
-
199
-
200
 |
 |