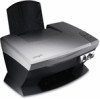
Lexmark Photo P3150 User's Guide for Windows - Page 13
Make sure you select the appropriate paper size for your, paper support. - printer
 |
View all Lexmark Photo P3150 manuals
Add to My Manuals
Save this manual to your list of manuals |
Page 13 highlights
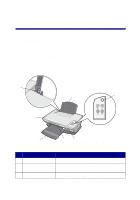
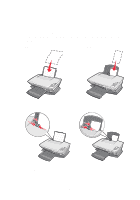
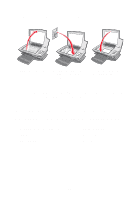
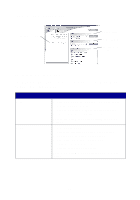
Before you begin printing, scanning, copying, or faxing documents, see page 6 to determine how much the paper exit tray can hold. Follow these guidelines when loading plain and specialty paper in the paper support. Load up to Make sure 100 sheets of plain paper The paper is designed for use with inkjet printers. 10 envelopes • The envelopes are loaded vertically against the right side of the paper support. • The stamp location is in the upper left corner. • The envelopes are designed for use with inkjet printers. • You squeeze and slide the paper guide to the left edge of the envelope. Note: Do not load envelopes with: • Holes, perforations, cutouts, or deep embossing. • Metal clasps, string ties, or metal folding bars. • Exposed flap adhesive. 25 sheets of card stock • The card stock is designed for use with inkjet printers. • The thickness does not exceed 0.025 inches. 10 greeting cards, index • The cards are loaded vertically against the right cards, postcards, or side of the paper support. photo cards • Adjust the paper guide (see page 8). 100 sheets of coated paper The coated side faces you. Note: Since photos require more drying time, we recommend that you remove each photo as it exits and allow it to dry to avoid ink smearing. 50 sheets of photo, or glossy paper The glossy or coated side faces you. Note: Since photos require more drying time, we recommend that you remove each photo as it exits and allow it to dry to avoid ink smearing. Note: Make sure you select the appropriate paper size for your document. 9
-
 1
1 -
2
-
3
-
4
-
5
-
6
-
7
-
 8
8 -
 9
9 -
 10
10 -
 11
11 -
 12
12 -
 13
13 -
 14
14 -
 15
15 -
 16
16 -
 17
17 -
 18
18 -
19
-
20
-
21
-
22
-
23
-
24
-
25
-
26
-
27
-
28
-
29
-
30
-
31
-
32
-
33
-
34
-
35
-
36
-
37
-
38
-
39
-
40
-
41
-
42
-
43
-
44
-
45
-
46
-
47
-
48
-
49
-
50
-
51
-
52
-
53
-
54
-
55
-
56
-
57
-
58
-
59
-
60
-
61
-
62
-
63
-
64
-
65
 |
 |
