Lexmark Photo P3150 User's Guide for Windows - Page 46
If the print quality has not improved, try cleaning the print cartridge, Print your document again.
 |
View all Lexmark Photo P3150 manuals
Add to My Manuals
Save this manual to your list of manuals |
Page 46 highlights
3 Hold the damp cloth against the gold nozzle area for about three seconds. Gently blot and wipe dry in one direction (this prevents the colors in the color cartridge from mixing). Nozzles 4 Hold a clean, damp section of cloth against the contacts for about three seconds. Gently blot and wipe dry in one direction. Contacts 5 Allow the nozzles and contacts to dry completely. 6 Reinstall the print cartridges. 7 Align the print cartridges (see page 40). 8 Print your document again. If the print quality has not improved, try cleaning the print cartridge nozzles up to two more times. If print quality is still unsatisfactory, replace your print cartridges (see page 38). 42
-
 1
1 -
2
-
3
-
4
-
5
-
6
-
7
-
8
-
9
-
10
-
11
-
12
-
13
-
14
-
15
-
16
-
17
-
18
-
19
-
20
-
21
-
22
-
23
-
24
-
25
-
26
-
27
-
28
-
29
-
30
-
31
-
32
-
33
-
34
-
35
-
36
-
37
-
38
-
39
-
40
-
 41
41 -
 42
42 -
 43
43 -
 44
44 -
 45
45 -
 46
46 -
 47
47 -
 48
48 -
 49
49 -
 50
50 -
 51
51 -
52
-
53
-
54
-
55
-
56
-
57
-
58
-
59
-
60
-
61
-
62
-
63
-
64
-
65
 |
 |

42
3
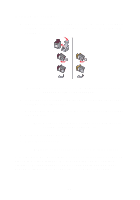
Hold the damp cloth against the gold nozzle area for about three
seconds. Gently blot and wipe dry in one direction (this prevents the
colors in the color cartridge from mixing).
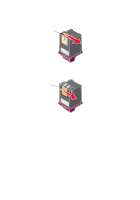
4
Hold a clean, damp section of cloth against the contacts for about
three seconds. Gently blot and wipe dry in one direction.
5
Allow the nozzles and contacts to dry completely.
6
Reinstall the print cartridges.
7
Align the print cartridges (see page 40).
8
Print your document again.
If the print quality has not improved, try cleaning the print cartridge
nozzles up to two more times.
If print quality is still unsatisfactory, replace your print cartridges
(see page 38).
Nozzles
Contacts