Lexmark Photo P3150 User's Guide for Windows - Page 9
Learning about the All-In-One, Setting up the All-In-One, Understanding the parts of the All-In-One
 |
View all Lexmark Photo P3150 manuals
Add to My Manuals
Save this manual to your list of manuals |
Page 9 highlights
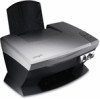
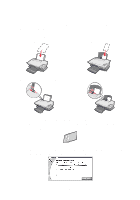
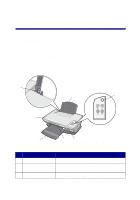
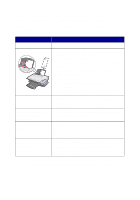
Learning about the All-In-One Setting up the All-In-One If you have not already done so, follow the steps on the setup documentation to complete the hardware and software installation. If problems occur during the setup process, see "Setup troubleshooting" on page 46. Understanding the parts of the All-In-One 7 1 2 6 5 4 3 (available on some models) # Use the 1 Paper support 2 Control panel 3 Memory card slots To Load paper into the All-In-One (AIO). Operate the AIO (see page 7 for details about each of the buttons). Insert digital camera memory cards. 5
-
 1
1 -
2
-
3
-
 4
4 -
 5
5 -
 6
6 -
 7
7 -
 8
8 -
 9
9 -
 10
10 -
 11
11 -
 12
12 -
 13
13 -
 14
14 -
15
-
16
-
17
-
18
-
19
-
20
-
21
-
22
-
23
-
24
-
25
-
26
-
27
-
28
-
29
-
30
-
31
-
32
-
33
-
34
-
35
-
36
-
37
-
38
-
39
-
40
-
41
-
42
-
43
-
44
-
45
-
46
-
47
-
48
-
49
-
50
-
51
-
52
-
53
-
54
-
55
-
56
-
57
-
58
-
59
-
60
-
61
-
62
-
63
-
64
-
65
 |
 |

5
Learning about the All-In-One
Setting up the All-In-One
If you have not already done so, follow the steps on the setup
documentation to complete the hardware and software installation. If
problems occur during the setup process, see “Setup troubleshooting” on
page 46.
Understanding the parts of the All-In-One
#
Use the
To
1
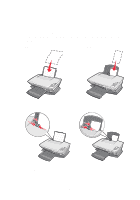
Paper support
Load paper into the All-In-One (AIO).
2
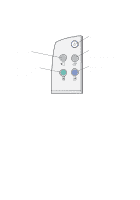
Control panel
Operate the AIO (see page 7 for details about
each of the buttons).
3
Memory card slots
Insert digital camera memory cards.
1
6
4
7
3 (available on some models)
5
2