Lexmark X500n Service Manual - Page 36
Serial number, Tools required for service, Tweezers, C-ring pliers
 |
View all Lexmark X500n manuals
Add to My Manuals
Save this manual to your list of manuals |
Page 36 highlights
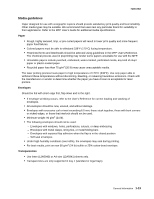
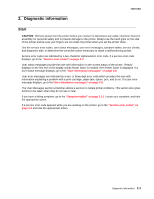
7100-XXX Serial number Look for serial number information on the right cover and the inside of the front cover of your MFP. Tools required for service The removal and adjustment procedures described in this manual require the following tools and equipment: • Analog volt ohmmeter (A digital volt ohmmeter may also be used.) • Flat-blade screwdrivers • Needle-nose pliers • #1 Phillips screwdriver • #2 Phillips screwdriver • Slotted screwdriver #1 • Slotted clock screwdriver #1 • Tweezers, C-ring pliers When you make voltage readings, always use frame ground unless another ground is specified. 1-16 Service Manual
-
 1
1 -
2
-
3
-
4
-
5
-
6
-
7
-
8
-
9
-
10
-
11
-
12
-
13
-
14
-
15
-
16
-
17
-
18
-
19
-
20
-
21
-
22
-
23
-
24
-
25
-
26
-
27
-
28
-
29
-
30
-
 31
31 -
 32
32 -
 33
33 -
 34
34 -
 35
35 -
 36
36 -
 37
37 -
 38
38 -
 39
39 -
 40
40 -
 41
41 -
42
-
43
-
44
-
45
-
46
-
47
-
48
-
49
-
50
-
51
-
52
-
53
-
54
-
55
-
56
-
57
-
58
-
59
-
60
-
61
-
62
-
63
-
64
-
65
-
66
-
67
-
68
-
69
-
70
-
71
-
72
-
73
-
74
-
75
-
76
-
77
-
78
-
79
-
80
-
81
-
82
-
83
-
84
-
85
-
86
-
87
-
88
-
89
-
90
-
91
-
92
-
93
-
94
-
95
-
96
-
97
-
98
-
99
-
100
-
101
-
102
-
103
-
104
-
105
-
106
-
107
-
108
-
109
-
110
-
111
-
112
-
113
-
114
-
115
-
116
-
117
-
118
-
119
-
120
-
121
-
122
-
123
-
124
-
125
-
126
-
127
-
128
-
129
-
130
-
131
-
132
-
133
-
134
-
135
-
136
-
137
-
138
-
139
-
140
-
141
-
142
-
143
-
144
-
145
-
146
-
147
-
148
-
149
-
150
-
151
-
152
-
153
-
154
-
155
-
156
-
157
-
158
-
159
-
160
-
161
-
162
-
163
-
164
-
165
-
166
-
167
-
168
-
169
-
170
-
171
-
172
-
173
-
174
-
175
-
176
-
177
-
178
-
179
-
180
-
181
-
182
-
183
-
184
-
185
-
186
-
187
-
188
-
189
-
190
-
191
-
192
-
193
-
194
-
195
-
196
-
197
-
198
-
199
-
200
-
201
-
202
-
203
-
204
-
205
-
206
-
207
-
208
-
209
-
210
-
211
-
212
-
213
-
214
-
215
-
216
-
217
-
218
-
219
-
220
-
221
-
222
-
223
-
224
-
225
-
226
-
227
-
228
-
229
-
230
-
231
-
232
-
233
-
234
-
235
-
236
-
237
-
238
-
239
-
240
-
241
-
242
-
243
-
244
 |
 |

1-16
Service Manual
7100-XXX
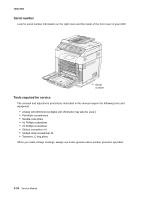
Serial number
Look for serial number information on the right cover and the inside of the front cover of your MFP.
Tools required for service
The removal and adjustment procedures described in this manual require the following tools and
equipment:
•
Analog volt ohmmeter (A digital volt ohmmeter may also be used.)
•
Flat-blade screwdrivers
•
Needle-nose pliers
•
#1 Phillips screwdriver
•
#2 Phillips screwdriver
•
Slotted screwdriver #1
•
Slotted clock screwdriver #1
•
Tweezers, C-ring pliers
When you make voltage readings, always use frame ground unless another ground is specified.