Philips DVDR3455H User manual - Page 24
Step 3: Installation and Setup
 |
UPC - 609585112773
View all Philips DVDR3455H manuals
Add to My Manuals
Save this manual to your list of manuals |
Page 24 highlights
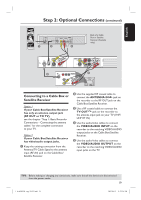
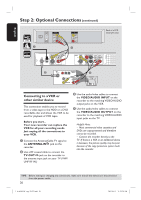
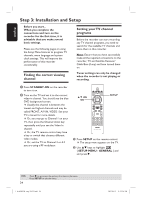
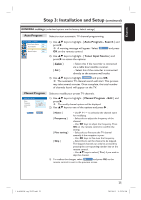
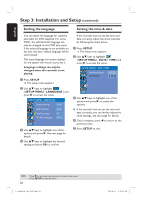
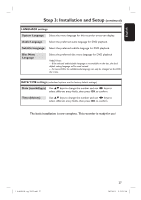
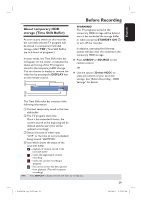
English Step 3: Installation and Setup Before you start... When you complete the connections and turn on the recorder for the first time, it is advisable that you make several basic settings. Please see the following pages on using the Setup Menu features to program TV channels, menu language and system clock settings. This will improve the performance of this recorder considerably. Finding the correct viewing channel Setting your TV channel programs Before the recorder can start recording any TV channel programs, you need to search for the available TV channels and store them in this recorder. Note: Ensure that you have successfully made all the required connections to the recorder, TV and Satellite Receiver/ Cable Box (if any) and have turned them on. Tuner settings can only be changed when the recorder is not playing or recording. A Press STANDBY-ON on the recorder to turn it on. B Turn on the TV and set it to the correct video-in channel. You should see the blue DVD background screen. Usually this channel is between the lowest and highest channels and may be called FRONT, A/V IN, VIDEO. See your TV's manual for more details. Or, you may go to Channel 1 on your TV, then press the Channel down key repeatedly until you see the Video In channel. Or, the TV remote control may have a key or switch that chooses different video modes. Or, set the TV to Channel 3 or 4 if you are using a RF modulator. SETUP OK CH A Press SETUP on the remote control. The setup menu appears on the TV. B Use ST keys to highlight { SETUP MENU - GENERAL } and and press X. TIPS: 24 Press X to go access the options of an item in the menu. Press SETUP to exit the menu. 1_dvdr3455H_eng_21832.indd 24 2007-06-11 11:23:24 AM
-
 1
1 -
2
-
3
-
4
-
5
-
6
-
7
-
8
-
9
-
10
-
11
-
12
-
13
-
14
-
15
-
16
-
17
-
18
-
 19
19 -
 20
20 -
 21
21 -
 22
22 -
 23
23 -
 24
24 -
 25
25 -
 26
26 -
 27
27 -
 28
28 -
 29
29 -
30
-
31
-
32
-
33
-
34
-
35
-
36
-
37
-
38
-
39
-
40
-
41
-
42
-
43
-
44
-
45
-
46
-
47
-
48
-
49
-
50
-
51
-
52
-
53
-
54
-
55
-
56
-
57
-
58
-
59
-
60
-
61
-
62
-
63
-
64
-
65
-
66
-
67
-
68
-
69
-
70
-
71
-
72
-
73
-
74
-
75
-
76
-
77
-
78
-
79
-
80
-
81
-
82
-
83
 |
 |