Philips DVDR3455H User manual - Page 41
YesDVD, setup and software, registration
 |
UPC - 609585112773
View all Philips DVDR3455H manuals
Add to My Manuals
Save this manual to your list of manuals |
Page 41 highlights
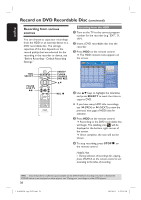
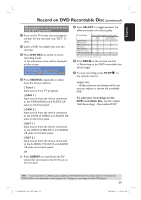
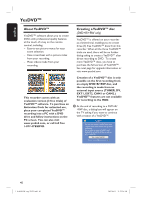
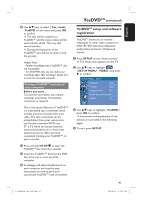
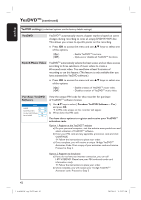
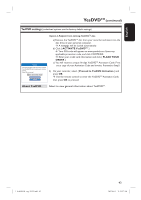
English YesDVDTM (continued) B Use ST keys to select { Yes, create YesDVD } in the menu and press OK to confirm. The disc will be created as a YesDVD™ and the music videos will be automatically added. This may take several minutes. During the finalization of the YesDVD™ you will not be able to stop the process. Helpful Hints: - Further recordings onto a YesDVD™ disc are not possible. - For DVD+RW only, you can make your recordings again after selecting { Delete all } to erase the recorded materials. Printing a YesDVDTM customized case coversheet Before you start... To print the coversheet, you require computer and printer. No Internet connection is required. YesDVDTM setup and software registration YesDVDTM allows you to transfer videotapes or other video content to a DVD+R/+RW with the professional quality features found in Hollywood movies. A Press SETUP on the remote control. The setup menu appears on the TV. B Use ST keys to highlight { SETUP MENU - VIDEO } and press X to confirm. SETUP MENU - VIDEO TV System NTSC TV Shape 4:3 LB Progressive Scan Off DivX(R) Video on Demand OK YesDVD Set One of the special features of YesDVD™ is a customized case coversheet which includes pictures of scenes from your video. The case coversheet can be printed direct from your own printer, and fits into a standard DVD case [7" x 5"] which can be purchased at www.store.yesdvd.com or from most electronics stores. After you have completed creating your YesDVD™ on your recorder: A Press and hold STOPÇ to eject the YesDVD™ disc from the recorder. B Insert the YesDVD™ disc into the DVD disc drive tray on your personal computer. C A webpage will automatically launch on your computer with step-by-step instructions on how to print your customized YesDVD™ case coversheet. C Use ST keys to highlight { YesDVD } press OK to confirm. Instructions and explanation of the options are provided in the following pages. D To exit, press SETUP. 41 1_dvdr3455H_eng_21832.indd 41 2007-06-11 11:23:27 AM
-
 1
1 -
2
-
3
-
4
-
5
-
6
-
7
-
8
-
9
-
10
-
11
-
12
-
13
-
14
-
15
-
16
-
17
-
18
-
19
-
20
-
21
-
22
-
23
-
24
-
25
-
26
-
27
-
28
-
29
-
30
-
31
-
32
-
33
-
34
-
35
-
 36
36 -
 37
37 -
 38
38 -
 39
39 -
 40
40 -
 41
41 -
 42
42 -
 43
43 -
 44
44 -
 45
45 -
 46
46 -
47
-
48
-
49
-
50
-
51
-
52
-
53
-
54
-
55
-
56
-
57
-
58
-
59
-
60
-
61
-
62
-
63
-
64
-
65
-
66
-
67
-
68
-
69
-
70
-
71
-
72
-
73
-
74
-
75
-
76
-
77
-
78
-
79
-
80
-
81
-
82
-
83
 |
 |