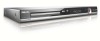
Philips DVDR3455H User manual - Page 39
DVD REC, SOURCE, Tuner, CAM 1, CAM 2, EXT 1, EXT 2, USB/DV, SELECT, To edit your recordings on the, - 160gb dvd recorder parts
 |
UPC - 609585112773
View all Philips DVDR3455H manuals
Add to My Manuals
Save this manual to your list of manuals |
Page 39 highlights
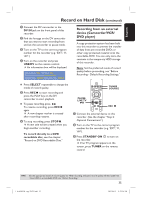
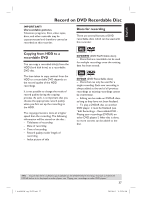
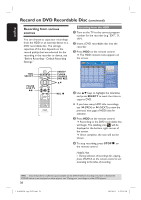
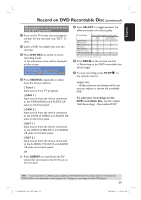
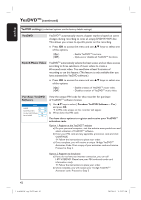
English Record on DVD Recordable Disc (continued) Recording from an external device/ VCR/ DV Camcorder A Turn on the TV to the correct program number for the recorder (e.g. 'EXT', '0', 'AV'). B Insert a DVD recordable disc into the recorder. C Press DVD REC to switch to direct recording mode. An information box will be displayed on the screen. System State: Stop Record to Optical Disc As Standard Play Elapsed Time: 00:00:00 Remaining Time: 02:00:00 D Press SOURCE repeatedly to select from the various options: { Tuner } Input source from TV programs. { CAM 1 } Input source from the device connected to the CAM1(VIDEO) and AUDIO L/R jacks on the front panel. { CAM 2 } Input source from the device connected to the CAM2 (S-VIDEO) and AUDIO L/R jacks on the front panel. { EXT 1 } Input source from the device connected to the VIDEO (CVBS) EXT1 and AUDIO L/R jacks on the back panel. { EXT 2 } Input source from the device connected to the S-VIDEO (Y/C) EXT2 and AUDIO L/R jacks on the back panel. OR Press USB/DV to record from the DV camcorder connected to the DV IN jack on the front panel. E Press SELECT to toggle between the different modes of record quality. Record Quality Hours of Recording that can be stored HQ High Quality HDD 160GB 34 DVD±R/±RW 4.7GB recordable disc 1 SP Standard Play 68 2 SPP Standard Play Plus 85 2.5 LP Long Play 102 3 EP Extended Play 136 4 SLP Super Long Play 200 6 SEP Super Extended Play 250 8 Values are estimates only. Parts of the HDD storage capacity will be reserved for the operations of this recorder and time shifting. F Press RECâon the remote control. Recording to the DVD recordable disc will be begin. G To stop recording, press STOPÇ on the remote control. Helpful Hint: - All title selections and settings will be lost once you replace or remove the recordable DVD. To edit your recordings on the DVD recordable disc, see the chapter "Edit Recordings - Recordable DVD." TIPS: Ensure that there is sufficient space available on the DVD±R before recording. You have to finalize the DVD±R before it can be played on other players, see "Playing your recordings on other DVD players." 39 1_dvdr3455H_eng_21832.indd 39 2007-06-11 11:23:26 AM
-
 1
1 -
2
-
3
-
4
-
5
-
6
-
7
-
8
-
9
-
10
-
11
-
12
-
13
-
14
-
15
-
16
-
17
-
18
-
19
-
20
-
21
-
22
-
23
-
24
-
25
-
26
-
27
-
28
-
29
-
30
-
31
-
32
-
33
-
 34
34 -
 35
35 -
 36
36 -
 37
37 -
 38
38 -
 39
39 -
 40
40 -
 41
41 -
 42
42 -
 43
43 -
 44
44 -
45
-
46
-
47
-
48
-
49
-
50
-
51
-
52
-
53
-
54
-
55
-
56
-
57
-
58
-
59
-
60
-
61
-
62
-
63
-
64
-
65
-
66
-
67
-
68
-
69
-
70
-
71
-
72
-
73
-
74
-
75
-
76
-
77
-
78
-
79
-
80
-
81
-
82
-
83
 |
 |
