Ricoh AP3800C Maintenance Guide - Page 23
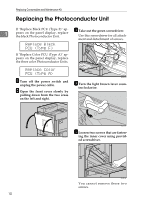
Tighten two screws using provid, Lower the inner cover slowly. - photoconductor
 |
View all Ricoh AP3800C manuals
Add to My Manuals
Save this manual to your list of manuals |
Page 23 highlights
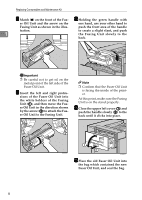
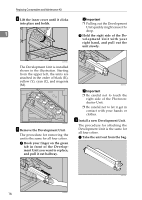
Replacing the Photoconductor Unit Important J Tighten two screws using provid- ❒ If you do not attach the green ed screwdriver. arrow of the Photoconductor Unit securely to the rail, you might damage the Photocon- 1 ductor Unit. ❒ Do not touch the light-sensitive area of the Photoconductor Unit. E Remove the cover and push in the Photoconductor Unit until it stops. ZDJH019J Note ❒ Be sure to return the provided screwdriver to its original position on the back of the front cover. K Turn the light brown lever clock- wise. ZDJX702E I Lower the inner cover slowly. ZDJH020E L Close the front cover slowly by pushing the two areas on the left ZDJH018J and right. ZDJH041J 13
-
 1
1 -
2
-
3
-
4
-
5
-
6
-
7
-
8
-
9
-
10
-
11
-
12
-
13
-
14
-
15
-
16
-
17
-
 18
18 -
 19
19 -
 20
20 -
 21
21 -
 22
22 -
 23
23 -
 24
24 -
 25
25 -
 26
26 -
 27
27 -
 28
28 -
29
-
30
-
31
-
32
-
33
-
34
-
35
-
36
-
37
-
38
-
39
-
40
-
41
-
42
-
43
-
44
-
45
-
46
-
47
-
48
-
49
-
50
-
51
-
52
-
53
-
54
-
55
-
56
-
57
-
58
-
59
-
60
-
61
-
62
-
63
-
64
-
65
-
66
-
67
-
68
-
69
-
70
-
71
-
72
-
73
-
74
-
75
-
76
-
77
-
78
-
79
-
80
-
81
-
82
-
83
-
84
-
85
-
86
-
87
-
88
-
89
-
90
-
91
-
92
-
93
-
94
-
95
-
96
-
97
-
98
-
99
-
100
-
101
-
102
-
103
-
104
-
105
-
106
-
107
-
108
-
109
-
110
-
111
-
112
-
113
-
114
-
115
-
116
-
117
-
118
-
119
-
120
-
121
-
122
-
123
-
124
 |
 |
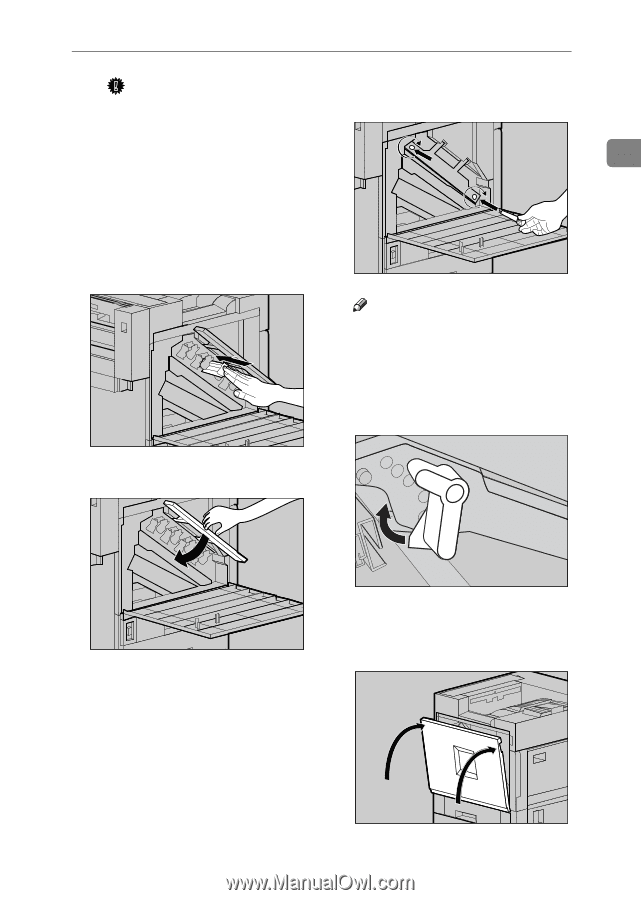
Replacing the Photoconductor Unit
13
1
Important
❒
If you do not attach the green
arrow of the Photoconductor
Unit securely to the rail, you
might damage the Photocon-
ductor Unit.
❒
Do not touch the light-sensi-
tive area of the Photoconduc-
tor Unit.
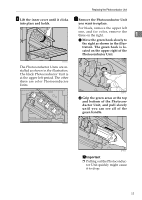
E
Remove the cover and push in
the Photoconductor Unit until
it stops.
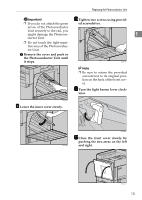
I
Lower the inner cover slowly.
J
Tighten two screws using provid-
ed screwdriver.
Note
❒
Be sure to return the provided
screwdriver to its original posi-
tion on the back of the front cov-
er.
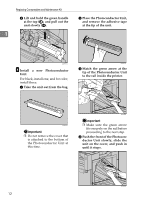
K
Turn the light brown lever clock-
wise.
L
Close the front cover slowly by
pushing the two areas on the left
and right.
ZDJX702E
ZDJH018J
ZDJH019J
ZDJH020E
ZDJH041J