Ricoh AP3800C Maintenance Guide - Page 26
Install a new Development Unit., Remove the Development Unit.
 |
View all Ricoh AP3800C manuals
Add to My Manuals
Save this manual to your list of manuals |
Page 26 highlights
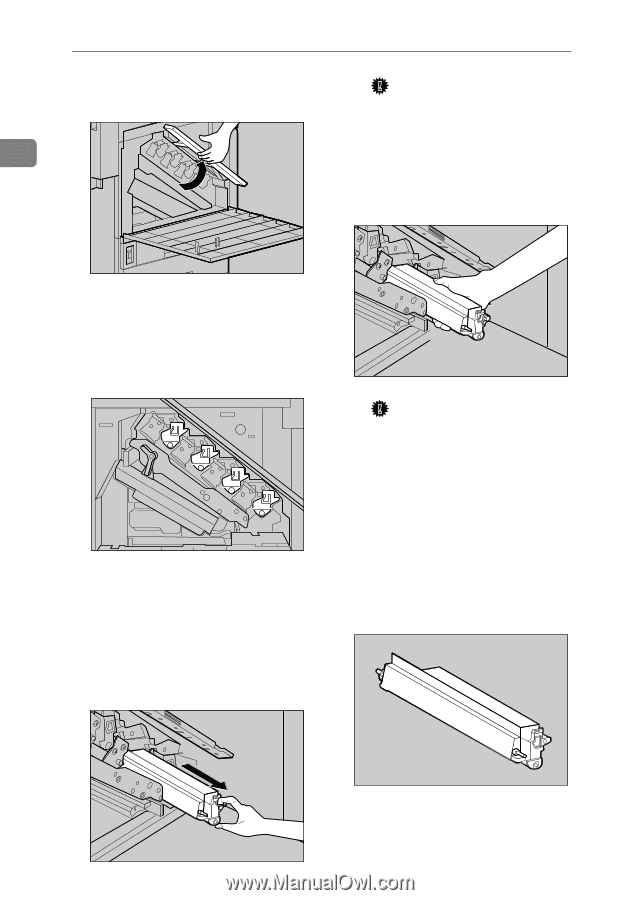
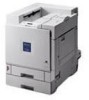
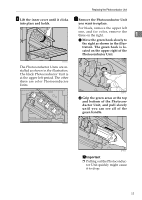
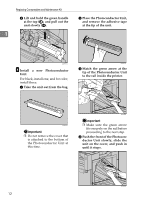
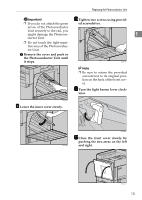
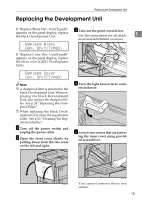
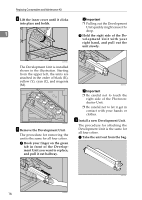
Replacing Consumables and Maintenance Kit F Lift the inner cover until it clicks into place and holds. 1 Important ❒ Pulling out the Development Unit quickly might cause it to drop. B Hold the right side of the Development Unit with your right hand, and pull out the unit slowly. ZDJH016J The Development Unit is installed shown in the illustration. Starting from the upper left, the units are attached in the order of black (K), yellow (Y), cyan (C), and magenta (M). ZDJH046J G Remove the Development Unit. The procedure for removing the unit is the same for all four colors. A Hook your finger on the green tab in front of the Development Unit you want to replace, and pull it out halfway. ZDJH993J Important ❒ Be careful not to touch the right side of the Photoconductor Unit. ❒ Be careful not to let it get in contact with your hands or clothes. H Install a new Development Unit. The procedure for attaching the Development Unit is the same for all four colors. A Take the unit out from the bag. 16 ZDJH225J ZDJH226J
-
 1
1 -
2
-
3
-
4
-
5
-
6
-
7
-
8
-
9
-
10
-
11
-
12
-
13
-
14
-
15
-
16
-
17
-
18
-
19
-
20
-
 21
21 -
 22
22 -
 23
23 -
 24
24 -
 25
25 -
 26
26 -
 27
27 -
 28
28 -
 29
29 -
 30
30 -
 31
31 -
32
-
33
-
34
-
35
-
36
-
37
-
38
-
39
-
40
-
41
-
42
-
43
-
44
-
45
-
46
-
47
-
48
-
49
-
50
-
51
-
52
-
53
-
54
-
55
-
56
-
57
-
58
-
59
-
60
-
61
-
62
-
63
-
64
-
65
-
66
-
67
-
68
-
69
-
70
-
71
-
72
-
73
-
74
-
75
-
76
-
77
-
78
-
79
-
80
-
81
-
82
-
83
-
84
-
85
-
86
-
87
-
88
-
89
-
90
-
91
-
92
-
93
-
94
-
95
-
96
-
97
-
98
-
99
-
100
-
101
-
102
-
103
-
104
-
105
-
106
-
107
-
108
-
109
-
110
-
111
-
112
-
113
-
114
-
115
-
116
-
117
-
118
-
119
-
120
-
121
-
122
-
123
-
124
 |
 |