Ricoh Aficio SP 1200SF User's Guide - Page 161
CAUTION, Clear/Back, f
 |
View all Ricoh Aficio SP 1200SF manuals
Add to My Manuals
Save this manual to your list of manuals |
Page 161 highlights
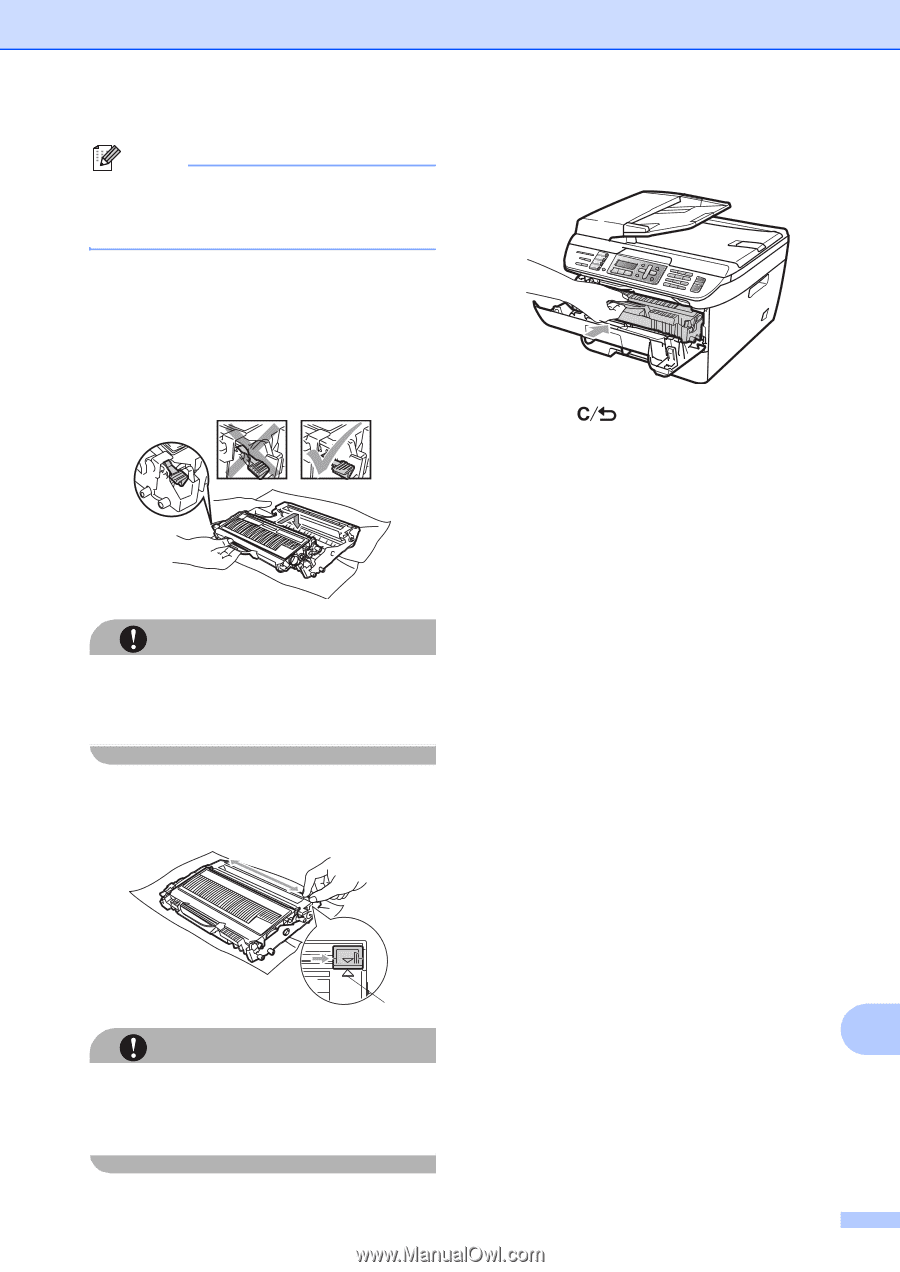
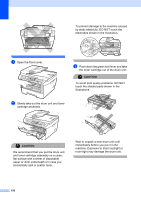
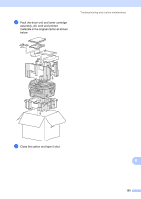
Note Be sure to seal up the used drum unit tightly in a bag so that toner powder does not spill out of the unit. d Unpack the new drum unit. e Put the toner cartridge firmly into the new drum unit until you hear it lock into place. If you put the cartridge in correctly, the green lock lever will lift automatically. Troubleshooting and routine maintenance g Put the new drum unit and toner cartridge assembly in the machine. h Press Clear/Back. To confirm you are installing a new drum, press 1. i When the LCD shows Accepted, close the front cover. CAUTION Make sure that you put in the toner cartridge correctly or it may separate from the drum unit. f Clean the corona wire of the drum unit by gently sliding the blue tab from right to left and left to right several times. 1 CAUTION Be sure to return the blue tab to the home position (a) (1). If you do not, printed pages may have a vertical stripe. B 151
-
 1
1 -
2
-
3
-
4
-
5
-
6
-
7
-
8
-
9
-
10
-
11
-
12
-
13
-
14
-
15
-
16
-
17
-
18
-
19
-
20
-
21
-
22
-
23
-
24
-
25
-
26
-
27
-
28
-
29
-
30
-
31
-
32
-
33
-
34
-
35
-
36
-
37
-
38
-
39
-
40
-
41
-
42
-
43
-
44
-
45
-
46
-
47
-
48
-
49
-
50
-
51
-
52
-
53
-
54
-
55
-
56
-
57
-
58
-
59
-
60
-
61
-
62
-
63
-
64
-
65
-
66
-
67
-
68
-
69
-
70
-
71
-
72
-
73
-
74
-
75
-
76
-
77
-
78
-
79
-
80
-
81
-
82
-
83
-
84
-
85
-
86
-
87
-
88
-
89
-
90
-
91
-
92
-
93
-
94
-
95
-
96
-
97
-
98
-
99
-
100
-
101
-
102
-
103
-
104
-
105
-
106
-
107
-
108
-
109
-
110
-
111
-
112
-
113
-
114
-
115
-
116
-
117
-
118
-
119
-
120
-
121
-
122
-
123
-
124
-
125
-
126
-
127
-
128
-
129
-
130
-
131
-
132
-
133
-
134
-
135
-
136
-
137
-
138
-
139
-
140
-
141
-
142
-
143
-
144
-
145
-
146
-
147
-
148
-
149
-
150
-
151
-
152
-
153
-
154
-
155
-
 156
156 -
 157
157 -
 158
158 -
 159
159 -
 160
160 -
 161
161 -
 162
162 -
 163
163 -
 164
164 -
 165
165 -
 166
166 -
167
-
168
-
169
-
170
-
171
-
172
-
173
-
174
-
175
-
176
-
177
-
178
-
179
-
180
-
181
-
182
-
183
-
184
-
185
-
186
-
187
-
188
-
189
-
190
-
191
-
192
-
193
-
194
-
195
-
196
 |
 |