Ricoh Aficio SP 1200SF User's Guide - Page 55
Setting the telephone line type, PBX and TRANSFER
 |
View all Ricoh Aficio SP 1200SF manuals
Add to My Manuals
Save this manual to your list of manuals |
Page 55 highlights
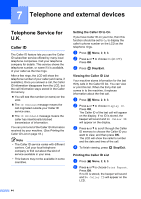
c Press Start. d After printing has finished, press Stop/Exit. Setting the telephone line type 7 If you are connecting the machine to a line that features a PBX or ISDN to send and receive faxes, it is necessary to change the Telephone Line Type accordingly by completing the following steps. If you are using a line that features a PBX, you can set your machine to always gain access to an outside line, or not. a Press Menu, 0, 6. b Press a or b to choose PBX, ISDN (or Normal). Press OK. c Do one of the following: „ If you chose ISDN or Normal, go to g. „ If you chose PBX, go to d d Do one of the following: „ If you want to change the current prefix number, press 1 and go to e. „ If you do not want to change the current prefix number, press 2 and go to g. e Enter the prefix number (up to 5 digits) on the dial pad. Press OK. Telephone and external devices Note • You can use the numbers 0 to 9, #, l and !. (Press Hook to display "!".) You cannot use ! with any other numbers or characters. If your telephone system requires a timed break recall, press break. Hook to enter the • If the pulse dialling mode is on, # and l are not available to use. f Press a or b to choose On or Always. Press OK. Note • If you choose On, pressing Hook (the 7 screen displays "!".) will let you access an outside line. • If you choose Always, you can access an outside line without pressing Hook. g Press Stop/Exit. PBX and TRANSFER 7 The machine is initially set to Normal, which lets the machine connect to a standard PSTN (Public Switched Telephone Network) line. However, many offices use a central telephone system or Private Branch Exchange (PBX). Your machine can be connected to most types of PBX. The machine's recall feature supports timed break recall only (TBR). TBR will work with most PBX systems allowing you to gain access to an outside line, or transfer calls to another extension. The feature works when is pressed. Hook 45
-
 1
1 -
2
-
3
-
4
-
5
-
6
-
7
-
8
-
9
-
10
-
11
-
12
-
13
-
14
-
15
-
16
-
17
-
18
-
19
-
20
-
21
-
22
-
23
-
24
-
25
-
26
-
27
-
28
-
29
-
30
-
31
-
32
-
33
-
34
-
35
-
36
-
37
-
38
-
39
-
40
-
41
-
42
-
43
-
44
-
45
-
46
-
47
-
48
-
49
-
 50
50 -
 51
51 -
 52
52 -
 53
53 -
 54
54 -
 55
55 -
 56
56 -
 57
57 -
 58
58 -
 59
59 -
 60
60 -
61
-
62
-
63
-
64
-
65
-
66
-
67
-
68
-
69
-
70
-
71
-
72
-
73
-
74
-
75
-
76
-
77
-
78
-
79
-
80
-
81
-
82
-
83
-
84
-
85
-
86
-
87
-
88
-
89
-
90
-
91
-
92
-
93
-
94
-
95
-
96
-
97
-
98
-
99
-
100
-
101
-
102
-
103
-
104
-
105
-
106
-
107
-
108
-
109
-
110
-
111
-
112
-
113
-
114
-
115
-
116
-
117
-
118
-
119
-
120
-
121
-
122
-
123
-
124
-
125
-
126
-
127
-
128
-
129
-
130
-
131
-
132
-
133
-
134
-
135
-
136
-
137
-
138
-
139
-
140
-
141
-
142
-
143
-
144
-
145
-
146
-
147
-
148
-
149
-
150
-
151
-
152
-
153
-
154
-
155
-
156
-
157
-
158
-
159
-
160
-
161
-
162
-
163
-
164
-
165
-
166
-
167
-
168
-
169
-
170
-
171
-
172
-
173
-
174
-
175
-
176
-
177
-
178
-
179
-
180
-
181
-
182
-
183
-
184
-
185
-
186
-
187
-
188
-
189
-
190
-
191
-
192
-
193
-
194
-
195
-
196
 |
 |
