Samsung ML-2551N User Manual (ENGLISH) - Page 122
CAUTIONS NOTE, more than a few minutes., If toner gets on your clothing, wipe it off with a dry cloth
 |
UPC - 635753622706
View all Samsung ML-2551N manuals
Add to My Manuals
Save this manual to your list of manuals |
Page 122 highlights
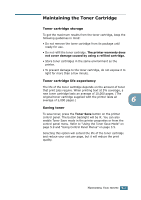
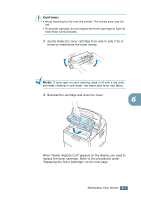
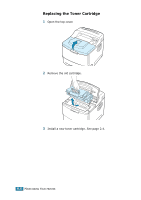
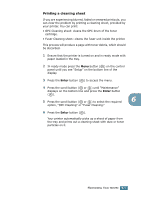
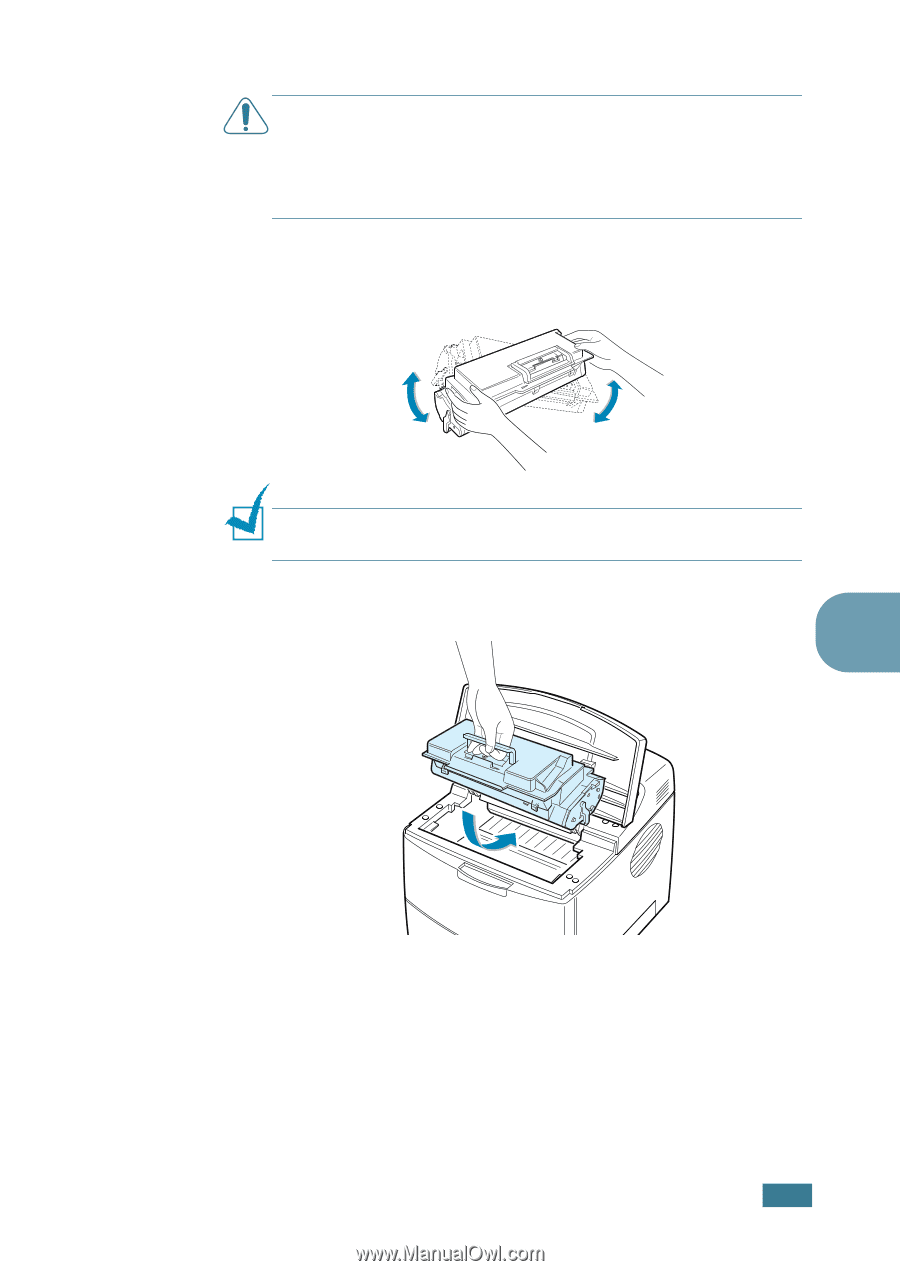
CAUTIONS: • Avoid reaching too far into the printer. The fusing area may be hot. • To prevent damage, do not expose the toner cartridge to light for more than a few minutes. 3 Gently shake the toner cartridge from side to side 5 for 6 times to redistribute the toner evenly. NOTE: If toner gets on your clothing, wipe it off with a dry cloth and wash clothing in cold water. Hot water sets toner into fabric. 4 Reinstall the cartridge and close the cover. 6 When "Ready Replace Cart" appears on the display, you need to replace the toner cartridge. Refer to the procedures under "Replacing the Toner Cartridge" on the next page. MAINTAINING YOUR PRINTER 6.5
-
 1
1 -
2
-
3
-
4
-
5
-
6
-
7
-
8
-
9
-
10
-
11
-
12
-
13
-
14
-
15
-
16
-
17
-
18
-
19
-
20
-
21
-
22
-
23
-
24
-
25
-
26
-
27
-
28
-
29
-
30
-
31
-
32
-
33
-
34
-
35
-
36
-
37
-
38
-
39
-
40
-
41
-
42
-
43
-
44
-
45
-
46
-
47
-
48
-
49
-
50
-
51
-
52
-
53
-
54
-
55
-
56
-
57
-
58
-
59
-
60
-
61
-
62
-
63
-
64
-
65
-
66
-
67
-
68
-
69
-
70
-
71
-
72
-
73
-
74
-
75
-
76
-
77
-
78
-
79
-
80
-
81
-
82
-
83
-
84
-
85
-
86
-
87
-
88
-
89
-
90
-
91
-
92
-
93
-
94
-
95
-
96
-
97
-
98
-
99
-
100
-
101
-
102
-
103
-
104
-
105
-
106
-
107
-
108
-
109
-
110
-
111
-
112
-
113
-
114
-
115
-
116
-
 117
117 -
 118
118 -
 119
119 -
 120
120 -
 121
121 -
 122
122 -
 123
123 -
 124
124 -
 125
125 -
 126
126 -
 127
127 -
128
-
129
-
130
-
131
-
132
-
133
-
134
-
135
-
136
-
137
-
138
-
139
-
140
-
141
-
142
-
143
-
144
-
145
-
146
-
147
-
148
-
149
-
150
-
151
-
152
-
153
-
154
-
155
-
156
-
157
-
158
-
159
-
160
-
161
-
162
-
163
-
164
-
165
-
166
-
167
-
168
-
169
-
170
-
171
-
172
-
173
-
174
-
175
-
176
-
177
-
178
-
179
-
180
-
181
-
182
-
183
-
184
-
185
-
186
-
187
-
188
-
189
-
190
-
191
-
192
-
193
-
194
-
195
-
196
-
197
-
198
-
199
-
200
-
201
-
202
-
203
-
204
-
205
-
206
-
207
-
208
-
209
-
210
-
211
-
212
-
213
-
214
-
215
-
216
-
217
-
218
-
219
-
220
-
221
-
222
-
223
-
224
-
225
-
226
-
227
-
228
-
229
-
230
-
231
-
232
-
233
 |
 |
M
AINTAINING
Y
OUR
PRINTER
6.
5
6
C
AUTIONS
:
• Avoid reaching too far into the printer. The fusing area may be
hot.
• To prevent damage, do not expose the toner cartridge to light for
more than a few minutes.
3
Gently shake the toner cartridge from side to side 5 for 6
times to redistribute the toner evenly.
N
OTE
:
If toner gets on your clothing, wipe it off with a dry cloth
and wash clothing in cold water. Hot water sets toner into fabric.
4
Reinstall the cartridge and close the cover.
When “Ready
Replace Cart” appears on the display, you need to
replace the toner cartridge. Refer to the procedures under
“Replacing the Toner Cartridge” on the next page.