Sony DVWM2000 Product Manual (Operation Manual 1st Edition (Revised 6)) - Page 61
Editing, 5-1 Automatic Editing, 5-1-1 Overview, Editing
 |
View all Sony DVWM2000 manuals
Add to My Manuals
Save this manual to your list of manuals |
Page 61 highlights
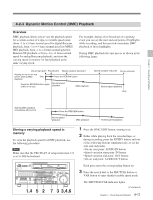
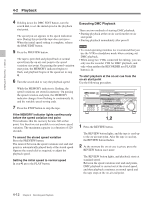
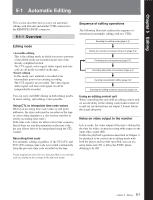
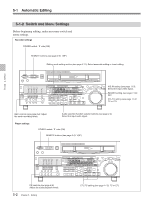
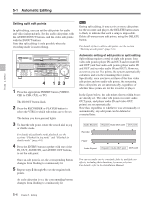
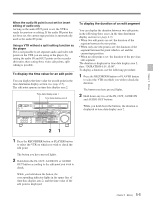
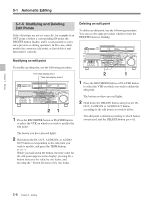
Chapter 5 Editing Chapter 5 Editing 5-1 Automatic Editing This section describes how to carry out automatic editing with this unit and another VTR connected to the REMOTE1-IN(9P) connector. 5-1-1 Overview Editing mode • Assemble editing This is the editing mode in which successive portions of the edited result are recorded on the end of the already completed section. The CTL signal, video signal, audio signal, and time code are all newly recorded on the tape. • Insert editing In this mode, new material is recorded at an intermediate point of an existing recording. The CTL signal is not recorded. The video signal, audio signal, and time code signal can all be independently recorded. You can carry out DMC editing in both editing modes. In insert editing, split editing is also possible. Using CTL to interpolate time code values When you are using time code values as edit point addresses, the time code must be recorded on the tape in correct time sequence (i.e. the sections must be in strictly ascending time order). If the time code values are all in correct time sequence, then if there are any discontinuities in the time code, the unit allows them to be interpolated using the CTL counter. Recording time code For automatic editing, regardless of the TCG (F1) and TCG (F2) settings, time code is recorded continuously from the previous time code recorded on the tape. Using setup menu item 610, it is also possible to record time code according to the settings in the function menu. Sequence of editing operations The following flowchart outlines the sequence of operations in automatic editing with two VTRs. Selecting the editing mode (page 5-3) Setting the recorder and player edit points (page 5-3) Previewing the edit segments (page 5-7) Amending edit points as necessary (page 5-6) Carrying out automatic editing (page 5-8) Checking the editing results as necessary (page 5-9) Using an editing control unit When controlling this unit with an editing control unit, set an edit delay on the editing control unit so that cut in and cut out instructions are output 5 frames before the actual edit point. Notes on video output to the monitor In E-E mode, the video output of the unit is delayed by the time for video circuit processing with respect to the input video signal (8H). Unlike the playback operations described in Chapter 4, for playback to be carried out in editing mode with both the player and recorder specified, you can use setup menu item 701 to delay the SYNC phase, delaying it by 8H. 5-1 Chapter 5 Editing
-
 1
1 -
2
-
3
-
4
-
5
-
6
-
7
-
8
-
9
-
10
-
11
-
12
-
13
-
14
-
15
-
16
-
17
-
18
-
19
-
20
-
21
-
22
-
23
-
24
-
25
-
26
-
27
-
28
-
29
-
30
-
31
-
32
-
33
-
34
-
35
-
36
-
37
-
38
-
39
-
40
-
41
-
42
-
43
-
44
-
45
-
46
-
47
-
48
-
49
-
50
-
51
-
52
-
53
-
54
-
55
-
 56
56 -
 57
57 -
 58
58 -
 59
59 -
 60
60 -
 61
61 -
 62
62 -
 63
63 -
 64
64 -
 65
65 -
 66
66 -
67
-
68
-
69
-
70
-
71
-
72
-
73
-
74
-
75
-
76
-
77
-
78
-
79
-
80
-
81
-
82
-
83
-
84
-
85
-
86
-
87
-
88
-
89
-
90
-
91
-
92
-
93
-
94
-
95
-
96
-
97
-
98
-
99
-
100
-
101
-
102
-
103
-
104
-
105
-
106
-
107
-
108
-
109
-
110
-
111
-
112
-
113
-
114
-
115
-
116
-
117
-
118
-
119
-
120
-
121
-
122
-
123
-
124
-
125
-
126
-
127
-
128
-
129
-
130
-
131
-
132
-
133
-
134
-
135
-
136
-
137
-
138
-
139
-
140
-
141
-
142
-
143
-
144
-
145
-
146
-
147
-
148
-
149
-
150
-
151
-
152
-
153
-
154
-
155
-
156
-
157
-
158
-
159
-
160
-
161
-
162
-
163
-
164
 |
 |