Sony DVWM2000 Product Manual (Operation Manual 1st Edition (Revised 6)) - Page 67
Cue-Up to Edit Points and Preroll, 5-1-7 Preview, To stop the preview
 |
View all Sony DVWM2000 manuals
Add to My Manuals
Save this manual to your list of manuals |
Page 67 highlights
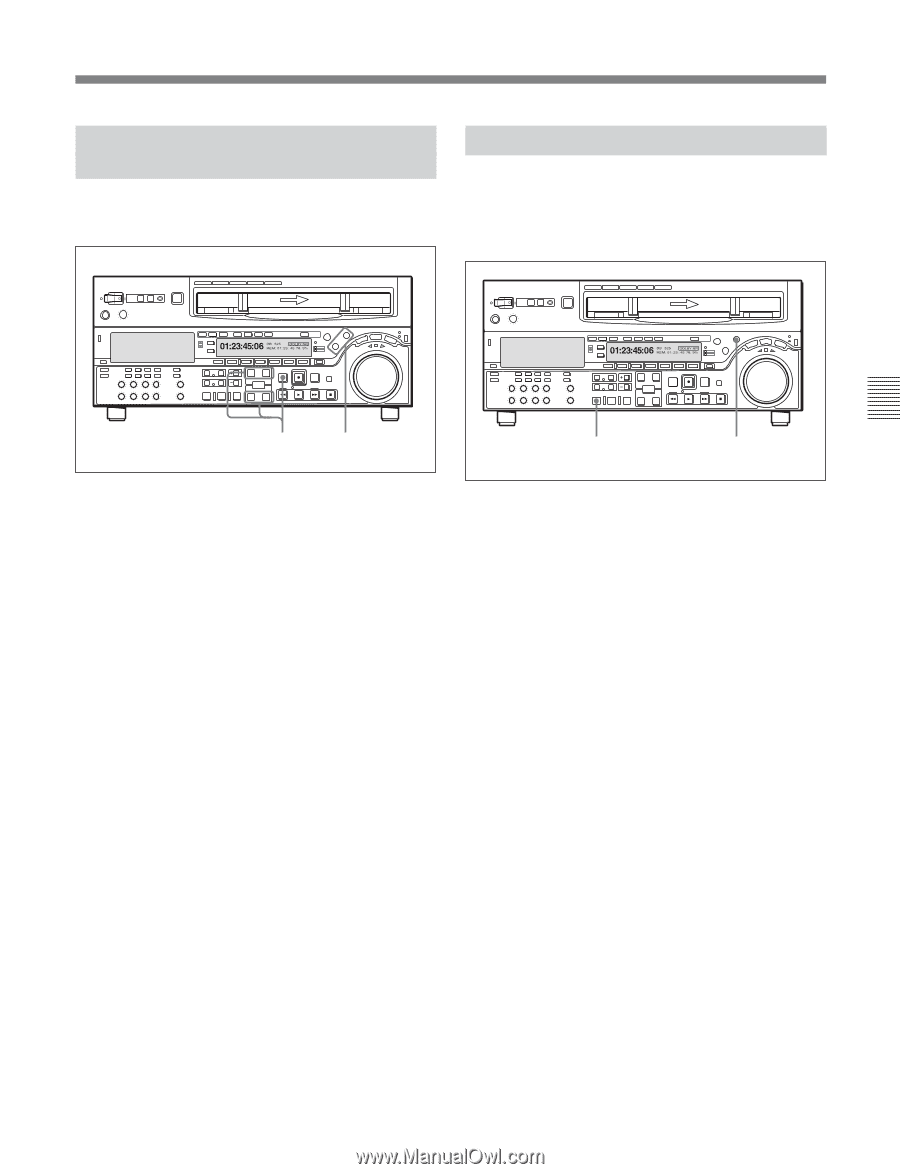
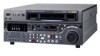
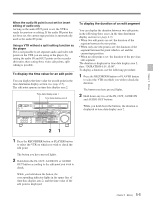
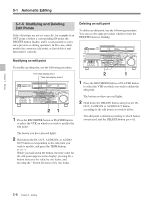
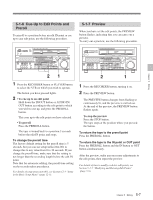
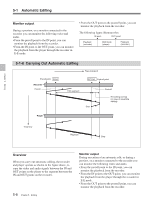
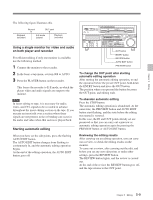
5-1-6 Cue-Up to Edit Points and Preroll To preroll to a position before an edit IN point or cue up to any edit point, use the following procedure. 5-1-7 Preview When you have set the edit points, the PREVIEW button flashes, indicating that you can carry out a preview. To carry out a preview, use the following procedure. Z Z Chapter 5 Editing 21 1 Press the RECORDER button or PLAYER button to select the VTR on which you wish to operate. The button you have pressed lights. 2 • To cue up to an edit point Hold down the IN/OUT button or AUDIO IN/ OUT button according to the edit point to which you wish to cue up, and press the PREROLL button. This cues up to the edit point you have selected. • To preroll Press the PREROLL button. The tape is wound back to a position 5 seconds before the edit IN point, and stops. To change the preroll time The factory default setting for the preroll time is 5 seconds, but you can use setup menu item 001 to change this to any value from 0 to 30 seconds. If you change the preroll time, make sure that the setting is not longer than the recording length before the edit IN point. Note that for automatic editing, the preroll time setting on the recorder takes precedence. For details of setup menu item 001, see Section 12-3 "Items in the Basic Setup Menu" (page 12-5). 2 1 1 Press the RECORDER button, turning it on. 2 Press the PREVIEW button. The PREVIEW button changes from flashing to continuously lit, and the preview is carried out. At the end of the preview, the PREVIEW button flashes again. To stop the preview Press the STOP button. The tape stops at the position where you pressed the button. To return the tape to the preroll point Press the PREROLL button. To return the tape to the IN point or OUT point Press the PREROLL button and the IN button or OUT button simultaneously. After the preview, make any necessary adjustments to the edit points, then repeat the preview. For details of how to modify or delete edit points, see Section 5-1-5 "Modifying and Deleting Edit Points" (page 5-6). 5-7 Chapter 5 Editing
-
 1
1 -
2
-
3
-
4
-
5
-
6
-
7
-
8
-
9
-
10
-
11
-
12
-
13
-
14
-
15
-
16
-
17
-
18
-
19
-
20
-
21
-
22
-
23
-
24
-
25
-
26
-
27
-
28
-
29
-
30
-
31
-
32
-
33
-
34
-
35
-
36
-
37
-
38
-
39
-
40
-
41
-
42
-
43
-
44
-
45
-
46
-
47
-
48
-
49
-
50
-
51
-
52
-
53
-
54
-
55
-
56
-
57
-
58
-
59
-
60
-
61
-
 62
62 -
 63
63 -
 64
64 -
 65
65 -
 66
66 -
 67
67 -
 68
68 -
 69
69 -
 70
70 -
 71
71 -
 72
72 -
73
-
74
-
75
-
76
-
77
-
78
-
79
-
80
-
81
-
82
-
83
-
84
-
85
-
86
-
87
-
88
-
89
-
90
-
91
-
92
-
93
-
94
-
95
-
96
-
97
-
98
-
99
-
100
-
101
-
102
-
103
-
104
-
105
-
106
-
107
-
108
-
109
-
110
-
111
-
112
-
113
-
114
-
115
-
116
-
117
-
118
-
119
-
120
-
121
-
122
-
123
-
124
-
125
-
126
-
127
-
128
-
129
-
130
-
131
-
132
-
133
-
134
-
135
-
136
-
137
-
138
-
139
-
140
-
141
-
142
-
143
-
144
-
145
-
146
-
147
-
148
-
149
-
150
-
151
-
152
-
153
-
154
-
155
-
156
-
157
-
158
-
159
-
160
-
161
-
162
-
163
-
164
 |
 |