Xerox 3100MFPX User Guide - Phaser 3100 MFP/X - Page 33
Fax transmission
 |
UPC - 095205741964
View all Xerox 3100MFPX manuals
Add to My Manuals
Save this manual to your list of manuals |
Page 33 highlights
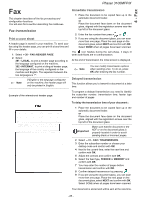
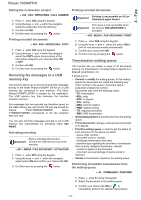
Phaser 3100MFP/X 4 - Fax Fax This chapter describes all the fax processing and configuration functions. You will also find a section describing fax mailboxes. Fax transmission Print a cover sheet A header page is stored in your machine. To send your fax using this header page, you can print it at any time and fill in your details. 1 Select 30 - FAX /HEADER PAGE. 2 Select: 301 - LOCAL, to print a header page according to the language configured on the machine, 302 - INTERNAT, to print a bilingual header page, the language of the country configured on the machine and English. The separator between the two languages is "/". Note If English is the language configured on the machine, the header page will only be printed in English. Immediate transmission 1 Place the document to be copied face up in the automatic document feeder. or Place the document face down on the document glass, aligned with the registration arrows near the top left of the document glass. 2 Enter the fax number then press or . 3 If you are using the document glass, you can scan more than one page. Place the next page on the document glass, select NEXT and confirm with OK. Select DONE when all pages have been scanned. The icon flashes during the call phase, it stays lit when both faxes are in communication. At the end of transmission the initial screen is displayed. Note You can modify transmission options when sending a fax. To do so, press OK after entering the fax number. Delayed transmission This function allows you to transmit a document at a later time. Example of the international header page: To program a delayed transmission you need to identify the subscriber number, transmission time, feeder type and number of pages. To delay the transmission time of your document : 1 Place the document to be copied face up in the automatic document feeder. or Place the document face down on the document glass, aligned with the registration arrows near the top left of the document glass. Important Make sure that the document in the ADF or on the document glass is properly located in order to avoid sending blank or incorrect pages. 2 Select 31 - FAX / TRANSMISSION. 3 Enter the subscriber number or choose your dialling mode and confirm with OK. 4 Next to the current time, enter the new time and confirm with OK. 5 Adjust the contrast and confirm with OK. 6 Select the feed type, FEEDER or MEMORY and confirm with OK. 7 You may enter the number of pages before transmission and confirm with OK. 8 Confirm delayed transmission by pressing . 9 If you are using the document glass, you can scan more than one page. Place the next page on the document glass, select NEXT and confirm with OK. Select DONE when all pages have been scanned. Your document is stored and will be sent at the new time. - 28 -
-
 1
1 -
2
-
3
-
4
-
5
-
6
-
7
-
8
-
9
-
10
-
11
-
12
-
13
-
14
-
15
-
16
-
17
-
18
-
19
-
20
-
21
-
22
-
23
-
24
-
25
-
26
-
27
-
 28
28 -
 29
29 -
 30
30 -
 31
31 -
 32
32 -
 33
33 -
 34
34 -
 35
35 -
 36
36 -
 37
37 -
 38
38 -
39
-
40
-
41
-
42
-
43
-
44
-
45
-
46
-
47
-
48
-
49
-
50
-
51
-
52
-
53
-
54
-
55
-
56
-
57
-
58
-
59
-
60
-
61
-
62
-
63
-
64
-
65
-
66
-
67
-
68
-
69
-
70
-
71
-
72
-
73
-
74
-
75
-
76
-
77
-
78
-
79
-
80
-
81
-
82
-
83
-
84
-
85
-
86
-
87
-
88
-
89
-
90
 |
 |