Xerox 3100MFPX User Guide - Phaser 3100 MFP/X - Page 41
Parameters, Setup - phaser firmware
 |
UPC - 095205741964
View all Xerox 3100MFPX manuals
Add to My Manuals
Save this manual to your list of manuals |
Page 41 highlights
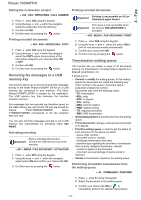
6 - Parameters/Setup Phaser 3100MFP/X Parameters/ Setup You can setup your machine as you like depending on the use. In this chapter you will find descriptions of the functions. You can print the functions guide and the current setup of your machine. Automatic mode 212 - SETUP / DATE/TIME / AUTO ADJUST If you select OFF and confirm with OK, the summer / winter time will not be changed automatically. For the machine to be set to the new time, you will need to use the 211 MODIFY menu. If you select ON and confirm with OK, you will not have to care about any change at the end of March (+1h) and October (-1h). You will just be informed of this change by a message on the screen. Note Your machine is continuously being updated, new functions are regularly made available. To benefit, visit our website www.xerox.com. You can also use the update function available with the Xerox Companion Suite software to download the latest online updates (see Firmware update, page 82). The default parameter is ON. Warning message On automatic changing to summer / winter time, a message will be displayed to inform you that the machine time has been changed. 25-03-07 02:01 CHECK TIME Date/Time or At any moment you may change the date and time on your machine. 28-10-07 02:01 CHECK TIME Depending on the country configured on the machine, the date format is of type DDMMYY (e.g.: France) or MMDDYY (e.g.: USA). 21 - SETUP / DATE/TIME 1 Press , enter 21 using the keypad. Confirm with OK. 2 Enter the numbers of the required time and date one after another (for example November 8 2004 at 9h33, press 0811040933 or 1108040933) and press OK to confirm. 3 To exit this menu, press . Summer time / Winter time setting This menu lets you choose to change to summer / winter time automatically or not. Your next action on the keypad will cause the message to be automatically cleared. Your fax number/Your name Your machine will print out your fax number and your name on each document it transmits if you save these settings. Important To benefit from this feature, you must set SENDING HEADER to ON (see Technical Parameters, page 40). The SENDING HEADER feature is by default activated on the US model and cannot be modified. To save your fax number and name: This function is only available if the Important country configured on the machine is part of the European Union. The 21>DATE/TIME menu includes 2 submenus: Manual mode 211 - SETUP / DATE/TIME / MODIFY Your machine will prompt you to change the date and time via the numerical keypad. 22 - SETUP / NUMBER/NAME 1 Press , enter 22 using the keypad. 2 Enter your fax number (20 digits max.) and press OK to confirm. 3 Enter your name (20 characters max) then press OK to confirm. For example, if you want to type the letter C, press the key C until it appears on the screen. 4 To exit this menu, press . - 36 -
-
 1
1 -
2
-
3
-
4
-
5
-
6
-
7
-
8
-
9
-
10
-
11
-
12
-
13
-
14
-
15
-
16
-
17
-
18
-
19
-
20
-
21
-
22
-
23
-
24
-
25
-
26
-
27
-
28
-
29
-
30
-
31
-
32
-
33
-
34
-
35
-
 36
36 -
 37
37 -
 38
38 -
 39
39 -
 40
40 -
 41
41 -
 42
42 -
 43
43 -
 44
44 -
 45
45 -
 46
46 -
47
-
48
-
49
-
50
-
51
-
52
-
53
-
54
-
55
-
56
-
57
-
58
-
59
-
60
-
61
-
62
-
63
-
64
-
65
-
66
-
67
-
68
-
69
-
70
-
71
-
72
-
73
-
74
-
75
-
76
-
77
-
78
-
79
-
80
-
81
-
82
-
83
-
84
-
85
-
86
-
87
-
88
-
89
-
90
 |
 |