Xerox 3100MFPX User Guide - Phaser 3100 MFP/X - Page 78
Creating a cover
 |
UPC - 095205741964
View all Xerox 3100MFPX manuals
Add to My Manuals
Save this manual to your list of manuals |
Page 78 highlights
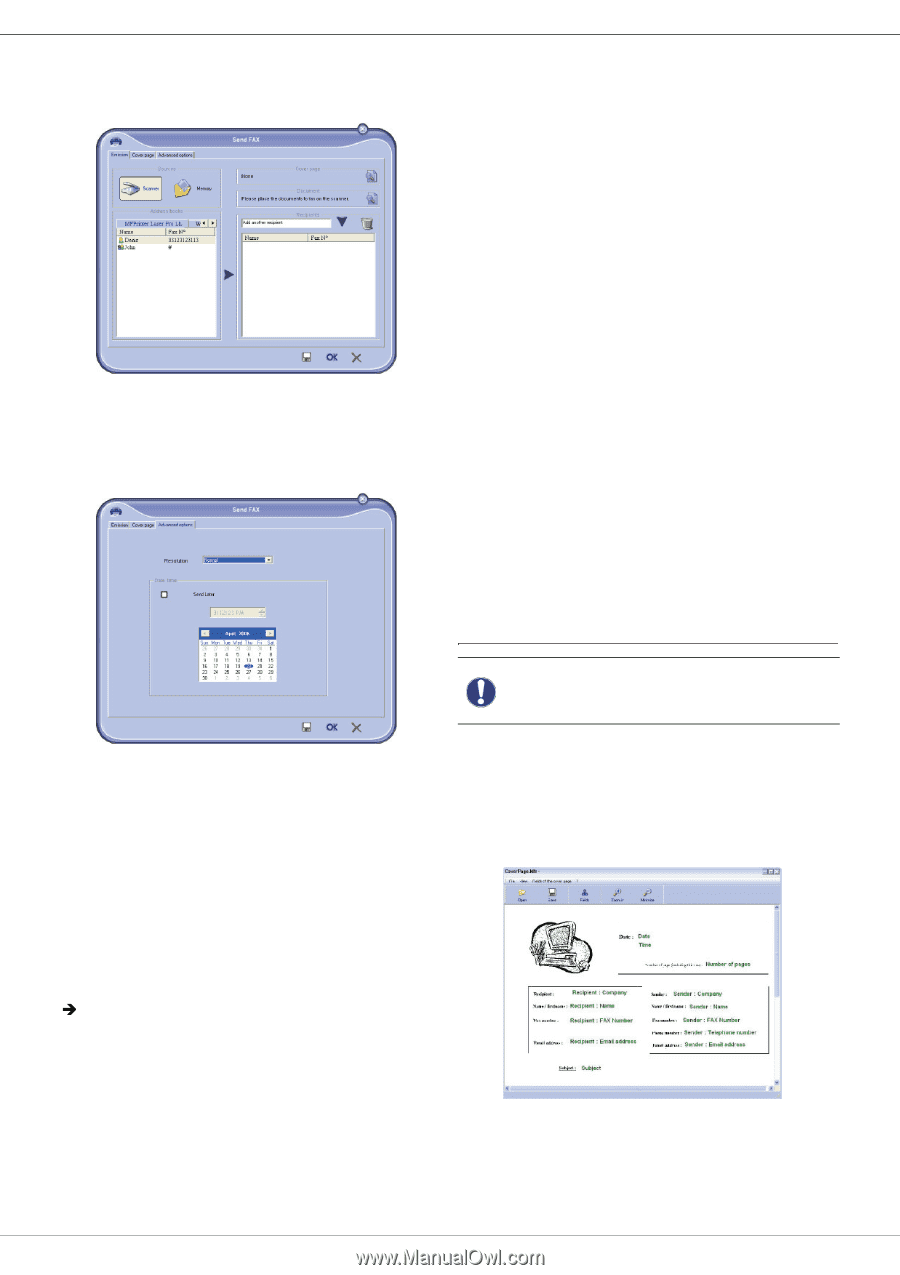
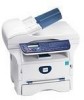
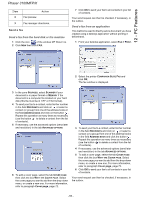
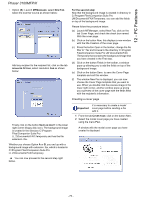
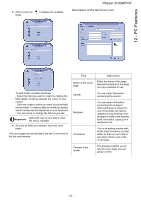
12 - PC Features Phaser 3100MFP/X • Option (B): Launch MFMANAGER, select NEW FAX, select the scanner source as shown below: Add any recipient to the recipient list, click on the tab ADVANCED OPTIONS, select resolution FINE as shown below: For the second step: Now that the background image is created in directory in C:\Program Files\Companion Suite Pro LM\Documents\FAX\Temporary, you can add the fields on top of the background image. Please follow the procedure below: (a) Launch MFManager, select New Fax, click on the tab Cover Page, and check the check box named With the cover page. (b) Click on the button New, this displays a new window with the title Creation of the cover page. (c) Press the button Open in the toolbar, change the file filter to *.fax and browse to the directory C:\Program Files\Companion Suite Pro LM \Documents\FAX \Temporary that contains the background image that you have created in the First step. (d) Click on the button Fields in the toolbar, a window pops up allowing you to add the fields on top of the background image. (e) Click on the button Save to save the Cover Page template and exit this window. (f) The window New Fax is displayed, you can now choose the Cover Page template that you want to use. When you double click the preview image in the lower right corner, another window pops up giving you a preview of the cover page with the fields filled with the recipient's information. Creating a cover page Finally click on the button SAVE AS DRAFT in the lower right corner (floppy disk icon). The background image is created in the directory C:\Program Files\Companion Suite Pro LL 2\Documents\FAX\Temporary and has the file extension .fax. Whether you choose Option A or B, you end up with a background image with extension .fax, which is located in C:\Program Files\Companion Suite Pro LL 2\Documents\FAX\Temporary. Î You can now proceed to the second step right below. It is necessary to create a model Important cover page before sending a fax with it. 1 From the tab COVER PAGE, click on the button NEW. 2 Select the model cover page you have created using the menu FILE. A window with the model cover page you have created is displayed: - 73 -
-
 1
1 -
2
-
3
-
4
-
5
-
6
-
7
-
8
-
9
-
10
-
11
-
12
-
13
-
14
-
15
-
16
-
17
-
18
-
19
-
20
-
21
-
22
-
23
-
24
-
25
-
26
-
27
-
28
-
29
-
30
-
31
-
32
-
33
-
34
-
35
-
36
-
37
-
38
-
39
-
40
-
41
-
42
-
43
-
44
-
45
-
46
-
47
-
48
-
49
-
50
-
51
-
52
-
53
-
54
-
55
-
56
-
57
-
58
-
59
-
60
-
61
-
62
-
63
-
64
-
65
-
66
-
67
-
68
-
69
-
70
-
71
-
72
-
 73
73 -
 74
74 -
 75
75 -
 76
76 -
 77
77 -
 78
78 -
 79
79 -
 80
80 -
 81
81 -
 82
82 -
 83
83 -
84
-
85
-
86
-
87
-
88
-
89
-
90
 |
 |