Xerox 3100MFPX User Guide - Phaser 3100 MFP/X - Page 71
Duplex, PRINTING, PUT THE PRIN, Important - x box
 |
UPC - 095205741964
View all Xerox 3100MFPX manuals
Add to My Manuals
Save this manual to your list of manuals |
Page 71 highlights
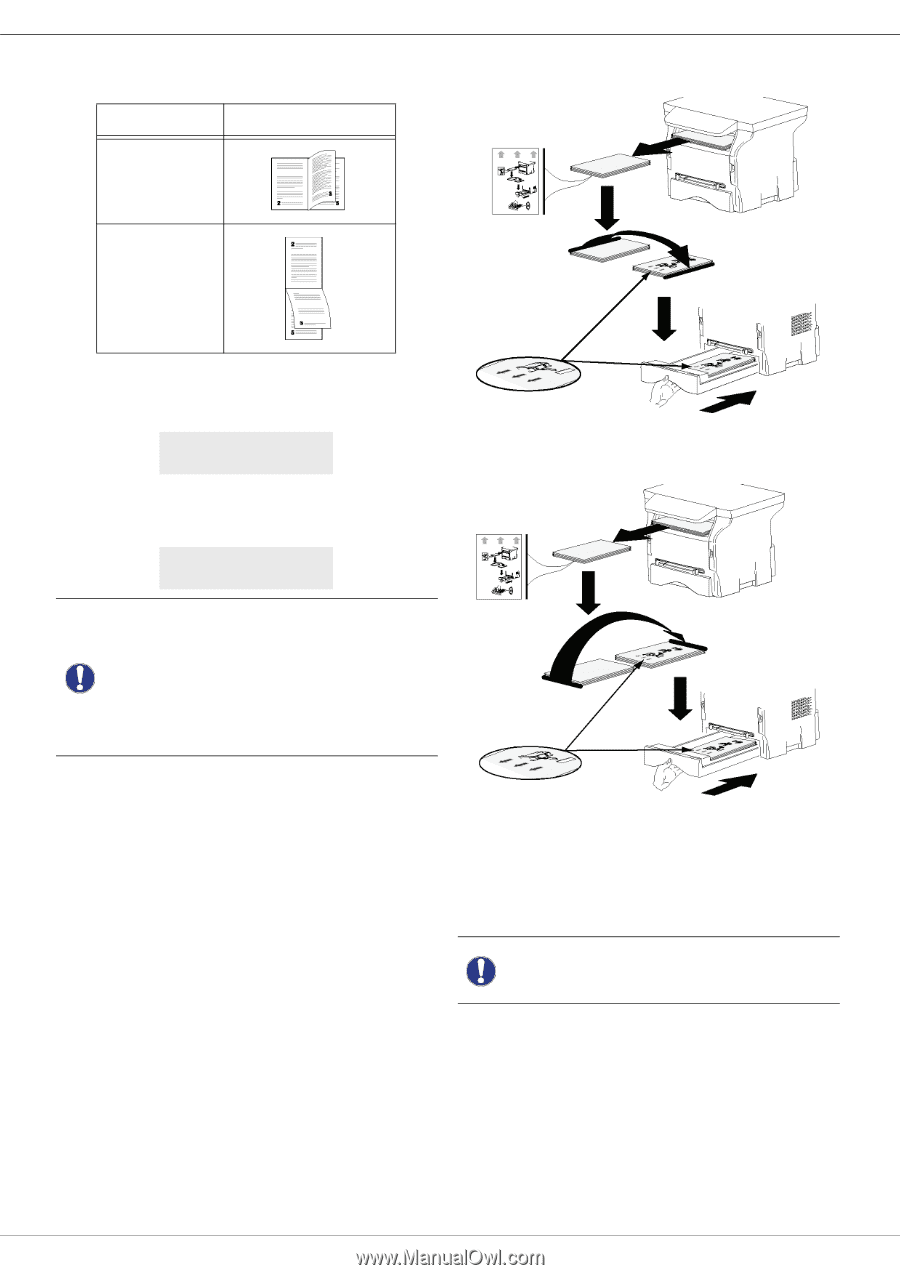
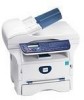
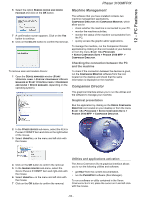
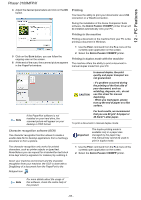
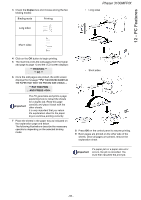
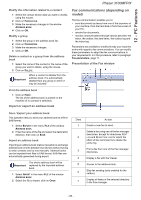
12 - PC Features 3 Check the Duplex box and choose among the two binding modes: Binding mode Printing Long sides Phaser 3100MFP/X • Long sides Short sides 4 Click on the OK button to begin printing. 5 The machine prints the odd pages (from the higher odd page to page 1) and the LCD screen displays: ** PRINTING ** ** PC ** 6 Once the odd pages are printed, the LCD screen displays the message **PUT THE PRINTED SHEETS IN THE PAPER TRAY WITH THE PRINTED SIDE VISIBLE...: ** PUT THE PRIN ... AND PRESS Important The PC generates and prints a page explaining how to reload the sheets for a duplex job. Read this page carefully and place it back with the other sheets. it is very important that you return the explanation sheet to the paper tray to continue printing correctly. 7 Place the sheets in the paper tray as indicated on the explanation page and below. The following illustrations describe the necessary operations depending on the selected binding mode: • Short sides 8 Press OK on the control panel to resume printing. 9 Even pages are printed on the other side of the sheets. Once all pages are printed, remove the explanation sheet. If a paper jam or a paper size error Important occurs, the job is cancelled. You must then resubmit the print job. - 66 -
-
 1
1 -
2
-
3
-
4
-
5
-
6
-
7
-
8
-
9
-
10
-
11
-
12
-
13
-
14
-
15
-
16
-
17
-
18
-
19
-
20
-
21
-
22
-
23
-
24
-
25
-
26
-
27
-
28
-
29
-
30
-
31
-
32
-
33
-
34
-
35
-
36
-
37
-
38
-
39
-
40
-
41
-
42
-
43
-
44
-
45
-
46
-
47
-
48
-
49
-
50
-
51
-
52
-
53
-
54
-
55
-
56
-
57
-
58
-
59
-
60
-
61
-
62
-
63
-
64
-
65
-
 66
66 -
 67
67 -
 68
68 -
 69
69 -
 70
70 -
 71
71 -
 72
72 -
 73
73 -
 74
74 -
 75
75 -
 76
76 -
77
-
78
-
79
-
80
-
81
-
82
-
83
-
84
-
85
-
86
-
87
-
88
-
89
-
90
 |
 |