Xerox 3100MFPX User Guide - Phaser 3100 MFP/X - Page 54
Referring to or changing your, network parameters
 |
UPC - 095205741964
View all Xerox 3100MFPX manuals
Add to My Manuals
Save this manual to your list of manuals |
Page 54 highlights
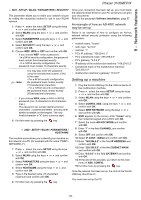
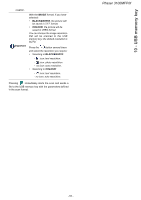
9 - Network features Phaser 3100MFP/X 8 IP CONF.: MANU or IP CONF.: AUTO appear on the screen. If you choose to set up the system manually, go to the next paragraph and enter the parameters IP ADDRESS, SUBNET MASK and GATEWAY. 9 At the end of this procedure, you return to the main menu of CONFIG. ASS. 10 Exit this menu by pressing the key. Once the network has been set up, the LED of the WLAN USB key should be on. Referring to or changing your network parameters Each of the parameters of your network may be changed as your network develops. 2822 - SETUP / WLAN / PARAMETERS / IP ADDRESS 1 Press , select the menu SETUP using the keys or and confirm with OK. 2 Select WLAN using the keys or and confirm with OK. 3 Select PARAMETERS using the keys or and confirm with OK. 4 Select IP ADDRESS using the keys or and confirm with OK. 5 The number of your IP address will appear in the format 000.000.000.000. Enter the new IP address for your machine in the format displayed and confirm with OK. 6 Exit this menu by pressing the key. 2823 - SETUP / WLAN / PARAMETERS / SUBNET MASK 1 Press , select the menu SETUP using the keys or and confirm with OK. 2 Select WLAN using the keys or and confirm with OK. 3 Select PARAMETERS using the keys or and confirm with OK. 4 Select SUBNET MASK using the keys or and confirm with OK. 5 The number of your subnet mask will appear in the format 000.000.000.000. Enter the new submask of your machine in the format displayed and confirm with OK. 6 Exit this menu by pressing the key. 2824 - SETUP / WLAN / PARAMETERS / GATEWAY 1 Press , select the menu SETUP using the keys or and confirm with OK. 2 Select WLAN using the keys or and confirm with OK. 3 Select PARAMETERS using the keys or and confirm with OK. 4 Select GATEWAY using the keys or and confirm with OK. 5 The number of your gateway will appear in the format 000.000.000.000. Enter the new gateway for your machine in the format displayed and confirm with OK. 6 Exit this menu by pressing the key. 2825 - SETUP /WLAN / PARAMETERS / SSID 1 Press , select the menu SETUP using the keys or and confirm with OK. 2 Select WLAN using the keys or and confirm with OK. 3 Select PARAMETERS using the keys or and confirm with OK. 4 Select SSID using the keys or and confirm with OK. 5 The name of your network will appear on the screen. Enter the new name of your network and confirm with OK. 6 Exit this menu by pressing the key. 2826 - SETUP / WLAN / PARAMETERS / MODE 1 Press , select the menu SETUP using the keys or and confirm with OK. 2 Select WLAN using the keys or and confirm with OK. 3 Select PARAMETERS using the keys or and confirm with OK. 4 Select MODE using the keys or and confirm with OK. 5 The symbol >>, tells you that your network is in active mode. 6 Select one of the modes and confirm with OK. - If you choose the AD-HOC MODE, the submenu CHANNEL will appear; enter a number between 1 and 13 and confirm with OK. 7 Exit this menu by pressing the key. Important In an AD-HOC network, the devices communicate directly with each other without passing through an access point. The speed of communication across the whole AD-HOC radio network is as fast as the weakest connection in the network. The speed of communication is also dependent on spatial distance between transmitter and receiver, as well as the number of barriers, such as walls or ceilings. - 49 -
-
 1
1 -
2
-
3
-
4
-
5
-
6
-
7
-
8
-
9
-
10
-
11
-
12
-
13
-
14
-
15
-
16
-
17
-
18
-
19
-
20
-
21
-
22
-
23
-
24
-
25
-
26
-
27
-
28
-
29
-
30
-
31
-
32
-
33
-
34
-
35
-
36
-
37
-
38
-
39
-
40
-
41
-
42
-
43
-
44
-
45
-
46
-
47
-
48
-
 49
49 -
 50
50 -
 51
51 -
 52
52 -
 53
53 -
 54
54 -
 55
55 -
 56
56 -
 57
57 -
 58
58 -
 59
59 -
60
-
61
-
62
-
63
-
64
-
65
-
66
-
67
-
68
-
69
-
70
-
71
-
72
-
73
-
74
-
75
-
76
-
77
-
78
-
79
-
80
-
81
-
82
-
83
-
84
-
85
-
86
-
87
-
88
-
89
-
90
 |
 |