3Com 2102PE Phone Guide - Page 36
Marking a Message as Private or Urgent, Forwarding Incoming Calls to Your Call Coverage Point
 |
View all 3Com 2102PE manuals
Add to My Manuals
Save this manual to your list of manuals |
Page 36 highlights
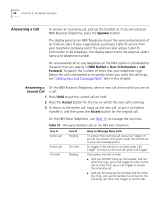
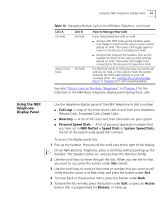
36 CHAPTER 4: NBX VOICE MESSAGING Marking a Message When you leave a message in another user's mailbox, you can mark it as as Private or Urgent Private or Urgent. If you do not select a delivery option, your message is sent as a Normal message. ■ Private Messages - The recipient cannot forward the message to others. ■ Urgent Messages - Places the message at the beginning of the recipient's message queue so that Urgent messages are heard first. 1 Follow the steps in "Replying to a Message", "Forwarding a Message", or "Creating and Sending a Message" earlier in this chapter. 2 In step 4, press 9. 3 To mark the message Urgent, press 1. To mark the message Private, press 2. 4 To send the marked message, press 1, or listen to the prompts for other choices. Forwarding Incoming Calls to Your Call Coverage Point You can configure your NBX telephone so that all incoming calls go directly into your call coverage point, which may be your voice mailbox, the Auto Attendant or receptionist, or a different telephone number. When a call comes in, the telephone rings once (giving you the chance to answer the call) and then sends the call to your call coverage point. On an NBX Business Telephone: 1 Press the FWD MAIL (Forward to Mail) button. The indicator light turns on. 2 To turn off Forward to Mail, press the button again. The light turns off. On an NBX Basic Telephone: 1 Pick up the handset. 2 Press the Feature button and 440. FWD appears in the display panel. 3 To turn off Forward to Mail, pick up the handset and press the Feature button and 440 again. FWD disappears from the display panel. To prevent the telephone from ringing even once, use the Do Not Disturb feature. See "Do Not Disturb" in Chapter 6. To view your current Forward Calls to Mail setting, log in to NBX NetSet > User Information > Feature Settings.
-
 1
1 -
2
-
3
-
4
-
5
-
6
-
7
-
8
-
9
-
10
-
11
-
12
-
13
-
14
-
15
-
16
-
17
-
18
-
19
-
20
-
21
-
22
-
23
-
24
-
25
-
26
-
27
-
28
-
29
-
30
-
 31
31 -
 32
32 -
 33
33 -
 34
34 -
 35
35 -
 36
36 -
 37
37 -
 38
38 -
 39
39 -
 40
40 -
 41
41 -
42
-
43
-
44
-
45
-
46
-
47
-
48
-
49
-
50
-
51
-
52
-
53
-
54
-
55
-
56
-
57
-
58
-
59
-
60
-
61
-
62
-
63
-
64
-
65
-
66
-
67
-
68
-
69
-
70
-
71
-
72
-
73
-
74
-
75
-
76
-
77
-
78
-
79
-
80
-
81
-
82
-
83
-
84
-
85
-
86
-
87
-
88
-
89
-
90
-
91
-
92
-
93
-
94
-
95
-
96
 |
 |