Adobe 22011292 User Manual - Page 88

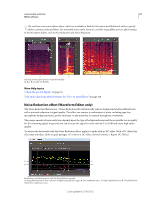
Chorus/Flanger effect, Average Left & Right Channel Input

Page 88 highlights

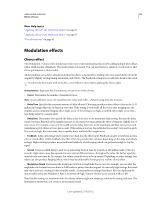
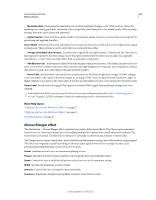
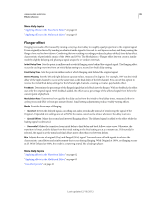
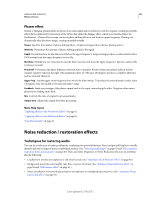
USING ADOBE AUDITION 84 Effects reference • Modulation Rate Determines the maximum rate at which amplitude changes occur. With very low values, the resulting voice slowly gets louder and quieter, like a singer that cannot keep his or her breath steady. With very high settings, the result can be jittery and unnatural. • Highest Quality Ensures the best quality results. Increasing the quality, however, increases the processing time for previewing and applying the effect. Stereo Width Determines where the individual voices are placed in the stereo field and how the original stereo signal is interpreted. These options are active only when you work with stereo files: • Average Left & Right Channel Input Combines the original left and right channels. If deselected, the channels are kept separate to preserve the stereo image. Leave this option deselected if the stereo source audio was originally monophonic-it won't have any effect other than increasing processing time. • Add Binaural Cues Adds separate delays to the left and right outputs of each voice. This delay can make each voice seem to come from a different direction when you listen through headphones. For greater stereo separation, deselect this option for audio that will be played through standard speakers . • Stereo Field Specifies where chorused voices are placed across the left and right stereo image. At lower settings, voices are closer to the center of the stereo image. At a setting of 50%, voices are spaced evenly from left to right. At higher settings, voices move to the outer edges. If you use an odd number of voices, one is always directly in the center. Output Level Sets the ratio of original (Dry) signal to chorused (Wet) signal. Extremely high settings may cause clipping. In the Multitrack Editor, you can vary the Wet level over time with automation lanes. (See "Automating track settings" on page 124.)This technique is handy for emphasizing vocal or instrumental solos. More Help topics "Applying effects in the Waveform Editor" on page 62 "Applying effects in the Multitrack Editor" on page 63 "Use effect presets" on page 61 Chorus/Flanger effect The Modulation > Chorus/Flanger effect combines two popular delay-based effects. The Chorus option simulates several voices or instruments played at once by adding multiple short delays with a small amount of feedback. The result is lush, rich sound. Use this effect to enhance vocal tracks or add stereo spaciousness to mono audio. The Flanger option creates a psychedelic, phase-shifted sound by mixing a varying, short delay with the original signal. This effect was originally created by sending an identical audio signal to two reel-to-reel tape recorders, and periodically pressing the flange of one reel to slow it down. Chorus Simulates several voices or instruments playing at once. Flanger Simulates the delayed, phase-shifted sound originally heard in psychedelic music. Speed Controls the rate at which the delay time cycles from zero to the maximum setting. Width Specifies the maximum amount of delay. Intensity Controls the ratio of original to processed audio. Transience Emphasizes transients, giving them a sharper, more distinct sound. Last updated 2/16/2012

  • 1
  • 2
  • 3
  • 4
  • 5
  • 6
  • 7
  • 8
  • 9
  • 10
  • 11
  • 12
  • 13
  • 14
  • 15
  • 16
  • 17
  • 18
  • 19
  • 20
  • 21
  • 22
  • 23
  • 24
  • 25
  • 26
  • 27
  • 28
  • 29
  • 30
  • 31
  • 32
  • 33
  • 34
  • 35
  • 36
  • 37
  • 38
  • 39
  • 40
  • 41
  • 42
  • 43
  • 44
  • 45
  • 46
  • 47
  • 48
  • 49
  • 50
  • 51
  • 52
  • 53
  • 54
  • 55
  • 56
  • 57
  • 58
  • 59
  • 60
  • 61
  • 62
  • 63
  • 64
  • 65
  • 66
  • 67
  • 68
  • 69
  • 70
  • 71
  • 72
  • 73
  • 74
  • 75
  • 76
  • 77
  • 78
  • 79
  • 80
  • 81
  • 82
  • 83
  • 84
  • 85
  • 86
  • 87
  • 88
  • 89
  • 90
  • 91
  • 92
  • 93
  • 94
  • 95
  • 96
  • 97
  • 98
  • 99
  • 100
  • 101
  • 102
  • 103
  • 104
  • 105
  • 106
  • 107
  • 108
  • 109
  • 110
  • 111
  • 112
  • 113
  • 114
  • 115
  • 116
  • 117
  • 118
  • 119
  • 120
  • 121
  • 122
  • 123
  • 124
  • 125
  • 126
  • 127
  • 128
  • 129
  • 130
  • 131
  • 132
  • 133
  • 134
  • 135
  • 136
  • 137
  • 138
  • 139
  • 140
  • 141
  • 142
  • 143
  • 144
  • 145
  • 146
  • 147

84
USING ADOBE AUDITION
Effects reference
Last updated 2/16/2012
Modulation Rate
Determines the maximum rate at which amplitude changes occur. With very low values, the
resulting voice slowly gets louder and quieter, like a singer that cannot keep his or her breath steady. With very high
settings, the result can be jittery and unnatural.
Highest Quality
Ensures the best quality results. Increasing the quality, however, increases the processing time for
previewing and applying the effect.
Stereo Width
Determines where the individual voices are placed in the stereo field and how the original stereo signal
is interpreted. These options are active only when you work with stereo files:
Average Left & Right Channel Input
Combines the original left and right channels. If deselected, the channels are
kept separate to preserve the stereo image. Leave this option deselected if the stereo source audio was originally
monophonic—it won’t have any effect other than increasing processing time.
Add Binaural Cues
Adds separate delays to the left and right outputs of each voice. This delay can make each voice
seem to come from a different direction when you listen through headphones. For greater stereo separation, deselect
this option for audio that will be played through standard speakers .
Stereo Field
Specifies where chorused voices are placed across the left and right stereo image. At lower settings,
voices are closer to the center of the stereo image. At a setting of 50%, voices are spaced evenly from left to right. At
higher settings, voices move to the outer edges. If you use an odd number of voices, one is always directly in the center.
Output Level
Sets the ratio of original (Dry) signal to chorused (Wet) signal. Extremely high settings may cause
clipping.
In the Multitrack Editor, you can vary the Wet level over time with automation lanes. (See “
Automating track
settings
” on page
124.)This technique is handy for emphasizing vocal or instrumental solos.
More Help topics
Applying effects in the Waveform Editor
” on page
62
Applying effects in the Multitrack Editor
” on page
63
Use effect presets
” on page
61
Chorus/Flanger effect
The Modulation
> Chorus/Flanger effect combines two popular delay-based effects. The Chorus option simulates
several voices or instruments played at once by adding multiple short delays with a small amount of feedback. The
result is lush, rich sound. Use this effect to enhance vocal tracks or add stereo spaciousness to mono audio.
The Flanger option creates a psychedelic, phase-shifted sound by mixing a varying, short delay with the original signal.
This effect was originally created by sending an identical audio signal to two reel-to-reel tape recorders, and
periodically pressing the flange of one reel to slow it down.
Chorus
Simulates several voices or instruments playing at once.
Flanger
Simulates the delayed, phase-shifted sound originally heard in psychedelic music.
Speed
Controls the rate at which the delay time cycles from zero to the maximum setting.
Width
Specifies the maximum amount of delay.
Intensity
Controls the ratio of original to processed audio.
Transience
Emphasizes transients, giving them a sharper, more distinct sound.