Alpine IVA D106 Owner's Manual - Page 13
Detaching and Attaching the Front Panel, Initial System Start-Up, Turning Power On or Off - parking brake
 |
UPC - 793276200594
View all Alpine IVA D106 manuals
Add to My Manuals
Save this manual to your list of manuals |
Page 13 highlights
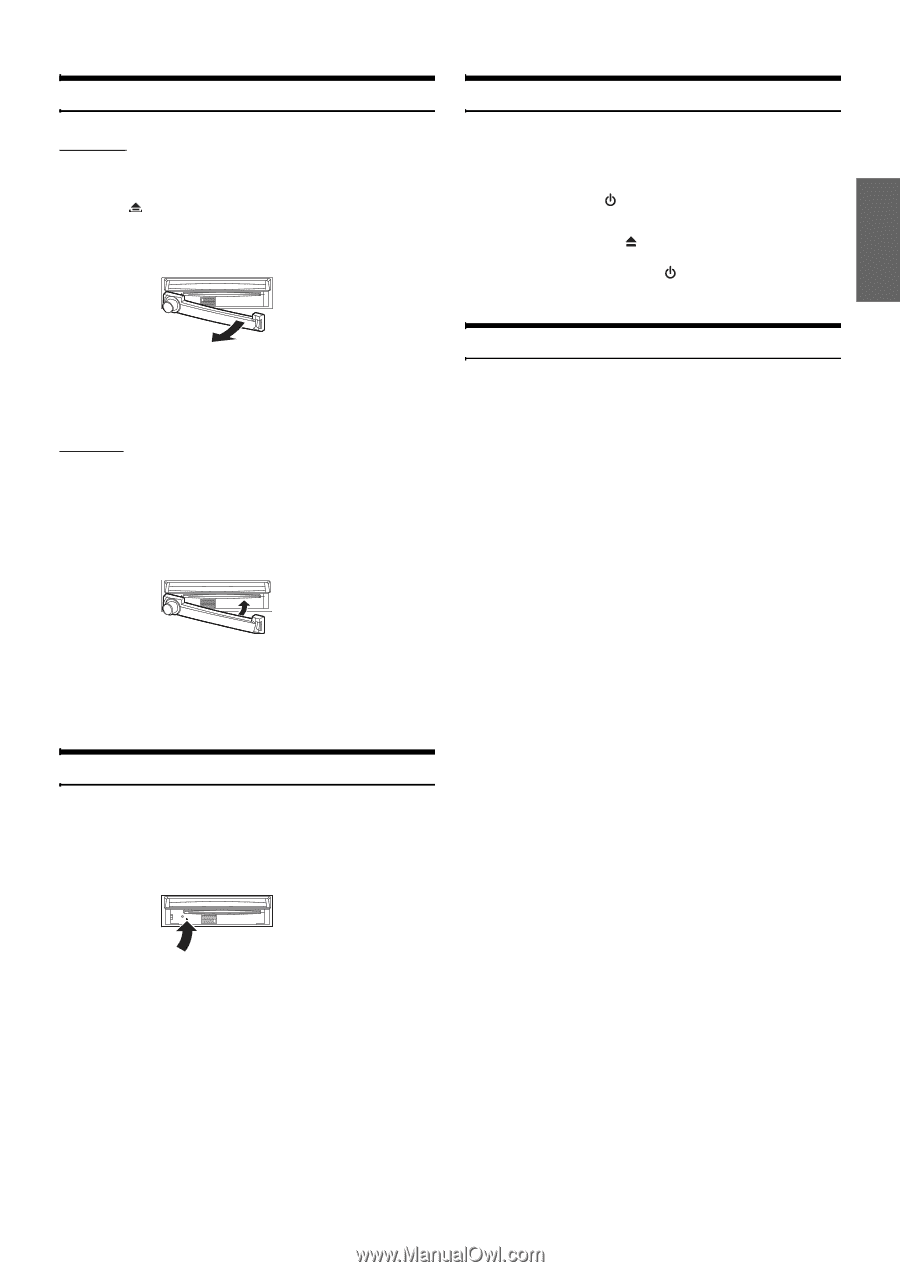
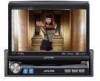
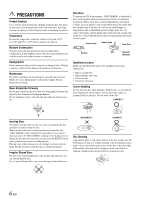
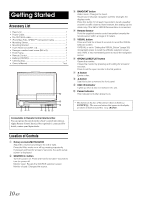
Detaching and Attaching the Front Panel Detaching 1 Turn off the unit power. 2 Press (Release) at the lower right side until the front panel pops out. 3 Grasp the right side of the front panel and pull it out. Turning Power On or Off Some of this unit's functions cannot be performed while the vehicle is in motion. Be sure to stop your vehicle in a safe location and apply the parking brake, before attempting these operations. 1 Press SOURCE/ to turn on the unit. • The unit can be turned on by pressing any button on the unit except OPEN/CLOSE/FLAT and (Eject). 2 Press and hold SOURCE/ for at least 2 seconds to turn off the unit. • The front panel may become hot in normal usage (especially the connector terminals on the back of the front panel). This is not a malfunction. • To protect the front panel, place it in the supplied carrying bag. Attaching 1 Insert the left side of the front panel into the main unit. Align the groove on the front panel with the projections on the main unit. 2 Push the right side of the front panel until it locks firmly into the main unit. • Before attaching the front panel, make sure that there is no dirt or dust on the connector terminals and no foreign object between the front panel and the main unit. • Attach the front panel carefully, holding the sides of the front panel to avoid pushing buttons by mistake. Initial System Start-Up Immediately after installing or applying power to the unit, it should be initialized. To do this, first, remove the detachable front panel. Behind the front panel, to the left of the connector, there is a small hole. Using a pencil or other pointed object, press the RESET switch mounted behind this hole to complete the initialization procedure. Opening/Closing the Monitor 1 Press OPEN. The monitor beeps 3 times and opens the monitor automatically. 2 Press and hold OPEN (CLOSE) for at least 2 seconds. The monitor beeps 3 times and closes the monitor automatically. • Opening/closing the monitor should never be performed manually. It may cause a malfunction. • The monitor's angle is set to 90 degrees at the factory. Depending on the car, the monitor may hit the dashboard when opened. The monitor's angle can be adjusted and stored in memory so that the monitor will not hit the dashboard when opening. For adjusting the monitor, refer to "Adjusting the Monitor Angle" on page 40. Even when the vehicle's battery power is removed, the adjusted monitor angle remains stored in memory. • The IVA-D106 is a precision device. With gentle handling, its unique capabilities can be enjoyed for a long time. • If the monitor touches anything while it is being opened (or closed), the monitor will stop opening (or closing) immediately. Should this occur, remove the obstacle and press and hold OPEN for at least 2 seconds again to lower the monitor. • When the movable monitor is opened, do not place any object on the monitor and be careful not to bump or apply any pressure to the monitor while it is open. This can cause damage to the mechanism. • In low ambient temperature conditions, the display may be dark for a short period of time immediately after the power is turned on. Once the LCD has warmed up, the display returns to normal. • For your safety, some operation of the unit cannot be performed while the vehicle is in motion. In this case, first stop the vehicle and engage the parking brake, then perform the operation. • Any of the buttons does not function while the monitor is closing by reset. 11-EN
-
 1
1 -
2
-
3
-
4
-
5
-
6
-
7
-
 8
8 -
 9
9 -
 10
10 -
 11
11 -
 12
12 -
 13
13 -
 14
14 -
 15
15 -
 16
16 -
 17
17 -
 18
18 -
19
-
20
-
21
-
22
-
23
-
24
-
25
-
26
-
27
-
28
-
29
-
30
-
31
-
32
-
33
-
34
-
35
-
36
-
37
-
38
-
39
-
40
-
41
-
42
-
43
-
44
-
45
-
46
-
47
-
48
-
49
-
50
-
51
-
52
-
53
-
54
-
55
-
56
-
57
-
58
-
59
-
60
-
61
-
62
-
63
-
64
-
65
-
66
-
67
-
68
-
69
-
70
-
71
-
72
-
73
-
74
-
75
-
76
-
77
-
78
-
79
-
80
-
81
-
82
-
83
-
84
-
85
-
86
-
87
-
88
-
89
-
90
-
91
-
92
-
93
-
94
-
95
-
96
-
97
-
98
-
99
-
100
-
101
-
102
-
103
-
104
-
105
-
106
-
107
-
108
-
109
-
110
-
111
-
112
-
113
-
114
-
115
-
116
-
117
-
118
-
119
-
120
-
121
-
122
-
123
-
124
-
125
-
126
-
127
-
128
-
129
-
130
-
131
-
132
-
133
-
134
-
135
-
136
-
137
-
138
-
139
-
140
-
141
-
142
-
143
-
144
-
145
-
146
-
147
-
148
-
149
-
150
-
151
-
152
-
153
-
154
-
155
-
156
-
157
-
158
-
159
-
160
-
161
-
162
-
163
-
164
-
165
-
166
-
167
-
168
-
169
-
170
-
171
-
172
-
173
-
174
-
175
-
176
-
177
-
178
-
179
-
180
-
181
-
182
-
183
-
184
-
185
-
186
-
187
-
188
-
189
-
190
-
191
-
192
-
193
-
194
-
195
-
196
-
197
-
198
-
199
-
200
-
201
-
202
-
203
-
204
-
205
-
206
-
207
-
208
-
209
-
210
-
211
-
212
-
213
-
214
-
215
-
216
-
217
-
218
-
219
-
220
-
221
-
222
-
223
-
224
-
225
-
226
-
227
-
228
-
229
-
230
-
231
-
232
-
233
-
234
-
235
-
236
-
237
-
238
-
239
-
240
-
241
-
242
-
243
-
244
-
245
-
246
-
247
-
248
-
249
-
250
-
251
-
252
-
253
-
254
-
255
-
256
-
257
-
258
-
259
-
260
-
261
-
262
-
263
-
264
-
265
-
266
 |
 |