Brother International DreamMaker„ XE VE2200 Users Manual - English - Page 160
Start Embroidering
 |
View all Brother International DreamMaker„ XE VE2200 manuals
Add to My Manuals
Save this manual to your list of manuals |
Page 160 highlights
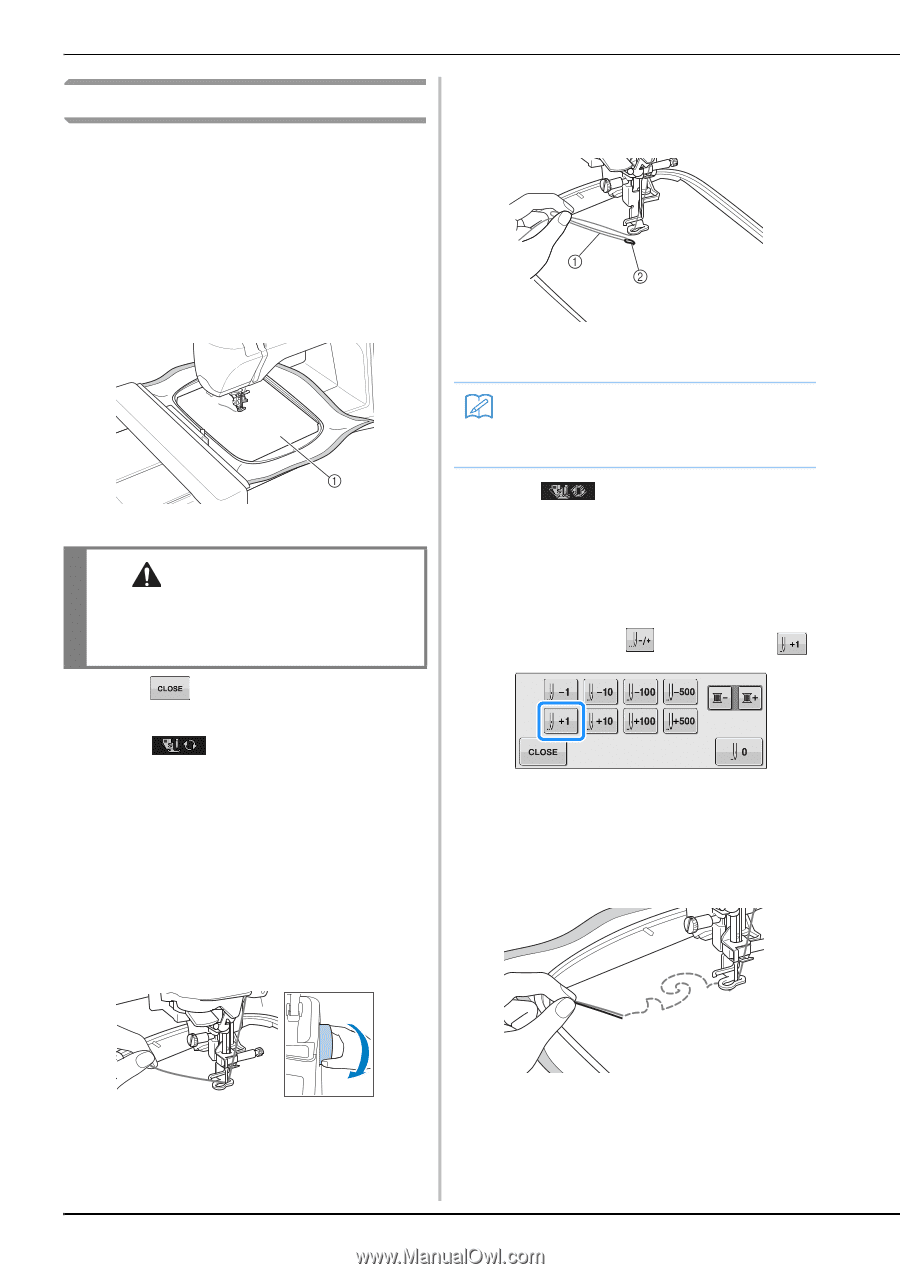
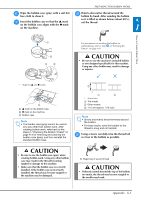
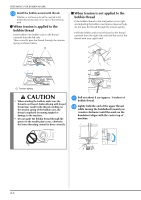
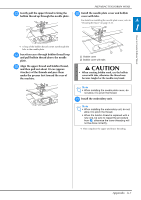
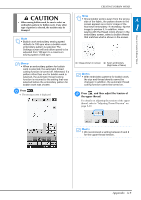
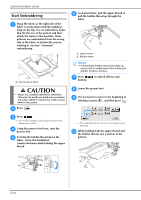
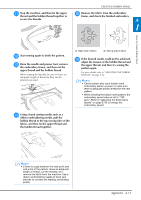
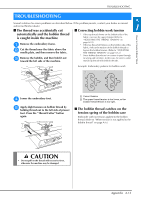
CREATING BOBBIN WORK Start Embroidering a Hoop the fabric so the right side of the fabric is facing down with the stabilizer lying on the top. Use an embroidery frame that fits the size of the pattern and then attach the frame to the machine. These patterns are embroidered from the wrong side of the fabric so technically you are working in "reverse" of normal embroidering. a Wrong side of fabric CAUTION • Always use a stabilizer material for embroidery. Otherwise, the needle may break and cause injuries. Not using a stabilizer material may result in a poor finish to your project. b Press . c Press . → The screen changes, and all keys and operation buttons are locked. d Using the presser presser foot. foot lever, raise the e To bring the bobbin thread above fabric, rotate the handwheel the counterclockwise while holding the upper thread. f As shown below, pull the upper thread pull the bobbin thread up through the to fabric. a Upper thread b Bobbin thread Memo • If the bobbin thread cannot be pulled up, use an awl to create small hole to help pull bobbin thread to surface. g Press buttons. to unlock all keys and h Lower the presser foot. i It is necessary to move to the beginning of stitching so press , and then press . → The embroidery frame moves to the beginning of stitching. j While holding both the upper thread and the bobbin thread, sew a section of the pattern. A-10
-
 1
1 -
2
-
3
-
4
-
5
-
6
-
7
-
8
-
9
-
10
-
11
-
12
-
13
-
14
-
15
-
16
-
17
-
18
-
19
-
20
-
21
-
22
-
23
-
24
-
25
-
26
-
27
-
28
-
29
-
30
-
31
-
32
-
33
-
34
-
35
-
36
-
37
-
38
-
39
-
40
-
41
-
42
-
43
-
44
-
45
-
46
-
47
-
48
-
49
-
50
-
51
-
52
-
53
-
54
-
55
-
56
-
57
-
58
-
59
-
60
-
61
-
62
-
63
-
64
-
65
-
66
-
67
-
68
-
69
-
70
-
71
-
72
-
73
-
74
-
75
-
76
-
77
-
78
-
79
-
80
-
81
-
82
-
83
-
84
-
85
-
86
-
87
-
88
-
89
-
90
-
91
-
92
-
93
-
94
-
95
-
96
-
97
-
98
-
99
-
100
-
101
-
102
-
103
-
104
-
105
-
106
-
107
-
108
-
109
-
110
-
111
-
112
-
113
-
114
-
115
-
116
-
117
-
118
-
119
-
120
-
121
-
122
-
123
-
124
-
125
-
126
-
127
-
128
-
129
-
130
-
131
-
132
-
133
-
134
-
135
-
136
-
137
-
138
-
139
-
140
-
141
-
142
-
143
-
144
-
145
-
146
-
147
-
148
-
149
-
150
-
151
-
152
-
153
-
154
-
 155
155 -
 156
156 -
 157
157 -
 158
158 -
 159
159 -
 160
160 -
 161
161 -
 162
162 -
 163
163 -
 164
164 -
 165
165 -
166
-
167
-
168
-
169
-
170
-
171
-
172
-
173
-
174
-
175
-
176
-
177
-
178
-
179
-
180
 |
 |