Brother International DreamMaker„ XE VE2200 Users Manual - English - Page 46
Embroidery foot W+ with LED
 |
View all Brother International DreamMaker„ XE VE2200 manuals
Add to My Manuals
Save this manual to your list of manuals |
Page 46 highlights
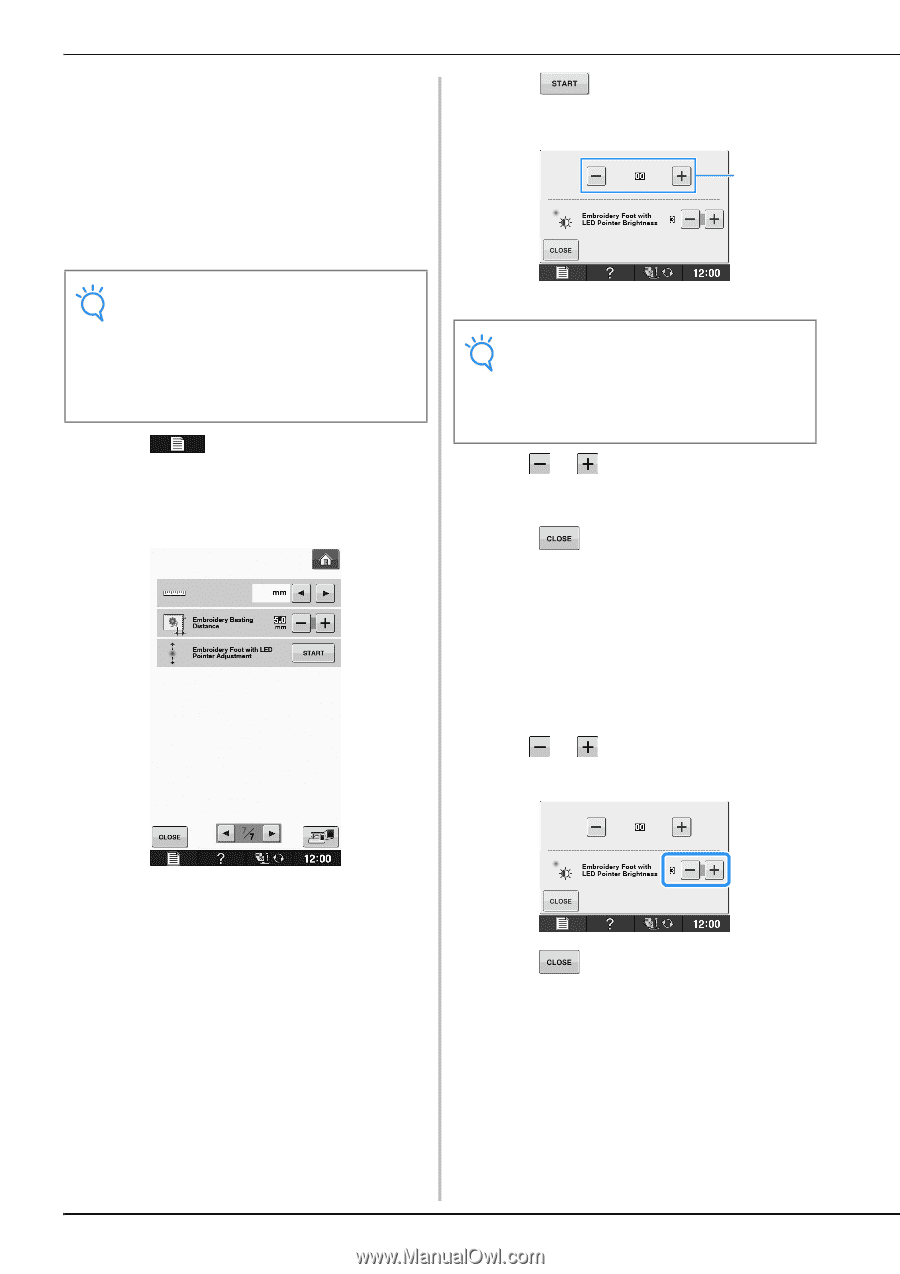
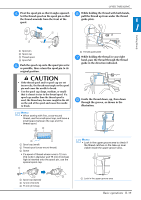
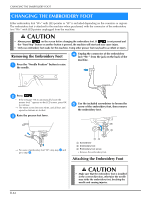
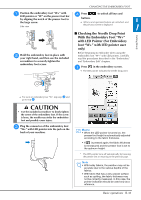
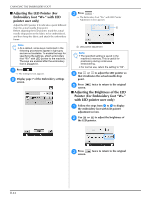
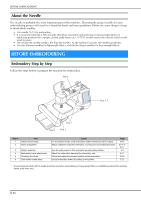
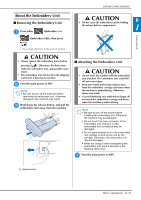
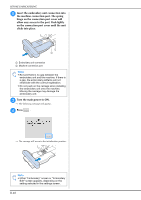
CHANGING THE EMBROIDERY FOOT ■ Adjusting the LED Pointer (For Embroidery foot "W+" with LED pointer user only) Adjust the LED pointer if it indicates a point different than the actual needle drop point. Before adjusting the LED pointer, mark the actual needle drop point on the fabric to be embroidered, and then hoop the fabric and attach the embroidery frame. Note • As a default, some keys mentioned in the following procedures appear in light gray and are not available. To enable the keys for specifying the settings, attach embroidery foot "W+" with LED pointer to the machine. The keys are enabled after the embroidery foot is plugged in. a Press . → The settings screen appears. b Display screen. page 7 of the Embroidery settings c Press . → The Embroidery Foot "W+" with LED Pointer Adjustment screen appears. a a LED pointer adjustment Note • The specified setting is saved in the machine's memory. This is useful for positioning during continuous embroidering. • For normal use, return the setting to "00". d Use that it or to adjust the LED pointer indicates the actual needle drop so point. e Press screen. twice to return to the original ■ Adjusting the Brightness of the LED Pointer (For Embroidery foot "W+" with LED pointer user only) a Follow the steps from a to d to display the embroidery foot with LED pointer adjustment screen. b Use or to the LED pointer. adjust the brightness of c Press screen. twice to return to the original B-44
-
 1
1 -
2
-
3
-
4
-
5
-
6
-
7
-
8
-
9
-
10
-
11
-
12
-
13
-
14
-
15
-
16
-
17
-
18
-
19
-
20
-
21
-
22
-
23
-
24
-
25
-
26
-
27
-
28
-
29
-
30
-
31
-
32
-
33
-
34
-
35
-
36
-
37
-
38
-
39
-
40
-
 41
41 -
 42
42 -
 43
43 -
 44
44 -
 45
45 -
 46
46 -
 47
47 -
 48
48 -
 49
49 -
 50
50 -
 51
51 -
52
-
53
-
54
-
55
-
56
-
57
-
58
-
59
-
60
-
61
-
62
-
63
-
64
-
65
-
66
-
67
-
68
-
69
-
70
-
71
-
72
-
73
-
74
-
75
-
76
-
77
-
78
-
79
-
80
-
81
-
82
-
83
-
84
-
85
-
86
-
87
-
88
-
89
-
90
-
91
-
92
-
93
-
94
-
95
-
96
-
97
-
98
-
99
-
100
-
101
-
102
-
103
-
104
-
105
-
106
-
107
-
108
-
109
-
110
-
111
-
112
-
113
-
114
-
115
-
116
-
117
-
118
-
119
-
120
-
121
-
122
-
123
-
124
-
125
-
126
-
127
-
128
-
129
-
130
-
131
-
132
-
133
-
134
-
135
-
136
-
137
-
138
-
139
-
140
-
141
-
142
-
143
-
144
-
145
-
146
-
147
-
148
-
149
-
150
-
151
-
152
-
153
-
154
-
155
-
156
-
157
-
158
-
159
-
160
-
161
-
162
-
163
-
164
-
165
-
166
-
167
-
168
-
169
-
170
-
171
-
172
-
173
-
174
-
175
-
176
-
177
-
178
-
179
-
180
 |
 |