Brother International DreamMaker„ XE VE2200 Users Manual - English - Page 34
onto the spool pin as far as possible
 |
View all Brother International DreamMaker„ XE VE2200 manuals
Add to My Manuals
Save this manual to your list of manuals |
Page 34 highlights
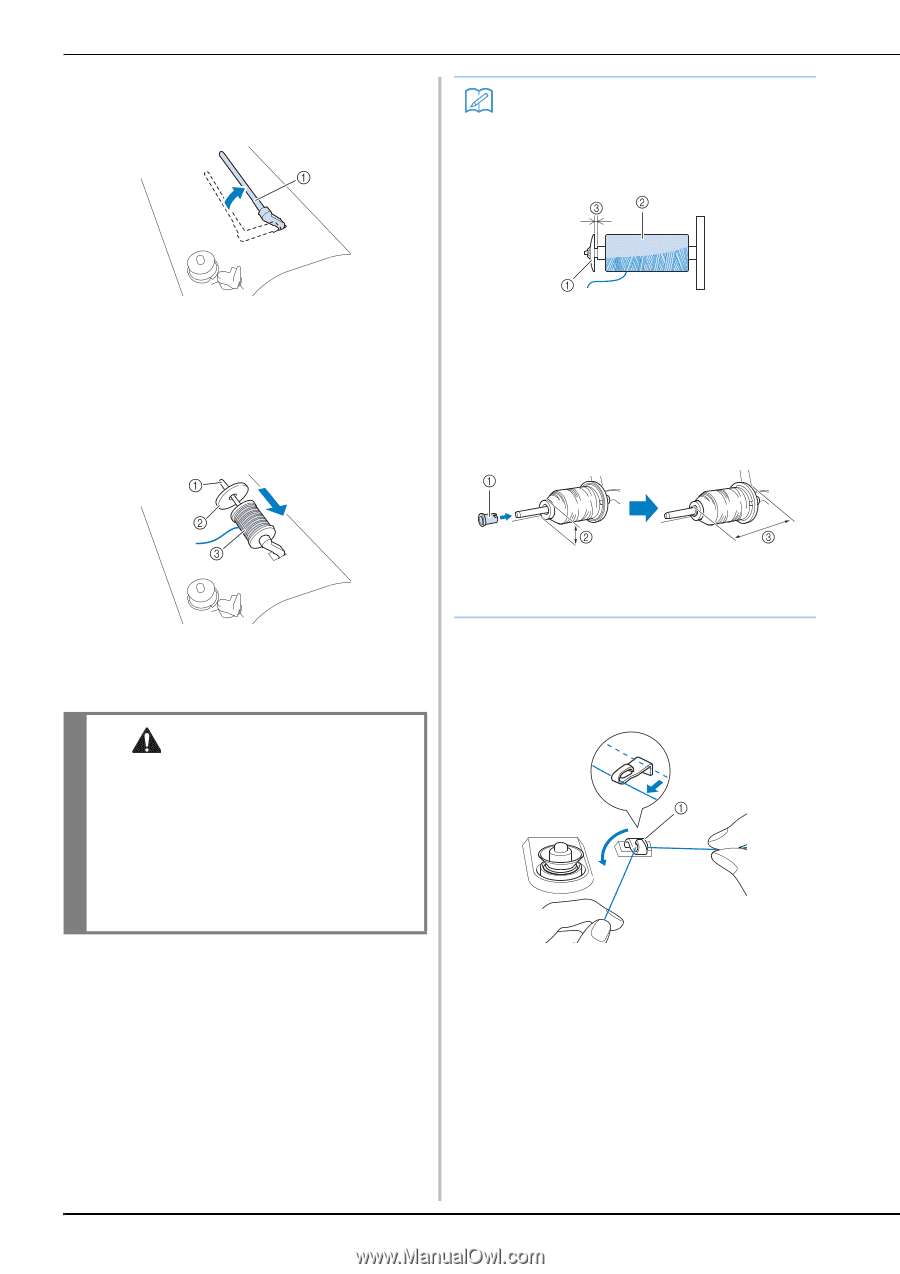
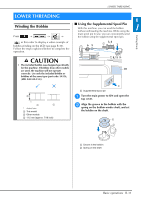
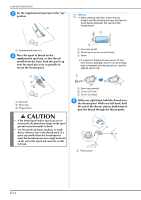
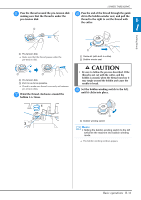
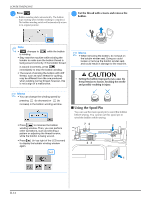
LOWER THREADING c Set the supplemental position. spool pin in the "up" Memo • When sewing with fine, cross-wound thread, use the small spool cap, and leave a small space between the cap and the thread spool. a Supplemental spool pin d Place the spool of thread on the supplemental spool pin, so that thread unrolls from the front. Push the spool cap onto the spool pin as far as possible to secure the thread spool. a Spool cap (small) b Thread spool (cross-wound thread) c Space • If a spool of thread whose core is 12 mm (1/2 inch) in diameter and 75 mm (3 inches) high is inserted onto the spool pin, use the special spool cap. a Spool pin b Spool cap c Thread spool CAUTION • If the thread spool and/or spool cap are set incorrectly, the thread may tangle on the spool pin and cause the needle to break. • Use the spool cap (large, medium, or small) that is closest in size to the thread spool. If a spool cap smaller than the thread spool is used, the thread may become caught in the slit on the end of the spool and cause the needle to break. a Spool cap (special) b 12 mm (1/2 inch) c 75 mm (3 inches) e With your right hand, hold the thread the thread spool. With your left hand, near hold the end of the thread, and use both hands to pass the thread through the thread guide. a Thread guide B-32
-
 1
1 -
2
-
3
-
4
-
5
-
6
-
7
-
8
-
9
-
10
-
11
-
12
-
13
-
14
-
15
-
16
-
17
-
18
-
19
-
20
-
21
-
22
-
23
-
24
-
25
-
26
-
27
-
28
-
 29
29 -
 30
30 -
 31
31 -
 32
32 -
 33
33 -
 34
34 -
 35
35 -
 36
36 -
 37
37 -
 38
38 -
 39
39 -
40
-
41
-
42
-
43
-
44
-
45
-
46
-
47
-
48
-
49
-
50
-
51
-
52
-
53
-
54
-
55
-
56
-
57
-
58
-
59
-
60
-
61
-
62
-
63
-
64
-
65
-
66
-
67
-
68
-
69
-
70
-
71
-
72
-
73
-
74
-
75
-
76
-
77
-
78
-
79
-
80
-
81
-
82
-
83
-
84
-
85
-
86
-
87
-
88
-
89
-
90
-
91
-
92
-
93
-
94
-
95
-
96
-
97
-
98
-
99
-
100
-
101
-
102
-
103
-
104
-
105
-
106
-
107
-
108
-
109
-
110
-
111
-
112
-
113
-
114
-
115
-
116
-
117
-
118
-
119
-
120
-
121
-
122
-
123
-
124
-
125
-
126
-
127
-
128
-
129
-
130
-
131
-
132
-
133
-
134
-
135
-
136
-
137
-
138
-
139
-
140
-
141
-
142
-
143
-
144
-
145
-
146
-
147
-
148
-
149
-
150
-
151
-
152
-
153
-
154
-
155
-
156
-
157
-
158
-
159
-
160
-
161
-
162
-
163
-
164
-
165
-
166
-
167
-
168
-
169
-
170
-
171
-
172
-
173
-
174
-
175
-
176
-
177
-
178
-
179
-
180
 |
 |