Brother International DreamMaker„ XE VE2200 Users Manual - English - Page 55
Using the Sensor Pen Holder
 |
View all Brother International DreamMaker„ XE VE2200 manuals
Add to My Manuals
Save this manual to your list of manuals |
Page 55 highlights
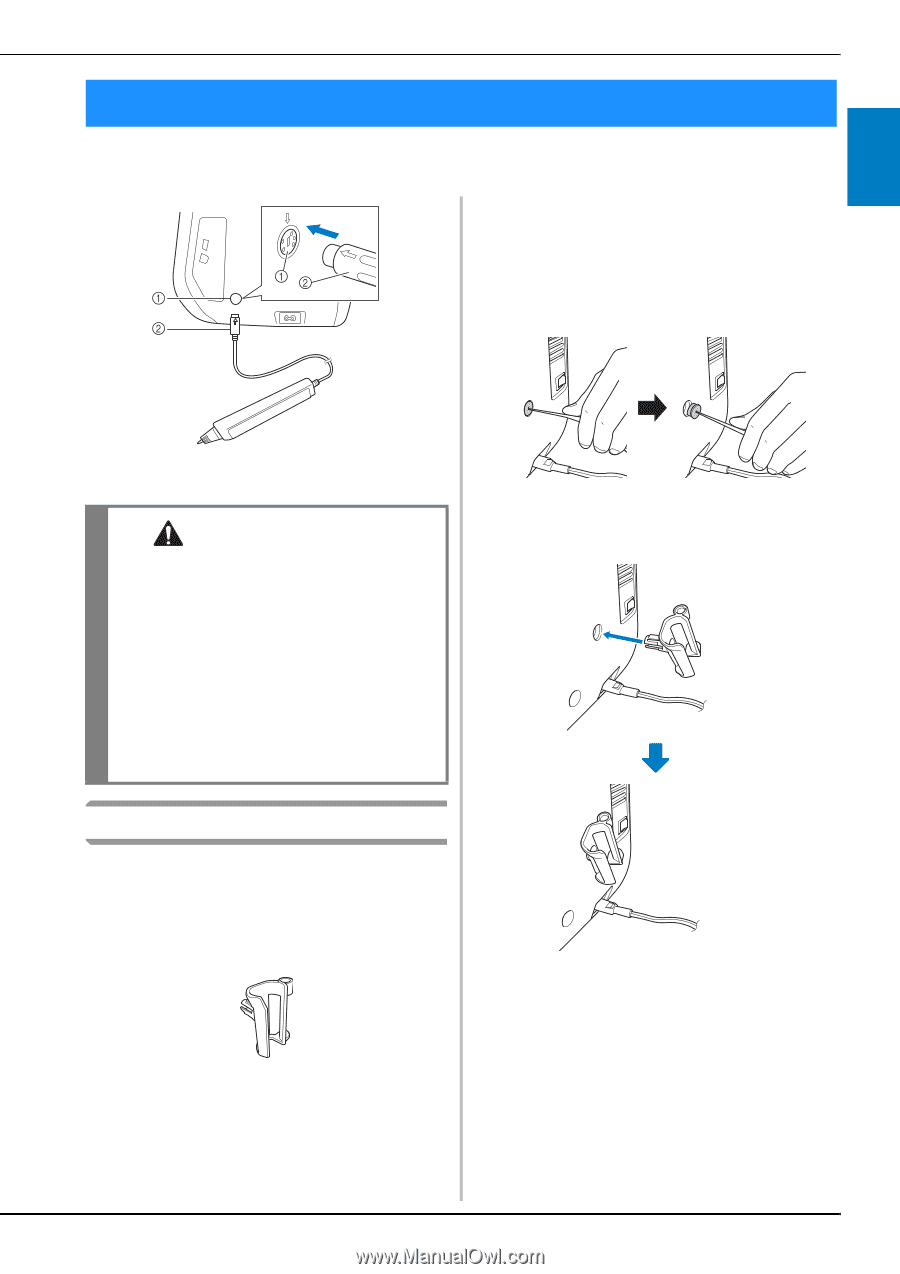
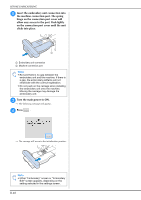
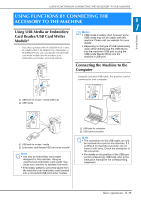
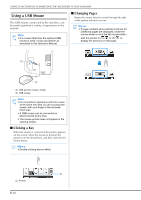
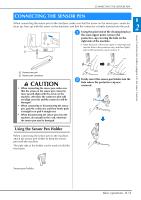
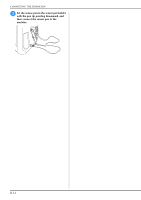
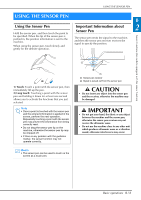
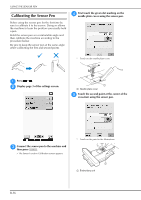
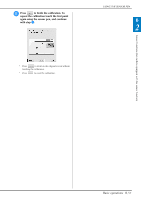
CONNECTING THE SENSOR PEN CONNECTING THE SENSOR PEN B When connecting the sensor pen to the machine, make sure that the arrow on the sensor pen connector faces up, lines up with the arrow on the machine, and that the connector is firmly inserted into the jack. 2 a Using the point end of the cleaning brush or the seam ripper point, remove the protective cap covering the hole on the right side of the machine. → Insert the point of the seam ripper or cleaning brush into the hole in the protective cap, and then lightly pull out the protective cap to remove it. Sensor Functions (For models equipped with the sensor function) a Sensor pen jack b Sensor pen connector CAUTION • When connecting the sensor pen, make sure that the arrow on the sensor pen connector faces up and aligns with the arrow on the machine, otherwise the connector pins will not align correctly and the connector will be damaged. • When connecting or disconnecting the sensor pen, grab the connector, and then slowly push it straight in or pull it straight out. • When disconnecting the sensor pen from the machine, do not pull on the cord, otherwise the sensor pen may be damaged. b Firmly insert the sensor pen holder hole where the protective cap was into the removed. Using the Sensor Pen Holder When connecting the sensor pen to the machine, attach the sensor pen holder to keep the sensor pen with the machine. The right side of the holder can be used to hold the touch pen. Sensor pen holder Basic operations B-53
-
 1
1 -
2
-
3
-
4
-
5
-
6
-
7
-
8
-
9
-
10
-
11
-
12
-
13
-
14
-
15
-
16
-
17
-
18
-
19
-
20
-
21
-
22
-
23
-
24
-
25
-
26
-
27
-
28
-
29
-
30
-
31
-
32
-
33
-
34
-
35
-
36
-
37
-
38
-
39
-
40
-
41
-
42
-
43
-
44
-
45
-
46
-
47
-
48
-
49
-
 50
50 -
 51
51 -
 52
52 -
 53
53 -
 54
54 -
 55
55 -
 56
56 -
 57
57 -
 58
58 -
 59
59 -
 60
60 -
61
-
62
-
63
-
64
-
65
-
66
-
67
-
68
-
69
-
70
-
71
-
72
-
73
-
74
-
75
-
76
-
77
-
78
-
79
-
80
-
81
-
82
-
83
-
84
-
85
-
86
-
87
-
88
-
89
-
90
-
91
-
92
-
93
-
94
-
95
-
96
-
97
-
98
-
99
-
100
-
101
-
102
-
103
-
104
-
105
-
106
-
107
-
108
-
109
-
110
-
111
-
112
-
113
-
114
-
115
-
116
-
117
-
118
-
119
-
120
-
121
-
122
-
123
-
124
-
125
-
126
-
127
-
128
-
129
-
130
-
131
-
132
-
133
-
134
-
135
-
136
-
137
-
138
-
139
-
140
-
141
-
142
-
143
-
144
-
145
-
146
-
147
-
148
-
149
-
150
-
151
-
152
-
153
-
154
-
155
-
156
-
157
-
158
-
159
-
160
-
161
-
162
-
163
-
164
-
165
-
166
-
167
-
168
-
169
-
170
-
171
-
172
-
173
-
174
-
175
-
176
-
177
-
178
-
179
-
180
 |
 |