Brother International DreamMaker„ XE VE2200 Users Manual - English - Page 86
Sewing Embroidery Patterns
 |
View all Brother International DreamMaker„ XE VE2200 manuals
Add to My Manuals
Save this manual to your list of manuals |
Page 86 highlights
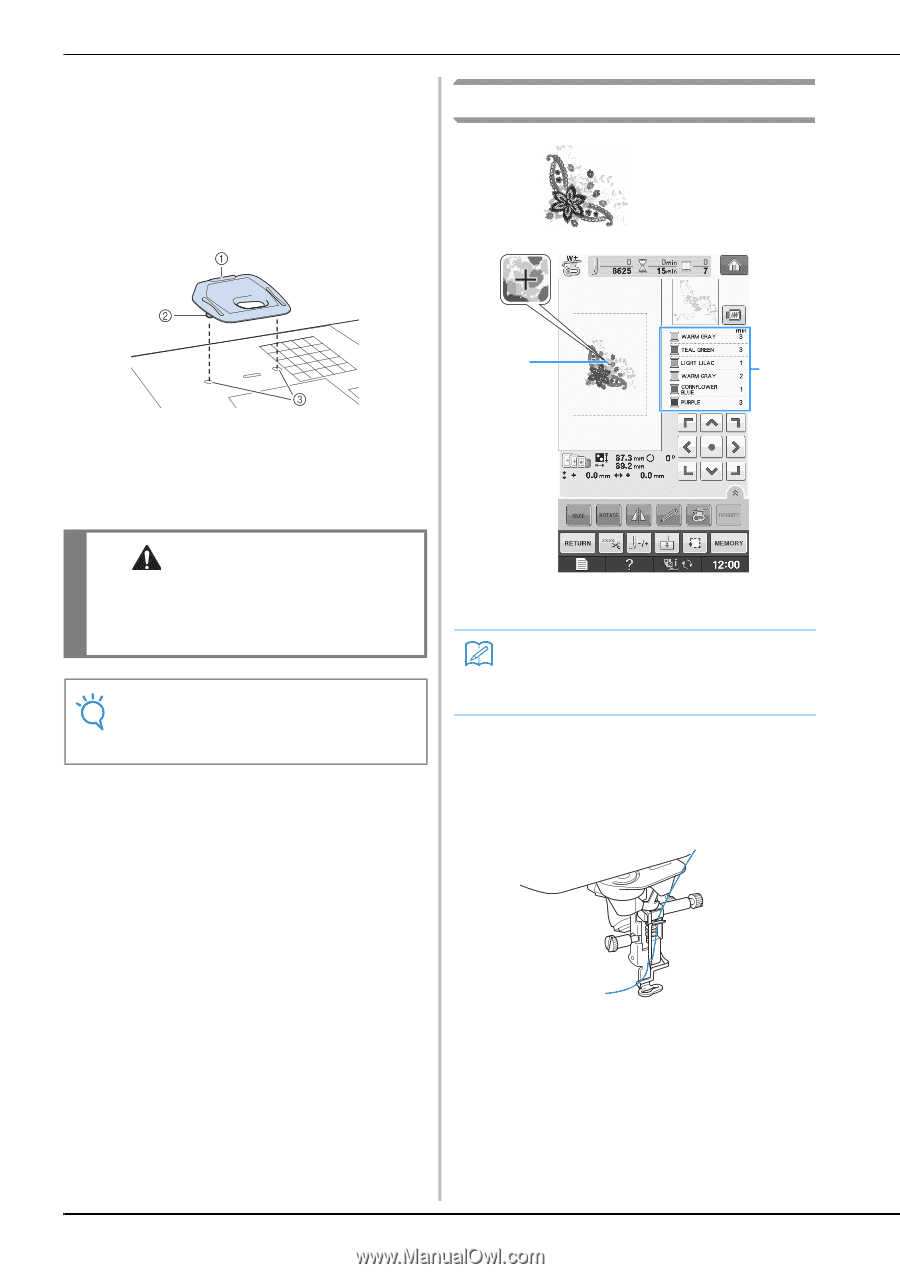
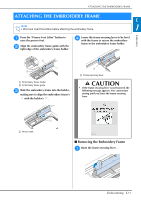
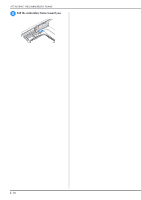
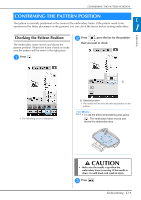
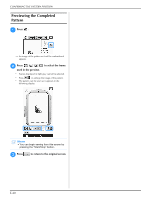
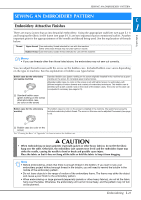
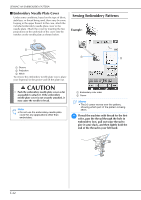
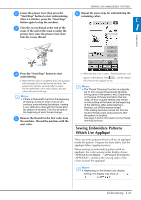
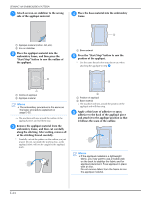
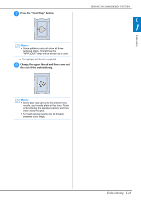
SEWING AN EMBROIDERY PATTERN ■ Embroidery Needle Plate Cover Under some conditions, based on the type of fabric, stabilizer, or thread being used, there may be some looping in the upper thread. In this case, attach the included embroidery needle plate cover to the needle plate. Attach the cover by inserting the two projections on the underside of the cover into the notches on the needle plate as shown below. Sewing Embroidery Patterns Example: b a a Groove b Projection c Notch To remove the embroidery needle plate cover, place your fingernail in the groove and lift the plate out. CAUTION • Push the embroidery needle plate cover as far as possible to attach it. If the embroidery needle plate cover is not securely attached, it may cause the needle to break. Note • Do not use the embroidery needle plate cover for any applications other than embroidery. a Embroidery color order b Cursor Memo • The [+] cursor moves over the pattern, showing which part of the pattern is being sewn. a Thread the machine with thread for the first color, pass the thread through the hole in embroidery foot, pull out some thread to give it some slack, and then lightly hold the end of the thread in your left hand. E-22
-
 1
1 -
2
-
3
-
4
-
5
-
6
-
7
-
8
-
9
-
10
-
11
-
12
-
13
-
14
-
15
-
16
-
17
-
18
-
19
-
20
-
21
-
22
-
23
-
24
-
25
-
26
-
27
-
28
-
29
-
30
-
31
-
32
-
33
-
34
-
35
-
36
-
37
-
38
-
39
-
40
-
41
-
42
-
43
-
44
-
45
-
46
-
47
-
48
-
49
-
50
-
51
-
52
-
53
-
54
-
55
-
56
-
57
-
58
-
59
-
60
-
61
-
62
-
63
-
64
-
65
-
66
-
67
-
68
-
69
-
70
-
71
-
72
-
73
-
74
-
75
-
76
-
77
-
78
-
79
-
80
-
 81
81 -
 82
82 -
 83
83 -
 84
84 -
 85
85 -
 86
86 -
 87
87 -
 88
88 -
 89
89 -
 90
90 -
 91
91 -
92
-
93
-
94
-
95
-
96
-
97
-
98
-
99
-
100
-
101
-
102
-
103
-
104
-
105
-
106
-
107
-
108
-
109
-
110
-
111
-
112
-
113
-
114
-
115
-
116
-
117
-
118
-
119
-
120
-
121
-
122
-
123
-
124
-
125
-
126
-
127
-
128
-
129
-
130
-
131
-
132
-
133
-
134
-
135
-
136
-
137
-
138
-
139
-
140
-
141
-
142
-
143
-
144
-
145
-
146
-
147
-
148
-
149
-
150
-
151
-
152
-
153
-
154
-
155
-
156
-
157
-
158
-
159
-
160
-
161
-
162
-
163
-
164
-
165
-
166
-
167
-
168
-
169
-
170
-
171
-
172
-
173
-
174
-
175
-
176
-
177
-
178
-
179
-
180
 |
 |