Brother International DreamMaker„ XE VE2200 Users Manual - English - Page 18

Basic operations

Page 18 highlights

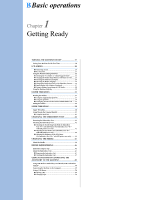
BBasic operations 1 Chapter Getting Ready TURNING THE MACHINE ON/OFF 17 Setting Your Machine for the First Time 18 LCD SCREEN 20 ■ Home Page Screen 20 ■ Key Functions 21 Using the Machine Setting Mode Key 22 ■ Selecting the "Eco Mode" or "Shutoff Support Mode 25 ■ Changing the Pointer Shape When a USB Mouse Is Used ........ 25 ■ Selecting the Initial Screen Display 25 ■ Choosing the Display Language 26 ■ Changing the Background Colors of the Embroidery Patterns....... 26 ■ Specifying the Size of Pattern Thumbnails 27 ■ Saving a Settings Screen Image to USB Media 28 Using the Machine Help Key 29 LOWER THREADING 31 Winding the Bobbin 31 ■ Using the Supplemental Spool Pin 31 ■ Using the Spool Pin 34 ■ Untangling Thread from Beneath the Bobbin Winder Seat ...... 35 Setting the Bobbin 36 UPPER THREADING 38 Upper Threading 38 Using Threads that Unwind Quickly 41 ■ Using the Spool Net 41 CHANGING THE EMBROIDERY FOOT 42 Removing the Embroidery Foot 42 Attaching the Embroidery Foot 42 ■ Checking the Needle Drop Point With the Embroidery Foot "W+" with LED Pointer (For Embroidery foot "W+" with LED pointer user only 43 ■ Adjusting the LED Pointer (For Embroidery foot "W+" with LED pointer user only 44 ■ Adjusting the Brightness of the LED Pointer (For Embroidery foot "W+" with LED pointer user only) ......... 44 CHANGING THE NEEDLE 45 About the Needle 46 BEFORE EMBROIDERING 46 Embroidery Step by Step 46 About the Embroidery Unit 47 ■ Removing the Embroidery Unit 47 ■ Attaching the Embroidery Unit 47 USING FUNCTIONS BY CONNECTING THE ACCESSORY TO THE MACHINE 49 Using USB Media or Embroidery Card Reader/USB Card Writer Module 49 Connecting the Machine to the Computer 49 Using a USB Mouse 50 ■ Clicking a Key 50 ■ Changing Pages 50

  • 1
  • 2
  • 3
  • 4
  • 5
  • 6
  • 7
  • 8
  • 9
  • 10
  • 11
  • 12
  • 13
  • 14
  • 15
  • 16
  • 17
  • 18
  • 19
  • 20
  • 21
  • 22
  • 23
  • 24
  • 25
  • 26
  • 27
  • 28
  • 29
  • 30
  • 31
  • 32
  • 33
  • 34
  • 35
  • 36
  • 37
  • 38
  • 39
  • 40
  • 41
  • 42
  • 43
  • 44
  • 45
  • 46
  • 47
  • 48
  • 49
  • 50
  • 51
  • 52
  • 53
  • 54
  • 55
  • 56
  • 57
  • 58
  • 59
  • 60
  • 61
  • 62
  • 63
  • 64
  • 65
  • 66
  • 67
  • 68
  • 69
  • 70
  • 71
  • 72
  • 73
  • 74
  • 75
  • 76
  • 77
  • 78
  • 79
  • 80
  • 81
  • 82
  • 83
  • 84
  • 85
  • 86
  • 87
  • 88
  • 89
  • 90
  • 91
  • 92
  • 93
  • 94
  • 95
  • 96
  • 97
  • 98
  • 99
  • 100
  • 101
  • 102
  • 103
  • 104
  • 105
  • 106
  • 107
  • 108
  • 109
  • 110
  • 111
  • 112
  • 113
  • 114
  • 115
  • 116
  • 117
  • 118
  • 119
  • 120
  • 121
  • 122
  • 123
  • 124
  • 125
  • 126
  • 127
  • 128
  • 129
  • 130
  • 131
  • 132
  • 133
  • 134
  • 135
  • 136
  • 137
  • 138
  • 139
  • 140
  • 141
  • 142
  • 143
  • 144
  • 145
  • 146
  • 147
  • 148
  • 149
  • 150
  • 151
  • 152
  • 153
  • 154
  • 155
  • 156
  • 157
  • 158
  • 159
  • 160
  • 161
  • 162
  • 163
  • 164
  • 165
  • 166
  • 167
  • 168
  • 169
  • 170
  • 171
  • 172
  • 173
  • 174
  • 175
  • 176
  • 177
  • 178
  • 179
  • 180

Chapter
1
B
Basic operations
Getting Ready
TURNING THE MACHINE ON/OFF
........................
17
Setting Your Machine for the First Time
...................................
18
LCD SCREEN
............................................................
20
Home Page Screen
...................................................................
20
Key Functions
...........................................................................
21
Using the Machine Setting Mode Key
......................................
22
Selecting the “Eco Mode” or “Shutoff Support Mode”
.............
25
Changing the Pointer Shape When a USB Mouse Is Used
........
25
Selecting the Initial Screen Display
..........................................
25
Choosing the Display Language
................................................
26
Changing the Background Colors of the Embroidery Patterns
.......
26
Specifying the Size of Pattern Thumbnails
...............................
27
Saving a Settings Screen Image to USB Media
..........................
28
Using the Machine Help Key
...................................................
29
LOWER THREADING
..............................................
31
Winding the Bobbin
..................................................................
31
Using the Supplemental Spool Pin
............................................
31
Using the Spool Pin
..................................................................
34
Untangling Thread from Beneath the Bobbin Winder Seat
......
35
Setting the Bobbin
....................................................................
36
UPPER THREADING
................................................
38
Upper Threading
.......................................................................
38
Using Threads that Unwind Quickly
.........................................
41
Using the Spool Net
.................................................................
41
CHANGING THE EMBROIDERY FOOT
...................
42
Removing the Embroidery Foot
.................................................
42
Attaching the Embroidery Foot
.................................................
42
Checking the Needle Drop Point With the Embroidery
Foot “W+” with LED Pointer (For Embroidery foot “W+”
with LED pointer user only)
.....................................................
43
Adjusting the LED Pointer (For Embroidery foot “W+”
with LED pointer user only)
.....................................................
44
Adjusting the Brightness of the LED Pointer
(For Embroidery foot “W+” with LED pointer user only)
.........
44
CHANGING THE NEEDLE
.......................................
45
About the Needle
......................................................................
46
BEFORE EMBROIDERING
........................................
46
Embroidery Step by Step
..........................................................
46
About the Embroidery Unit
.......................................................
47
Removing the Embroidery Unit
...............................................
47
Attaching the Embroidery Unit
................................................
47
USING FUNCTIONS BY CONNECTING THE
ACCESSORY TO THE MACHINE
.............................
49
Using USB Media or Embroidery Card Reader/USB Card Writer
Module*
....................................................................................
49
Connecting the Machine to the Computer
................................
49
Using a USB Mouse
..................................................................
50
Clicking a Key
..........................................................................
50
Changing Pages
........................................................................
50