Brother International DreamMaker„ XE VE2200 Users Manual - English - Page 97
Adjusting the Embroidery Speed
 |
View all Brother International DreamMaker„ XE VE2200 manuals
Add to My Manuals
Save this manual to your list of manuals |
Page 97 highlights
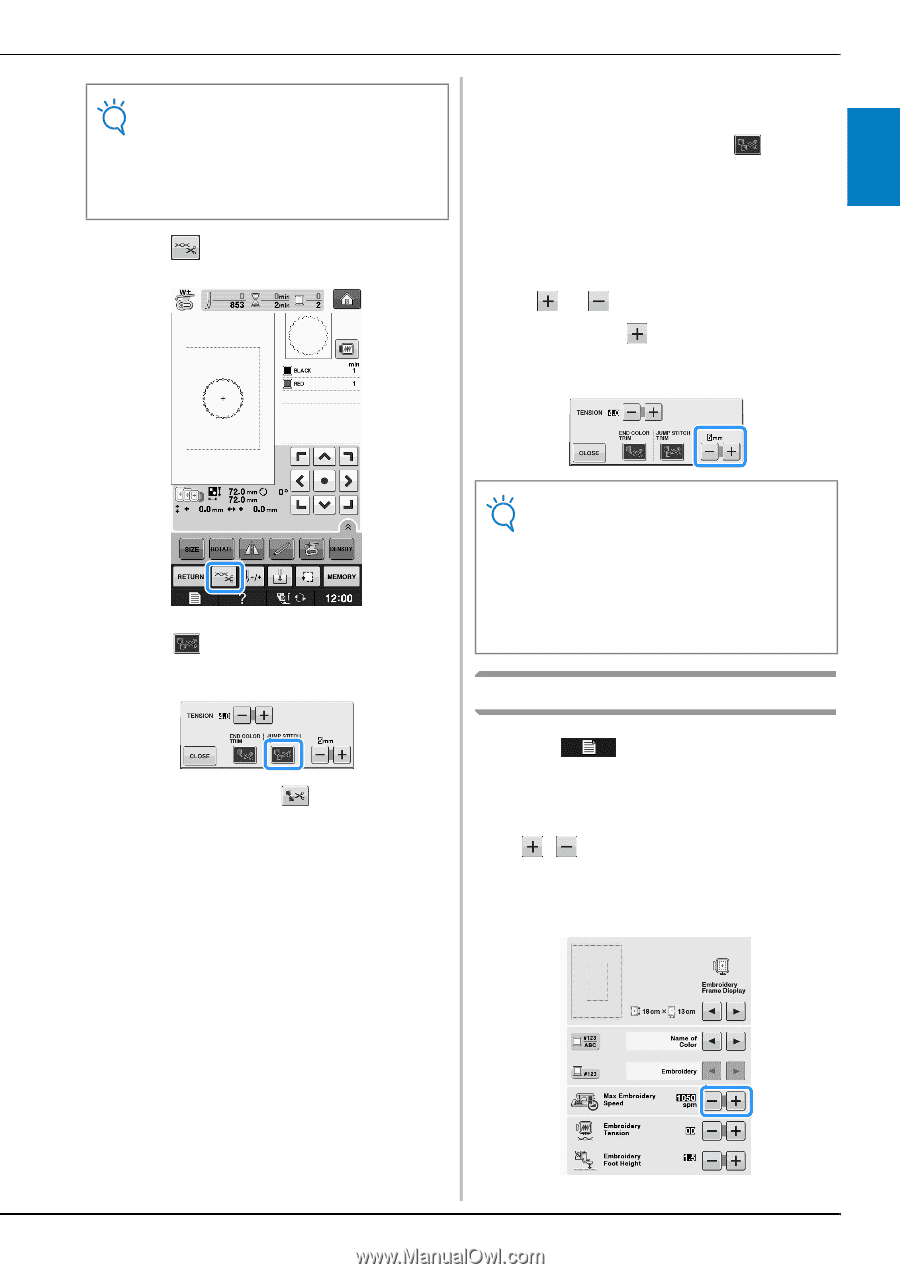
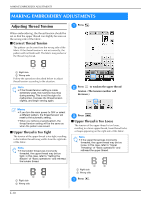
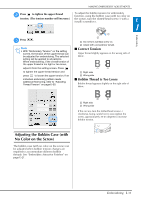
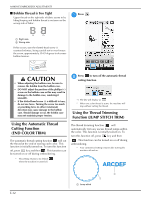
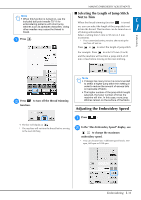
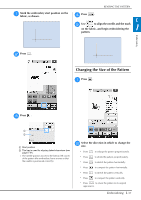
Note • When this function is turned on, use the included ball point needle 75/11 for embroidering patterns with short jump stitches such as alphabet characters. Using other needles may cause the thread to break. a Press . MAKING EMBROIDERY ADJUSTMENTS ■ Selecting the Length of Jump Stitch Not to Trim E When the thread trimming function is turned on, you can select the length of the jump stitch not to trim the thread. This function can be turned on or 1 off during embroidering. Select a setting from 5 mm to 50 mm in 5 mm increments. * Your customized setting remains after turning the machine off and on. Embroidery Press or to select the length of jump stitch. For example: Press to select 25 mm (1 inch) and the machine will not trim a jump stitch of 25 mm or less before moving to the next stitching. b Press to turn off the thread trimming function. Note • If design has many trims it is recommended to select a higher jump stitch trim setting in order to reduce the amount of excess tails on backside of fabric. • The higher number of the jump stitch length selected, the fewer number of times the machine will trim. In this case, more jump stitches remain on the surface of the fabric. Adjusting the Embroidery Speed → The key will display as * The machine will not trim the thread before moving to the next stitching. a Press . b In the "Max Embroidery Speed" display, use to change the maximum embroidery speed. * You can choose from 3 different speed levels, 350 spm, 600 spm or 1050 spm. Embroidering E-33
-
 1
1 -
2
-
3
-
4
-
5
-
6
-
7
-
8
-
9
-
10
-
11
-
12
-
13
-
14
-
15
-
16
-
17
-
18
-
19
-
20
-
21
-
22
-
23
-
24
-
25
-
26
-
27
-
28
-
29
-
30
-
31
-
32
-
33
-
34
-
35
-
36
-
37
-
38
-
39
-
40
-
41
-
42
-
43
-
44
-
45
-
46
-
47
-
48
-
49
-
50
-
51
-
52
-
53
-
54
-
55
-
56
-
57
-
58
-
59
-
60
-
61
-
62
-
63
-
64
-
65
-
66
-
67
-
68
-
69
-
70
-
71
-
72
-
73
-
74
-
75
-
76
-
77
-
78
-
79
-
80
-
81
-
82
-
83
-
84
-
85
-
86
-
87
-
88
-
89
-
90
-
91
-
 92
92 -
 93
93 -
 94
94 -
 95
95 -
 96
96 -
 97
97 -
 98
98 -
 99
99 -
 100
100 -
 101
101 -
 102
102 -
103
-
104
-
105
-
106
-
107
-
108
-
109
-
110
-
111
-
112
-
113
-
114
-
115
-
116
-
117
-
118
-
119
-
120
-
121
-
122
-
123
-
124
-
125
-
126
-
127
-
128
-
129
-
130
-
131
-
132
-
133
-
134
-
135
-
136
-
137
-
138
-
139
-
140
-
141
-
142
-
143
-
144
-
145
-
146
-
147
-
148
-
149
-
150
-
151
-
152
-
153
-
154
-
155
-
156
-
157
-
158
-
159
-
160
-
161
-
162
-
163
-
164
-
165
-
166
-
167
-
168
-
169
-
170
-
171
-
172
-
173
-
174
-
175
-
176
-
177
-
178
-
179
-
180
 |
 |