Brother International DreamMaker„ XE VE2200 Users Manual - English - Page 60
Using Sensor Functions
 |
View all Brother International DreamMaker„ XE VE2200 manuals
Add to My Manuals
Save this manual to your list of manuals |
Page 60 highlights
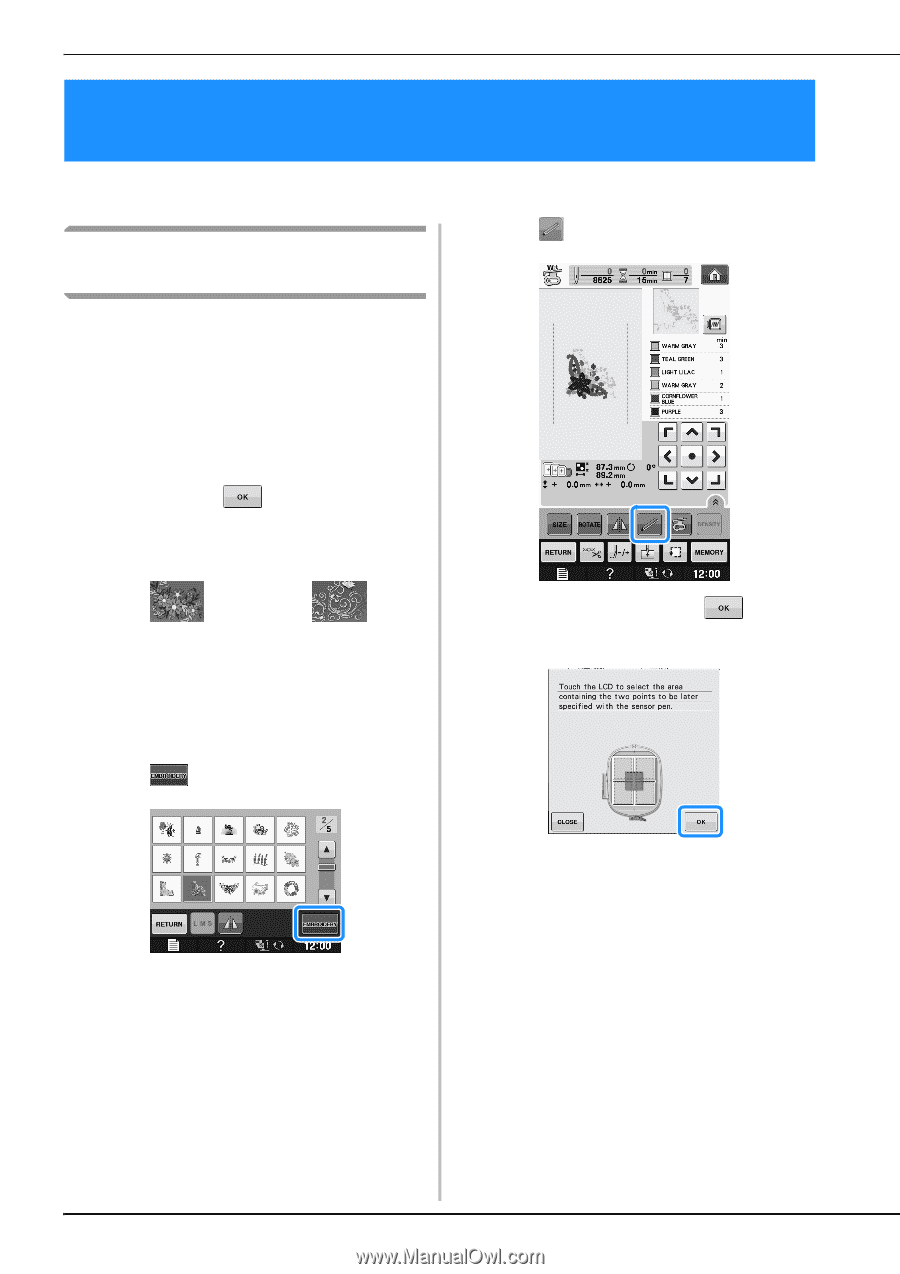
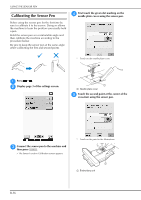
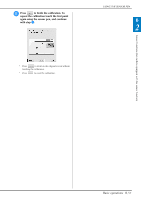
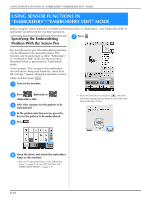
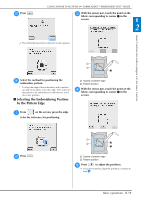
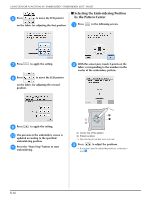
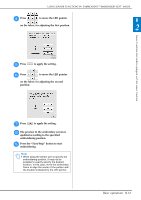
USING SENSOR FUNCTIONS IN "EMBROIDERY"/"EMBROIDERY EDIT" MODE USING SENSOR FUNCTIONS IN "EMBROIDERY"/"EMBROIDERY EDIT" MODE Before using the sensor functions, carefully read the procedure in "Embroidery" and "Embroidery Edit" to familiarize yourself with the machine operations. Specifying the Embroidering Position With the Sensor Pen g Press . By using the sensor pen, the embroidering position can be adjusted to the desired location. This function can be performed in either "Embroidery" or "Embroidery Edit" mode, but the procedure described below is performed in "Embroidery" mode. If the message "The carriage of the embroidery unit will move. Keep your hands etc. away from the carriage." appears during the operation, ensure safety, and then press . a Turn on the machine. b Press (Embroidery)/ (Embroidery Edit). c Select the category embroidered. for the pattern to be d In the pattern selection screen, press the key for the pattern to be embroidered. e Press . → Select the desired area and press when the following message appears (only for use of the extra large embroidery frame). f Hoop the fabric and attach frame to the machine. the embroidery → Refer to "Hooping the Fabric in the Embroidery Frame" on page E-13 and "ATTACHING THE EMBROIDERY FRAME" on page E-17. B-58
-
 1
1 -
2
-
3
-
4
-
5
-
6
-
7
-
8
-
9
-
10
-
11
-
12
-
13
-
14
-
15
-
16
-
17
-
18
-
19
-
20
-
21
-
22
-
23
-
24
-
25
-
26
-
27
-
28
-
29
-
30
-
31
-
32
-
33
-
34
-
35
-
36
-
37
-
38
-
39
-
40
-
41
-
42
-
43
-
44
-
45
-
46
-
47
-
48
-
49
-
50
-
51
-
52
-
53
-
54
-
 55
55 -
 56
56 -
 57
57 -
 58
58 -
 59
59 -
 60
60 -
 61
61 -
 62
62 -
 63
63 -
 64
64 -
 65
65 -
66
-
67
-
68
-
69
-
70
-
71
-
72
-
73
-
74
-
75
-
76
-
77
-
78
-
79
-
80
-
81
-
82
-
83
-
84
-
85
-
86
-
87
-
88
-
89
-
90
-
91
-
92
-
93
-
94
-
95
-
96
-
97
-
98
-
99
-
100
-
101
-
102
-
103
-
104
-
105
-
106
-
107
-
108
-
109
-
110
-
111
-
112
-
113
-
114
-
115
-
116
-
117
-
118
-
119
-
120
-
121
-
122
-
123
-
124
-
125
-
126
-
127
-
128
-
129
-
130
-
131
-
132
-
133
-
134
-
135
-
136
-
137
-
138
-
139
-
140
-
141
-
142
-
143
-
144
-
145
-
146
-
147
-
148
-
149
-
150
-
151
-
152
-
153
-
154
-
155
-
156
-
157
-
158
-
159
-
160
-
161
-
162
-
163
-
164
-
165
-
166
-
167
-
168
-
169
-
170
-
171
-
172
-
173
-
174
-
175
-
176
-
177
-
178
-
179
-
180
 |
 |