Canon imageFORMULA P-215 Scan-tini Personal Document Scanner User Manual - Page 49
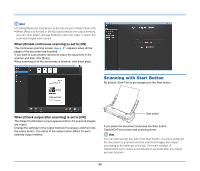
Scanning with Start Button, When [Enable continuous scanning] is set to [ON]
 |
View all Canon imageFORMULA P-215 Scan-tini Personal Document Scanner manuals
Add to My Manuals
Save this manual to your list of manuals |
Page 49 highlights
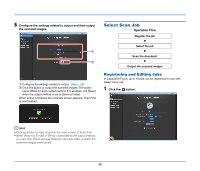
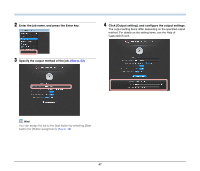
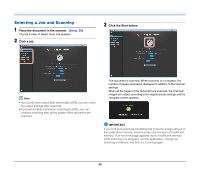
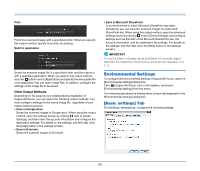
Hint • Clicking [Return to top] returns to the top screen of Select Scan Job. • When [Attach to E-mail] or [Print] is specified as the output method, you can click [Open storage folder] to open the folder in which the scanned images were saved. When [Enable continuous scanning] is set to [ON] The continuous scanning screen (see p. 51) appears when all the pages of the document are scanned. If you want to scan another document, place the document in the scanner and then click [Scan]. When scanning of all the documents is finished, click [Next step]. Scanning with Start Button By default, Scan First is pre-assigned to the Start button. When [Check output after scanning] is set to [ON] The Output Confirmation screen appears before the scanned images are output. Change the settings for the output method if necessary and then click the output button. The name of the output button differs for each selected output method. Start button If you place the document and press the Start button, CaptureOnTouch starts and scanning starts. Hint You can also assign any job to the Start button. If a job is assigned, the document is scanned and the scanned images are output according to the settings of the job. The main window of CaptureOnTouch closes automatically 5 seconds after the output process finishes. 49
-
 1
1 -
2
-
3
-
4
-
5
-
6
-
7
-
8
-
9
-
10
-
11
-
12
-
13
-
14
-
15
-
16
-
17
-
18
-
19
-
20
-
21
-
22
-
23
-
24
-
25
-
26
-
27
-
28
-
29
-
30
-
31
-
32
-
33
-
34
-
35
-
36
-
37
-
38
-
39
-
40
-
41
-
42
-
43
-
 44
44 -
 45
45 -
 46
46 -
 47
47 -
 48
48 -
 49
49 -
 50
50 -
 51
51 -
 52
52 -
 53
53 -
 54
54 -
55
-
56
-
57
-
58
-
59
-
60
-
61
-
62
-
63
-
64
-
65
-
66
-
67
-
68
-
69
-
70
-
71
-
72
-
73
-
74
-
75
-
76
-
77
-
78
-
79
-
80
-
81
-
82
-
83
-
84
-
85
-
86
-
87
-
88
-
89
-
90
-
91
-
92
-
93
-
94
-
95
-
96
-
97
-
98
-
99
-
100
-
101
-
102
-
103
-
104
-
105
-
106
-
107
-
108
-
109
-
110
-
111
-
112
-
113
-
114
-
115
-
116
 |
 |
