Canon imageFORMULA P-215 Scan-tini Personal Document Scanner User Manual - Page 51
Use advanced settings dialog box, Thumbnail Display Area, Preview Area
 |
View all Canon imageFORMULA P-215 Scan-tini Personal Document Scanner manuals
Add to My Manuals
Save this manual to your list of manuals |
Page 51 highlights
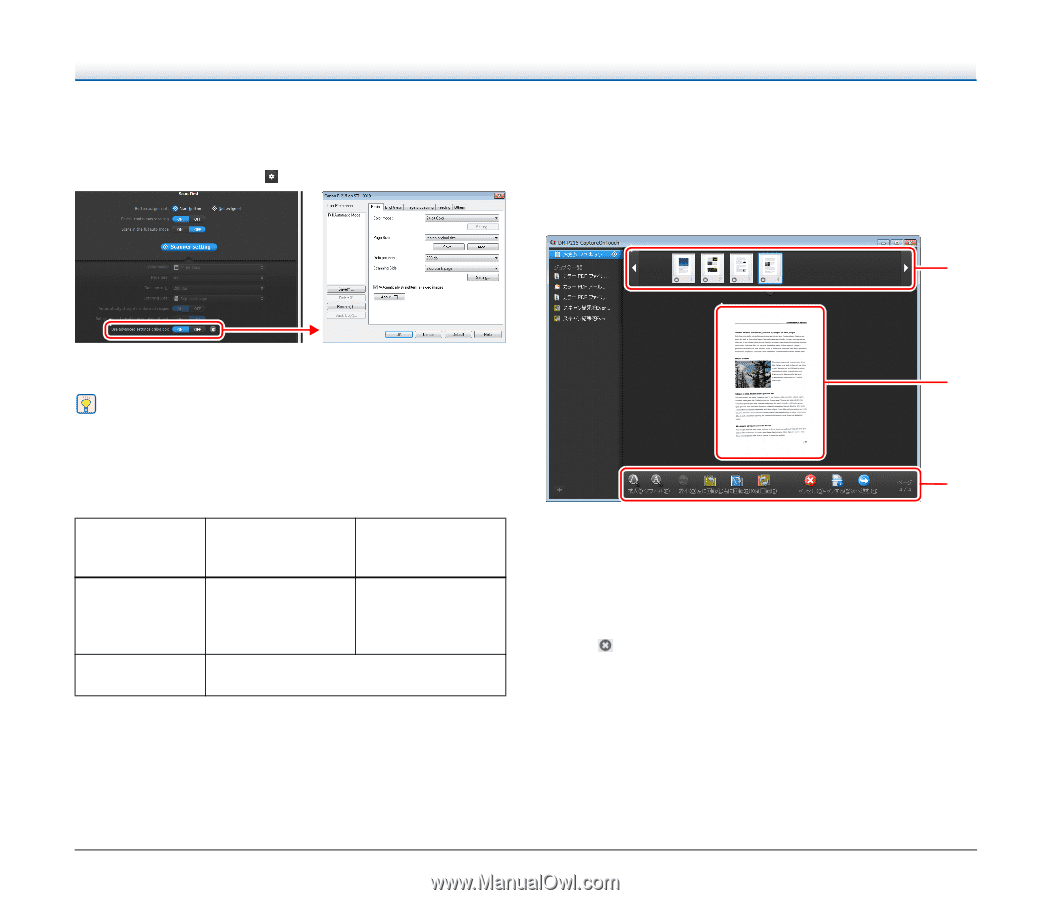
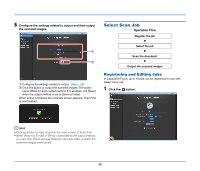
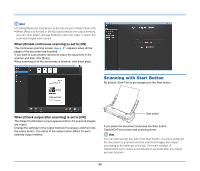
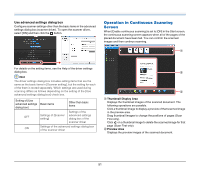
Use advanced settings dialog box Configure scanner settings other than the basic items in the advanced settings dialog box (scanner driver). To open the scanner driver, select [ON] and then click the button. Operation in Continuous Scanning Screen When [Enable continuous scanning] is set to [ON] in the Start screen, the continuous scanning screen appears when all of the pages of the placed document have been fed. You can confirm the scanned images and then continue scanning. A For details on the setting items, see the Help of the driver settings dialog box. Hint The driver settings dialog box includes setting items that are the same as the basic items in [Scanner setting], but the setting for each of the them is stored separately. Which settings are used during scanning differs as follows depending on the setting of the [Use advanced settings dialog box] check box. Setting of [Use advanced settings dialog box] OFF ON Basic items Other than basic items Settings of [Scanner setting] Settings of the advanced settings dialog box of the scanner driver Settings of the advanced settings dialog box of the scanner driver B C A Thumbnail Display Area Displays the thumbnail images of the scanned document. The following operations are possible. Click a thumbnail image to display a preview of that scanned image in the preview area. Drag thumbnail images to change the positions of pages (Scan First only). Click on a thumbnail image to delete the scanned image for that page (Scan First only). B Preview Area Displays the preview images of the scanned document. 51
-
 1
1 -
2
-
3
-
4
-
5
-
6
-
7
-
8
-
9
-
10
-
11
-
12
-
13
-
14
-
15
-
16
-
17
-
18
-
19
-
20
-
21
-
22
-
23
-
24
-
25
-
26
-
27
-
28
-
29
-
30
-
31
-
32
-
33
-
34
-
35
-
36
-
37
-
38
-
39
-
40
-
41
-
42
-
43
-
44
-
45
-
 46
46 -
 47
47 -
 48
48 -
 49
49 -
 50
50 -
 51
51 -
 52
52 -
 53
53 -
 54
54 -
 55
55 -
 56
56 -
57
-
58
-
59
-
60
-
61
-
62
-
63
-
64
-
65
-
66
-
67
-
68
-
69
-
70
-
71
-
72
-
73
-
74
-
75
-
76
-
77
-
78
-
79
-
80
-
81
-
82
-
83
-
84
-
85
-
86
-
87
-
88
-
89
-
90
-
91
-
92
-
93
-
94
-
95
-
96
-
97
-
98
-
99
-
100
-
101
-
102
-
103
-
104
-
105
-
106
-
107
-
108
-
109
-
110
-
111
-
112
-
113
-
114
-
115
-
116
 |
 |