Dell 948 User Guide - Page 112
Resizing Images or Documents, Cleaning up Scanned Copies of Newspaper Items
 |
View all Dell 948 manuals
Add to My Manuals
Save this manual to your list of manuals |
Page 112 highlights
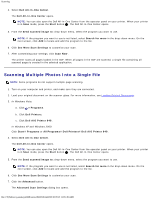
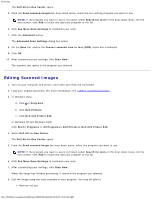
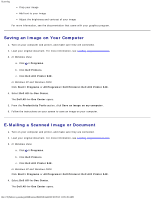
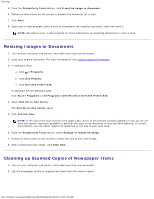
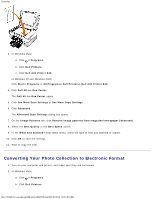
Scanning 5. From the Productivity Tools section, click E-mail an image or document. 6. Follow the instructions on the screen to prepare the document for e-mail. 7. Click Next. 8. Open your e-mail program, write a note to accompany the attached document, and then send it. NOTE: See Help in your e-mail program for more information on attaching documents to your e-mail. Resizing Images or Documents 1. Turn on your computer and printer, and make sure they are connected. 2. Load your original document. For more information, see Loading Original Documents. 3. In Windows Vista: a. Click ® Programs. b. Click Dell Printers. c. Click Dell AIO Printer 948. In Windows XP and Windows 2000: Click Start® Programs or All Programs® Dell Printers® Dell AIO Printer 948. 4. Select Dell All-In-One Center. The Dell All-In-One Center opens. 5. Click Preview Now. NOTE: If the size of the scan (found in the upper right corner of the preview window) appears in red, you do not have the system resources available to perform the scan at the resolution or size you have selected. To correct this problem, you can either reduce the resolution or the size of your scan area. 6. From the Productivity Tools section, select Enlarge or reduce an image. 7. Follow the instructions on the screen to select the size of your new image. 8. After customizing your image, click Scan Now. Cleaning up Scanned Copies of Newspaper Items 1. Turn on your computer and printer, and make sure they are connected. 2. Lay the newspaper article or clipping face down onto the scanner glass. file:///T|/htdocs/systems/prn948/en/en/d0e6016.html[10/10/2012 11:05:49 AM]
-
 1
1 -
2
-
3
-
4
-
5
-
6
-
7
-
8
-
9
-
10
-
11
-
12
-
13
-
14
-
15
-
16
-
17
-
18
-
19
-
20
-
21
-
22
-
23
-
24
-
25
-
26
-
27
-
28
-
29
-
30
-
31
-
32
-
33
-
34
-
35
-
36
-
37
-
38
-
39
-
40
-
41
-
42
-
43
-
44
-
45
-
46
-
47
-
48
-
49
-
50
-
51
-
52
-
53
-
54
-
55
-
56
-
57
-
58
-
59
-
60
-
61
-
62
-
63
-
64
-
65
-
66
-
67
-
68
-
69
-
70
-
71
-
72
-
73
-
74
-
75
-
76
-
77
-
78
-
79
-
80
-
81
-
82
-
83
-
84
-
85
-
86
-
87
-
88
-
89
-
90
-
91
-
92
-
93
-
94
-
95
-
96
-
97
-
98
-
99
-
100
-
101
-
102
-
103
-
104
-
105
-
106
-
 107
107 -
 108
108 -
 109
109 -
 110
110 -
 111
111 -
 112
112 -
 113
113 -
 114
114 -
 115
115 -
 116
116 -
 117
117 -
118
-
119
-
120
-
121
-
122
-
123
-
124
-
125
-
126
-
127
-
128
-
129
-
130
-
131
-
132
-
133
-
134
-
135
-
136
-
137
-
138
-
139
-
140
-
141
-
142
-
143
-
144
 |
 |
